Monthly Archives: August 2015

So Long Sweet Summer

08.31.2015

wallafarshot


As summer comes to an end, I can’t help but get a little sad. Summer is by far my favorite season. The cookouts, the sandals, the tans and maxis; I can never get enough. I guess its come time to hang up the hat and embrace the fall weather to come, so, so long sweet summer! And if I’m being completely honest, I can’t wait to break out the boots and oversized sweaters.

posedwithhatoff

faithgivingkey


Giving Keys are such awesome necklaces and make perfect gifts. The necklaces are engraved with words of hope, and the idea is to wear the necklace for a while, and then when you find someone who needs the inspiration more than you, you pass it on to them. This company employs those transitioning out of homelessness, having them engrave the words onto the keys. We sell these key necklaces at Accent Prone.

turquoisecuff

cuffupcloseonarm

ringupclose

climbingtrain

converse

walkingdowntrain

upclosesidewayshat

sittingontrain

railroadtrackslookingdown

lastpicrailroad

Jean Dress

Converse

Sunnies

Hat is from a local boutique, but you can find a similar style at Target here and it’s only $12.99.

All jewelry is from my boutique Accent Prone.

Hope you all have a great week ahead, and thanks for stopping by to read! Enjoy these last few weeks of Summer!

On to the next,

1newcreate.php

All photography by my amazing friend Catelin McNamara. If you are interested in her photography services, email me at cheri@accentprone.com for her contact info.


DIY Lattice Mailbox

08.25.2015

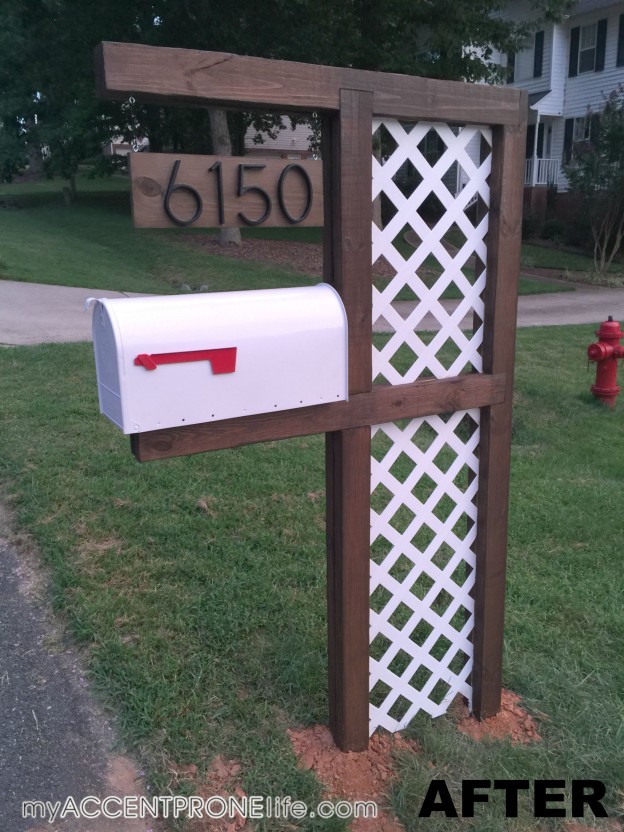
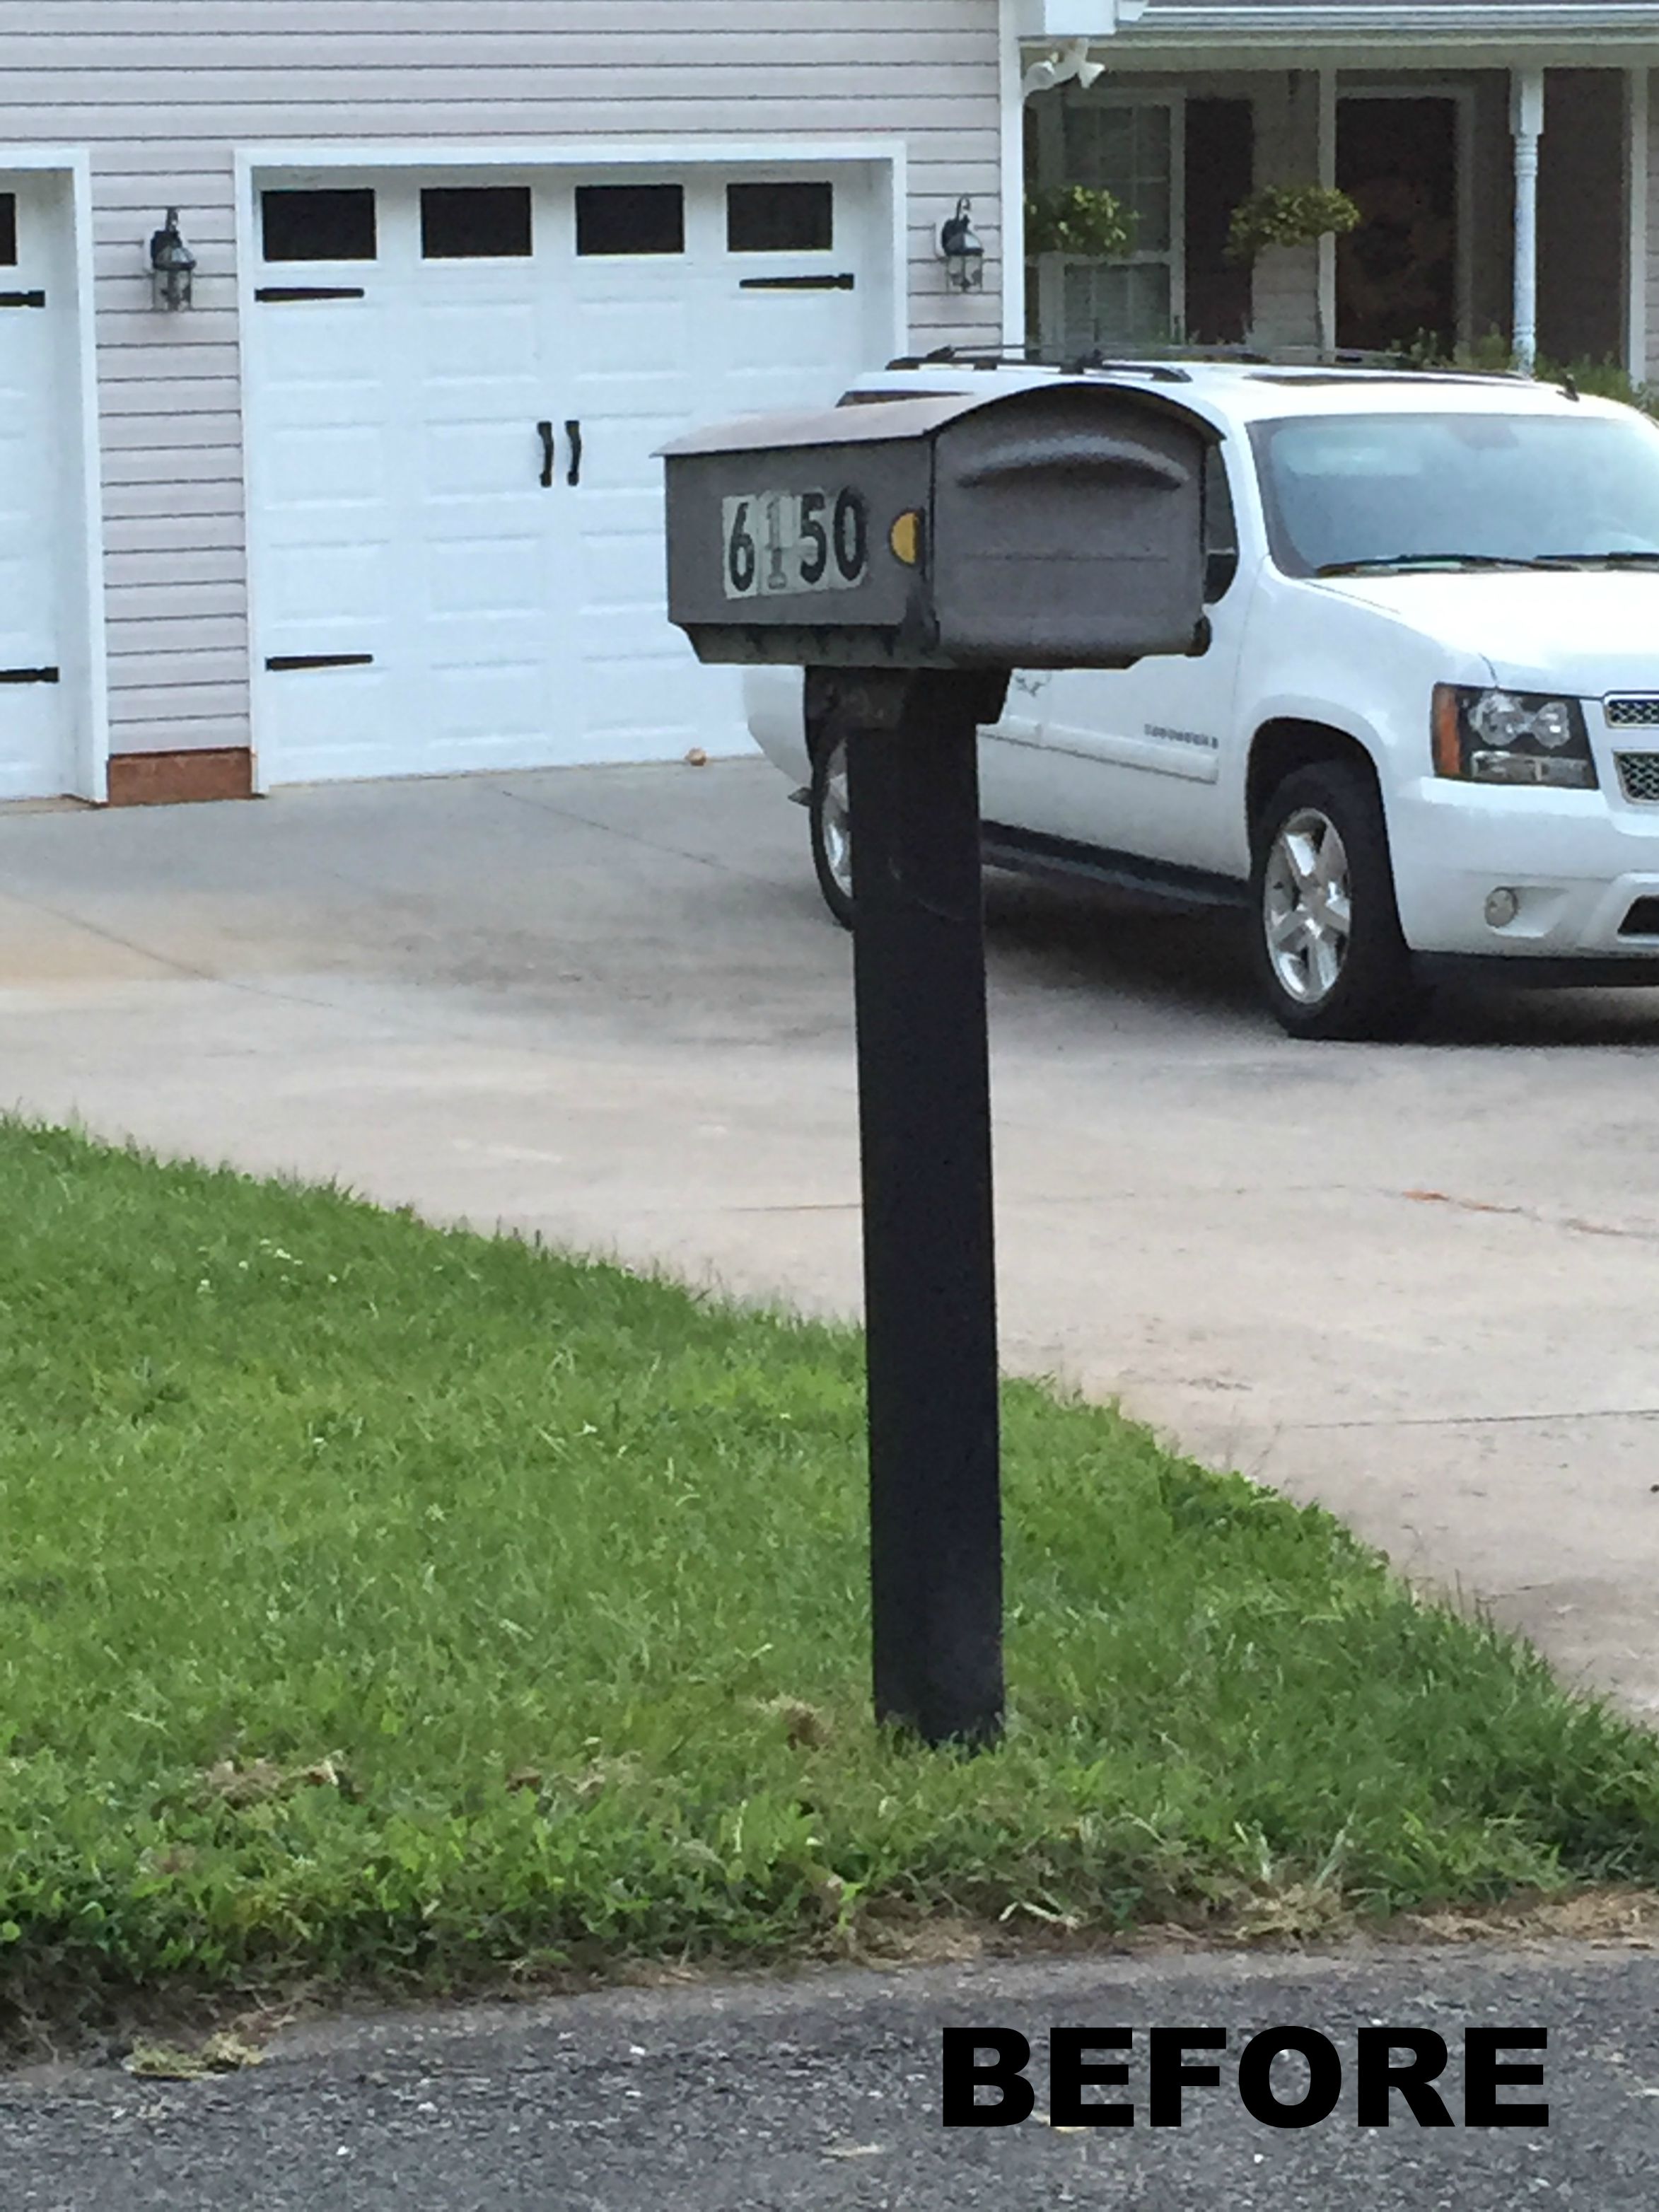
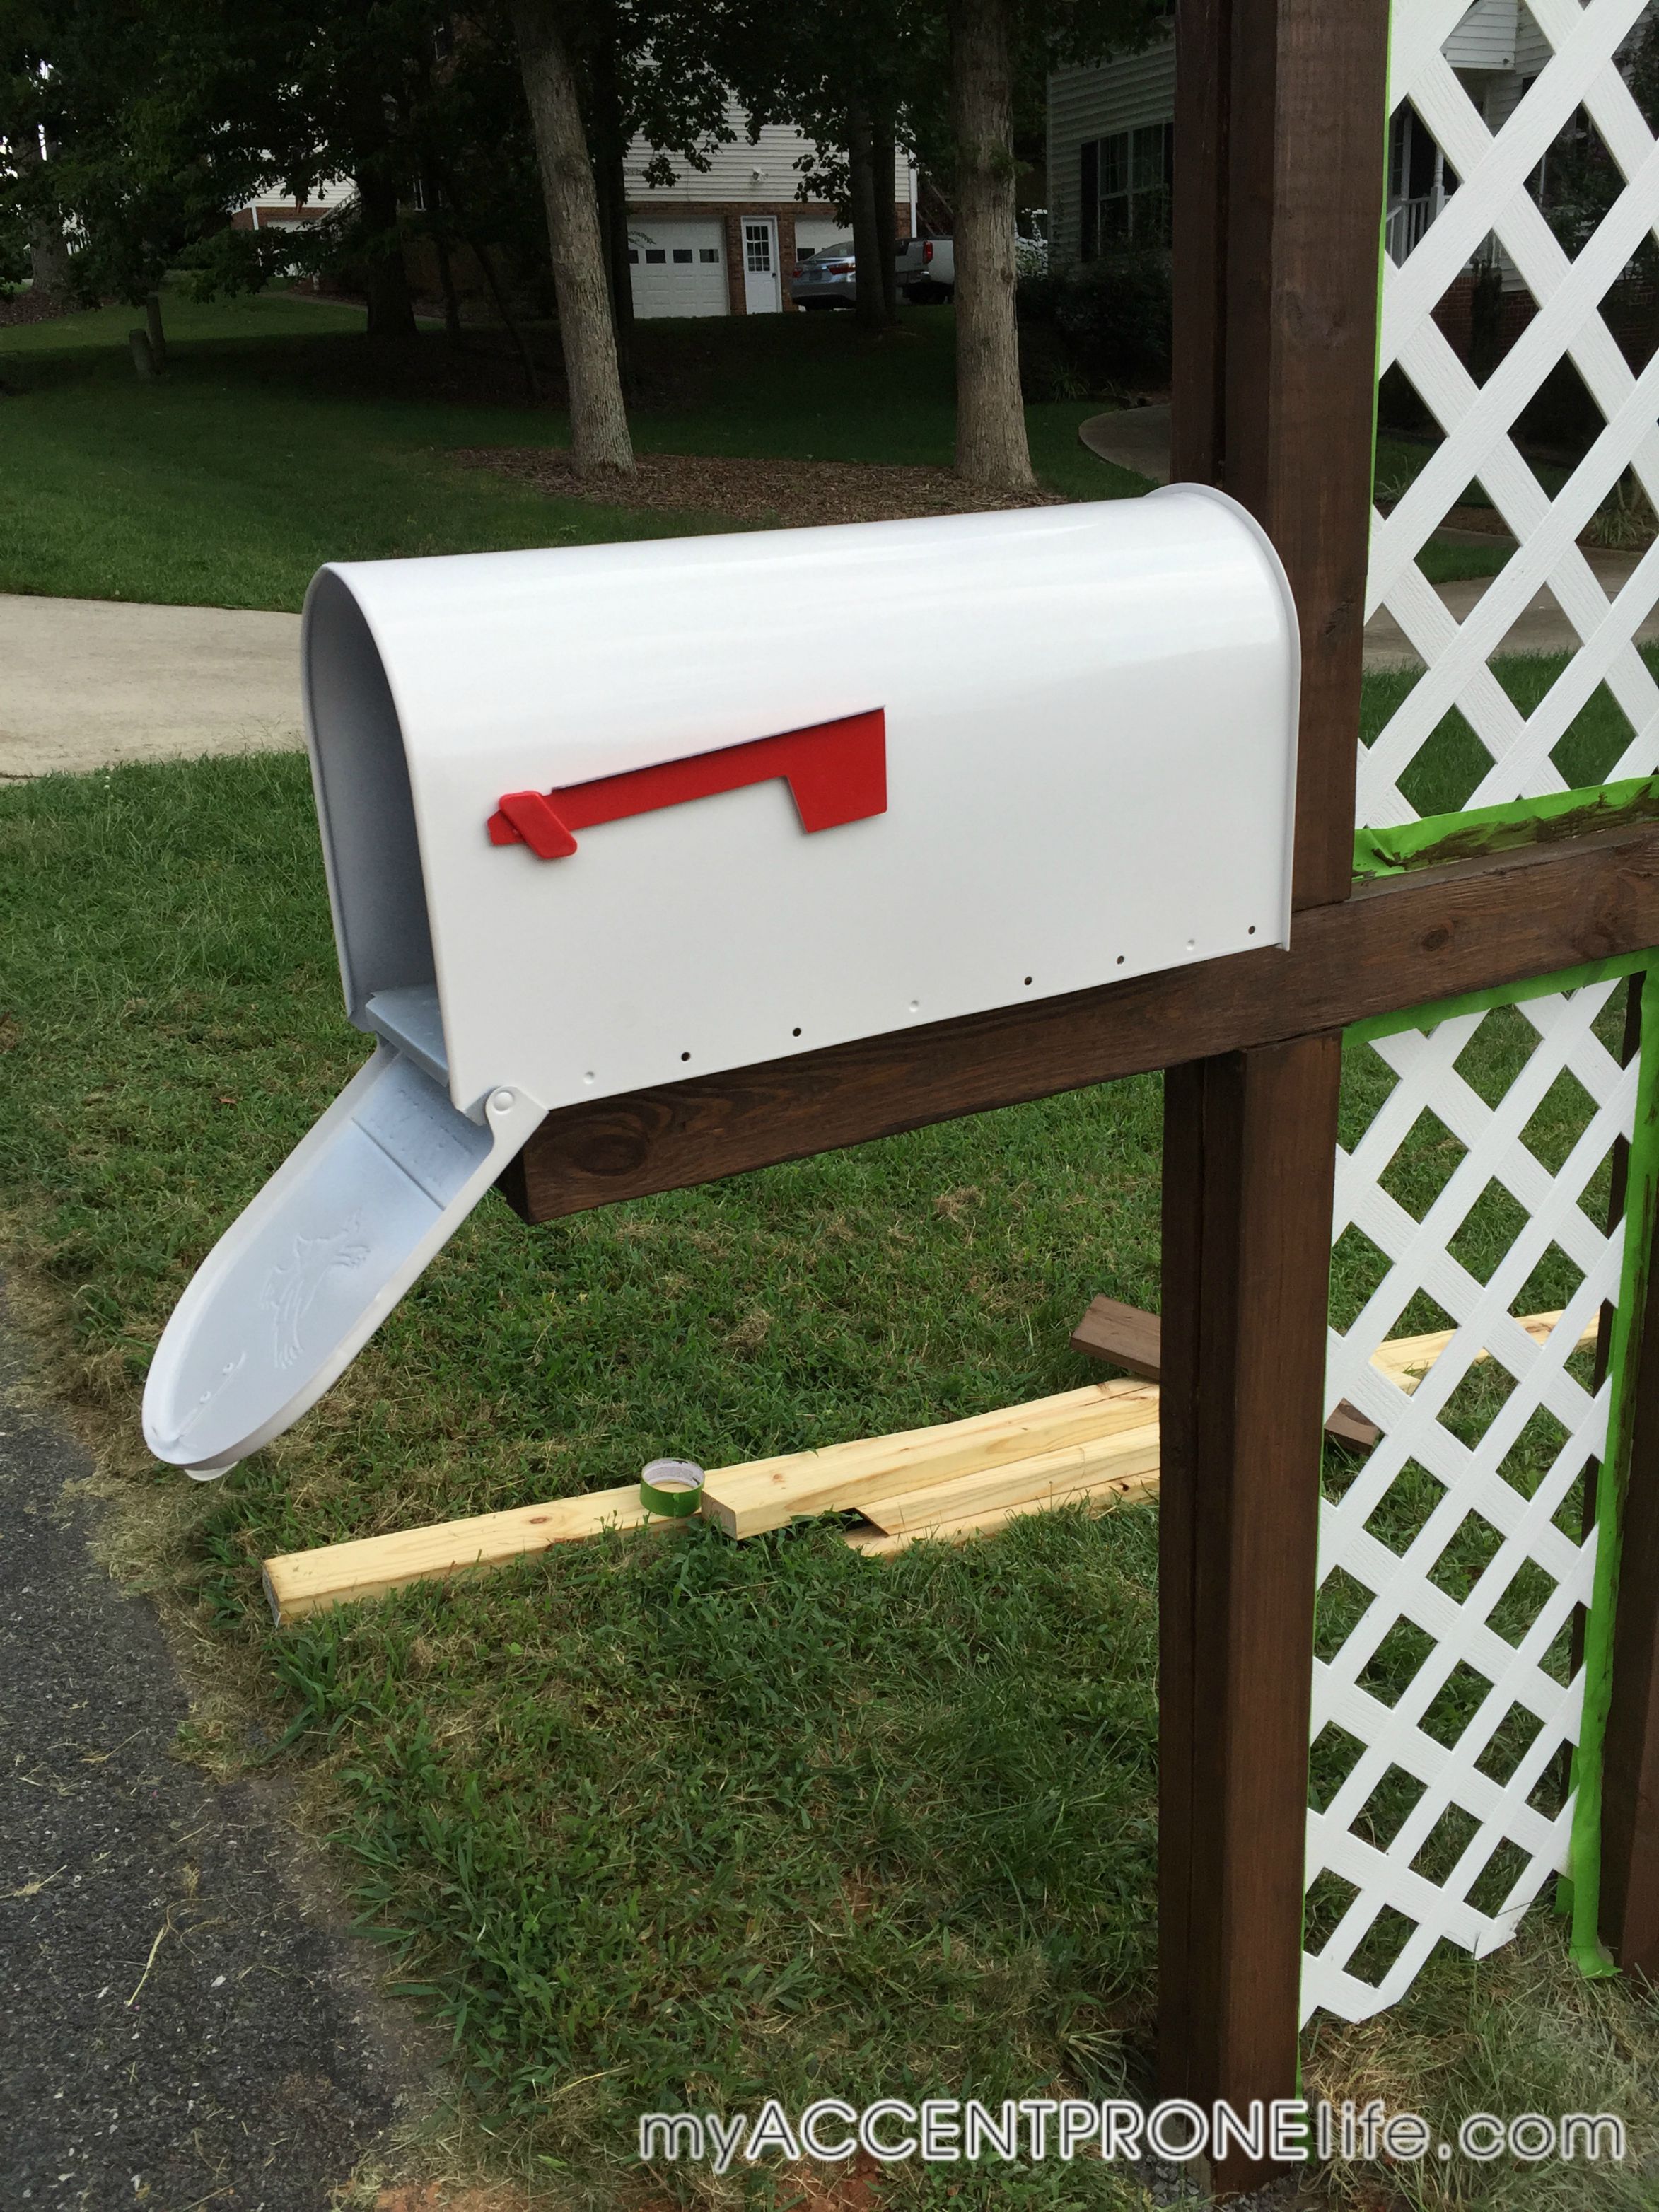
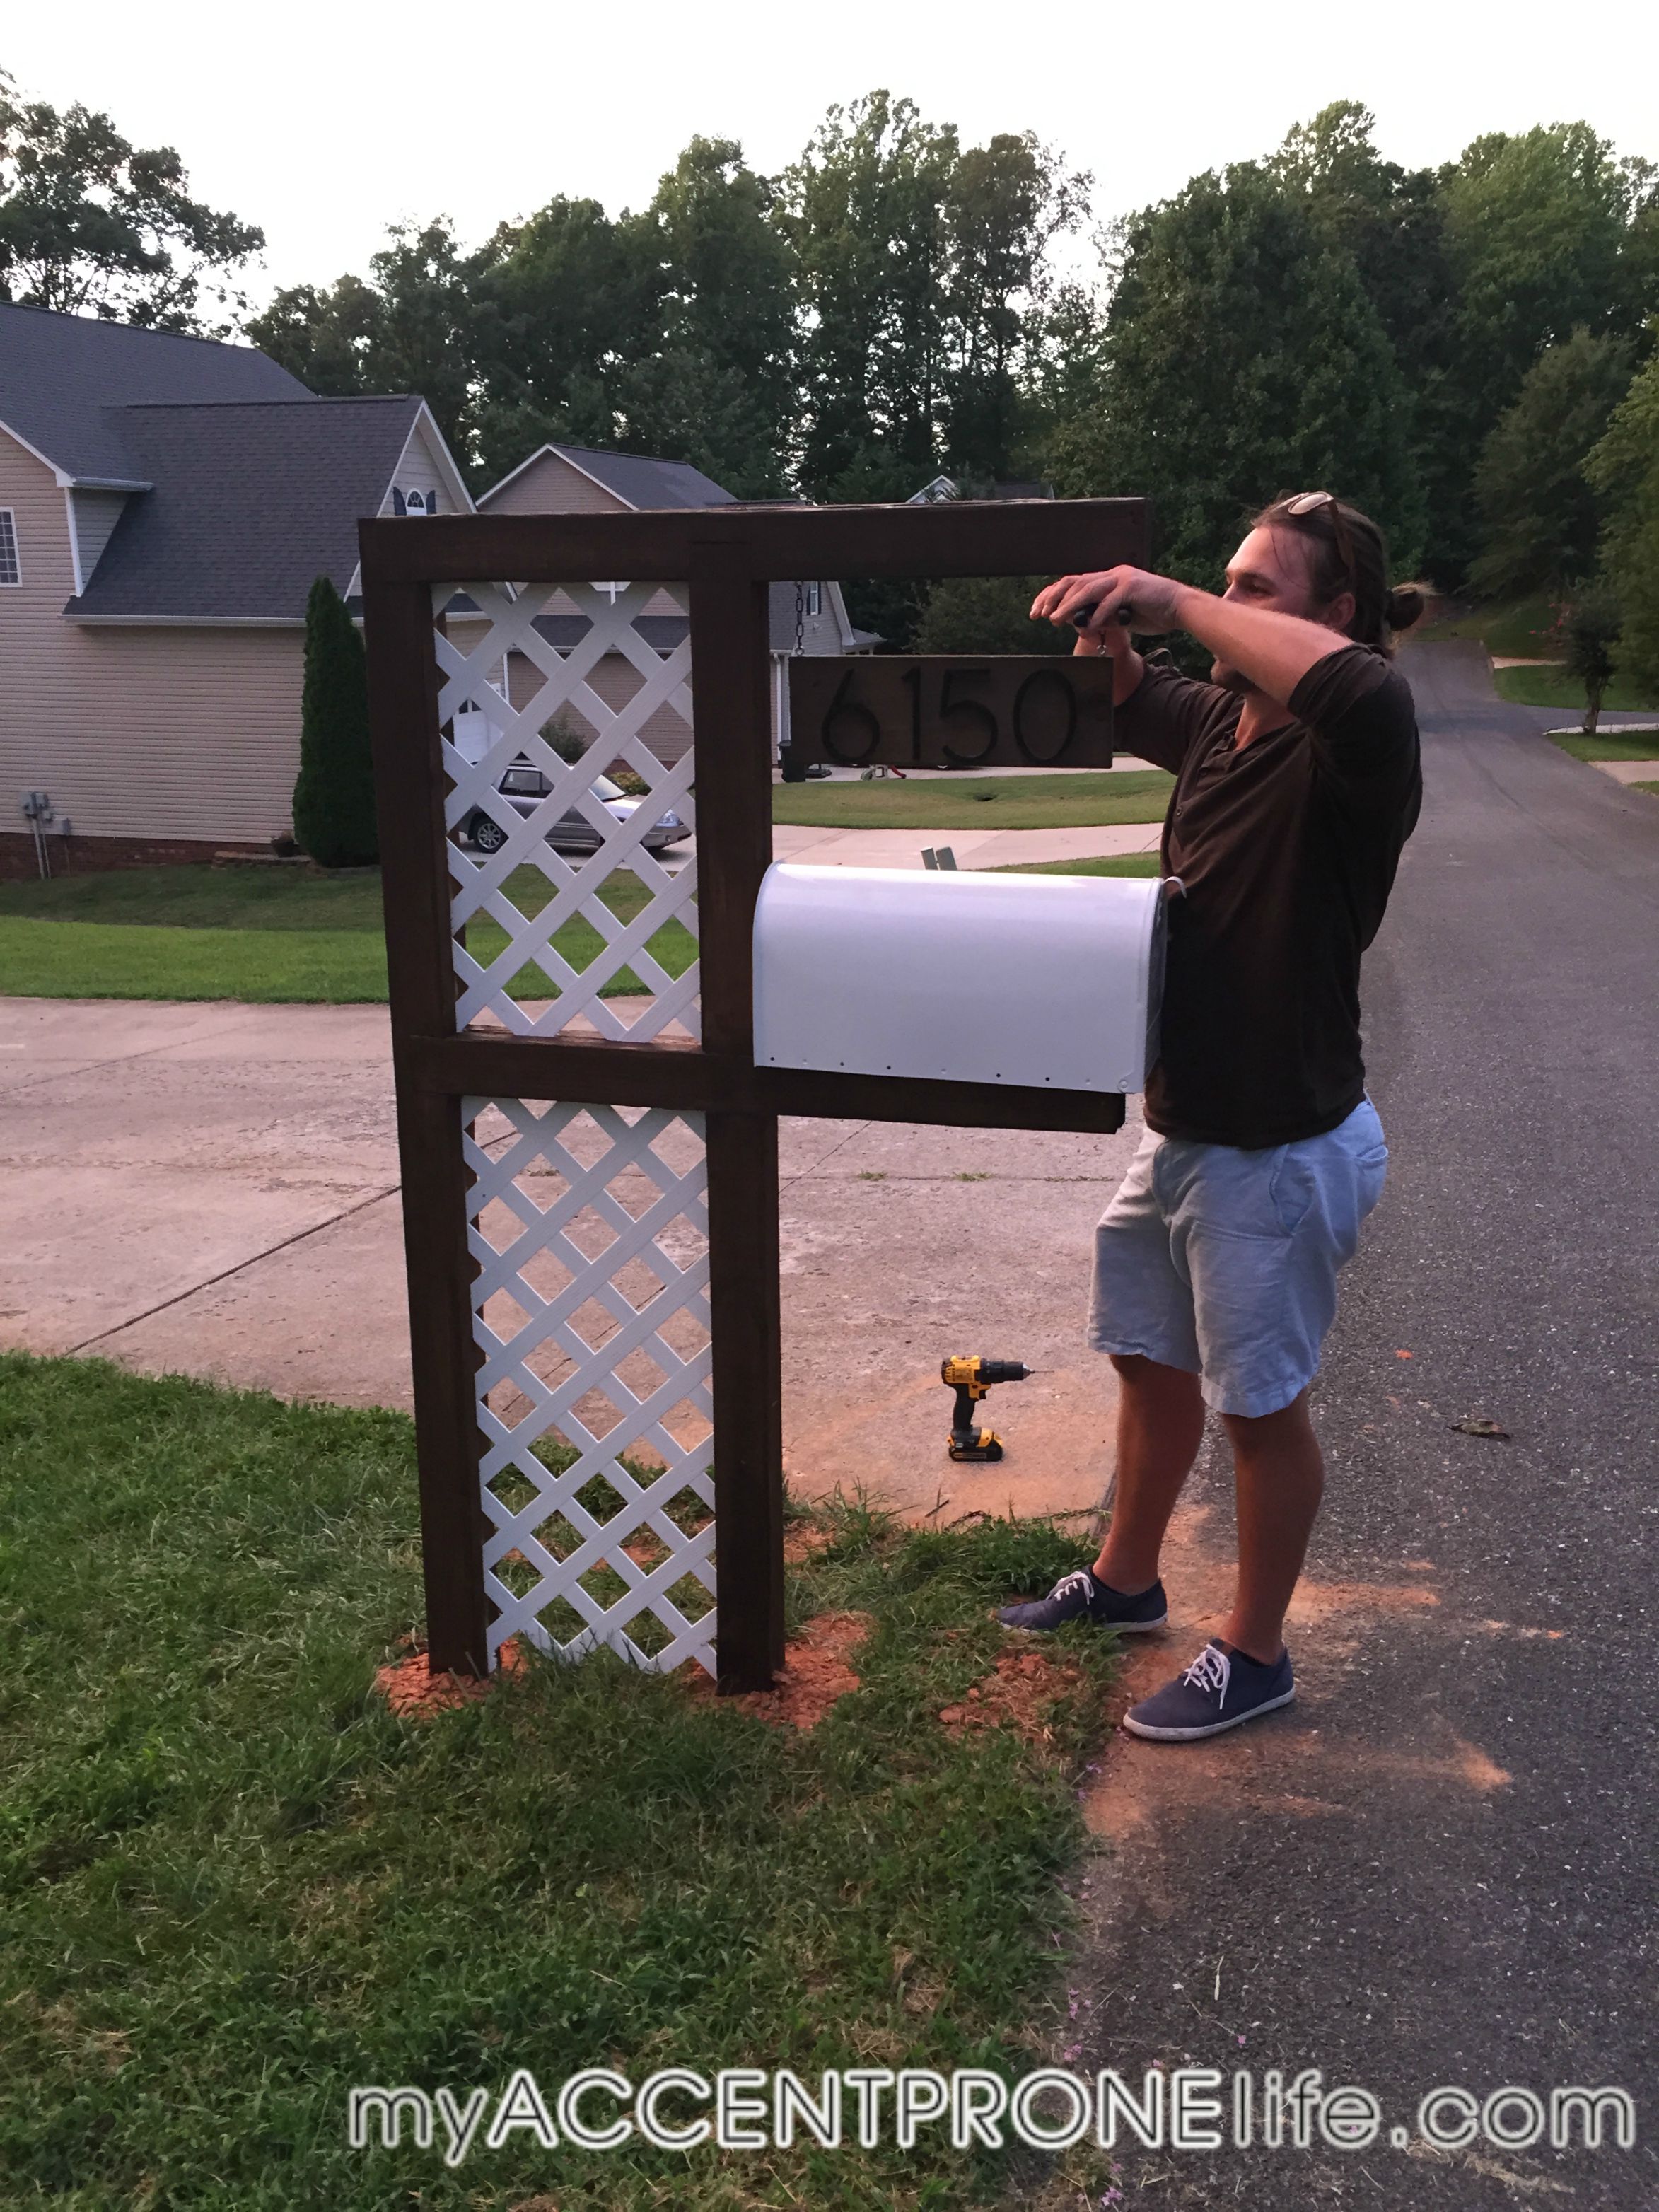
I don’t think we need much of an explanation as to why we wanted a new mailbox. Take one look and it’s pretty clear; we needed it!

beforemailbox

We chose to go with a more contemporary design, but added white lattice in between to make it a little more traditional, and to tie in our lattice fence in the background.

This mailbox consists of 2 sides with lattice in between, therefore, cutting boards in steps 1-7 will need to be done twice.

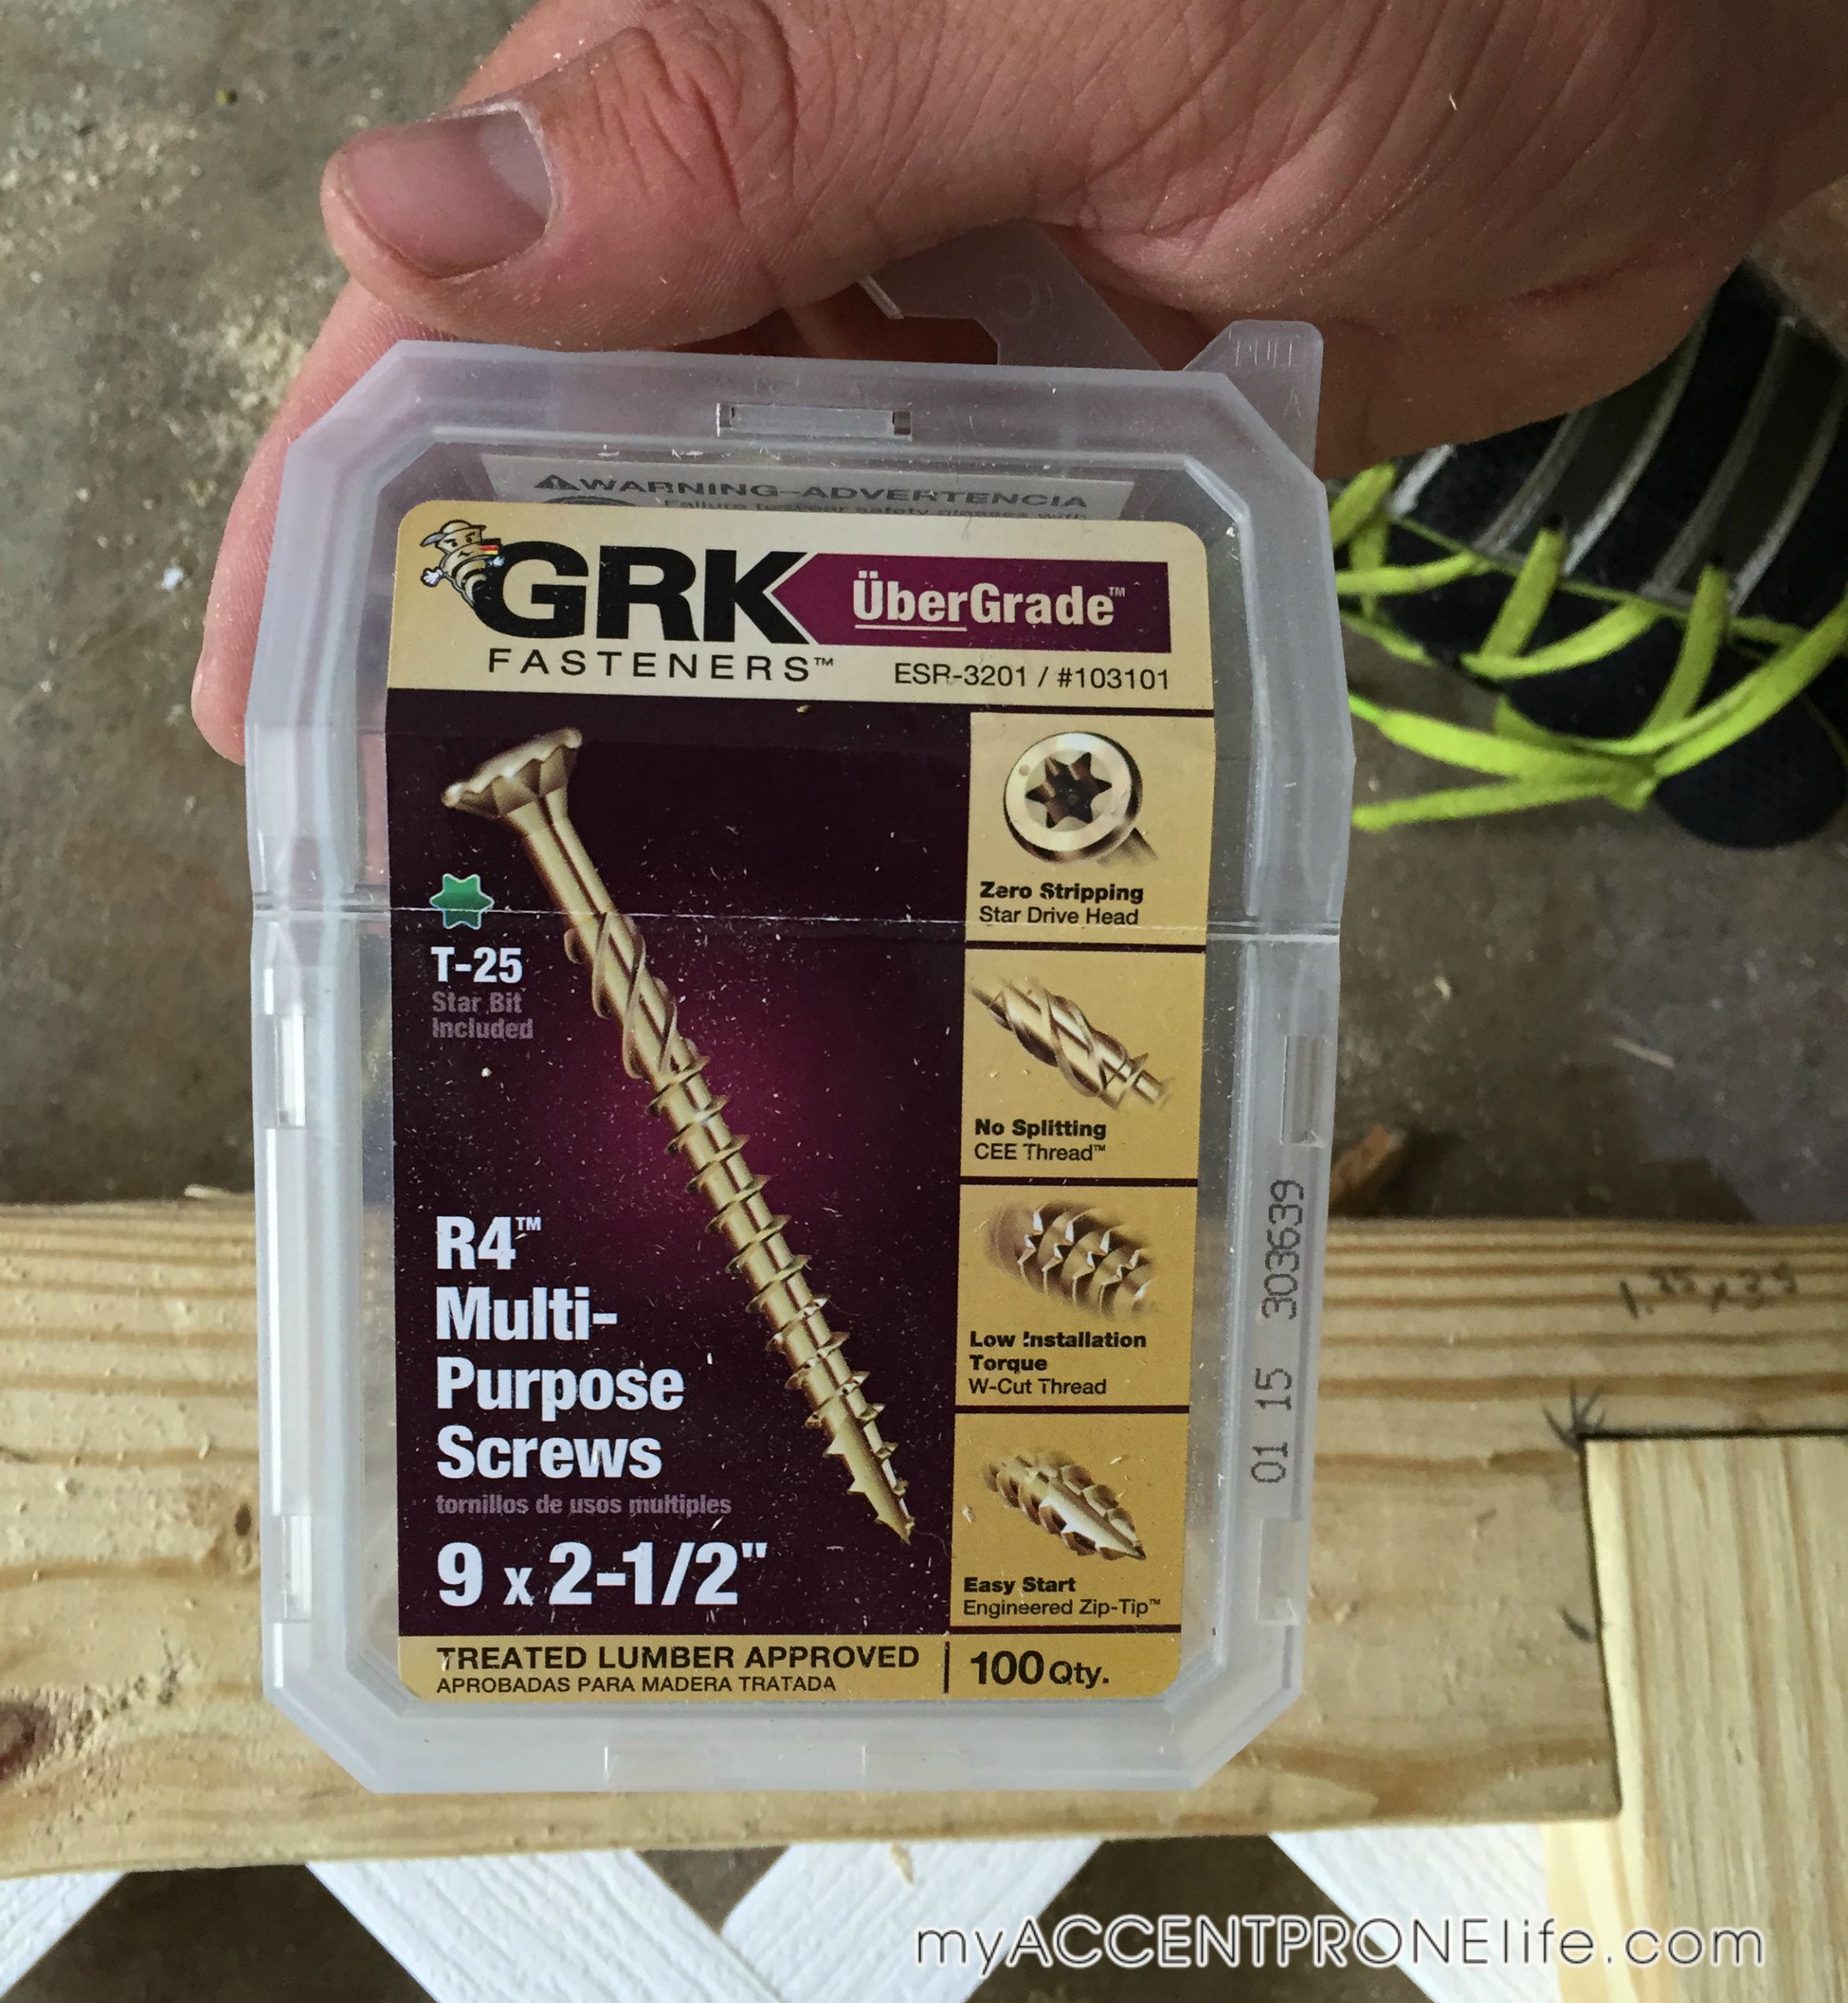
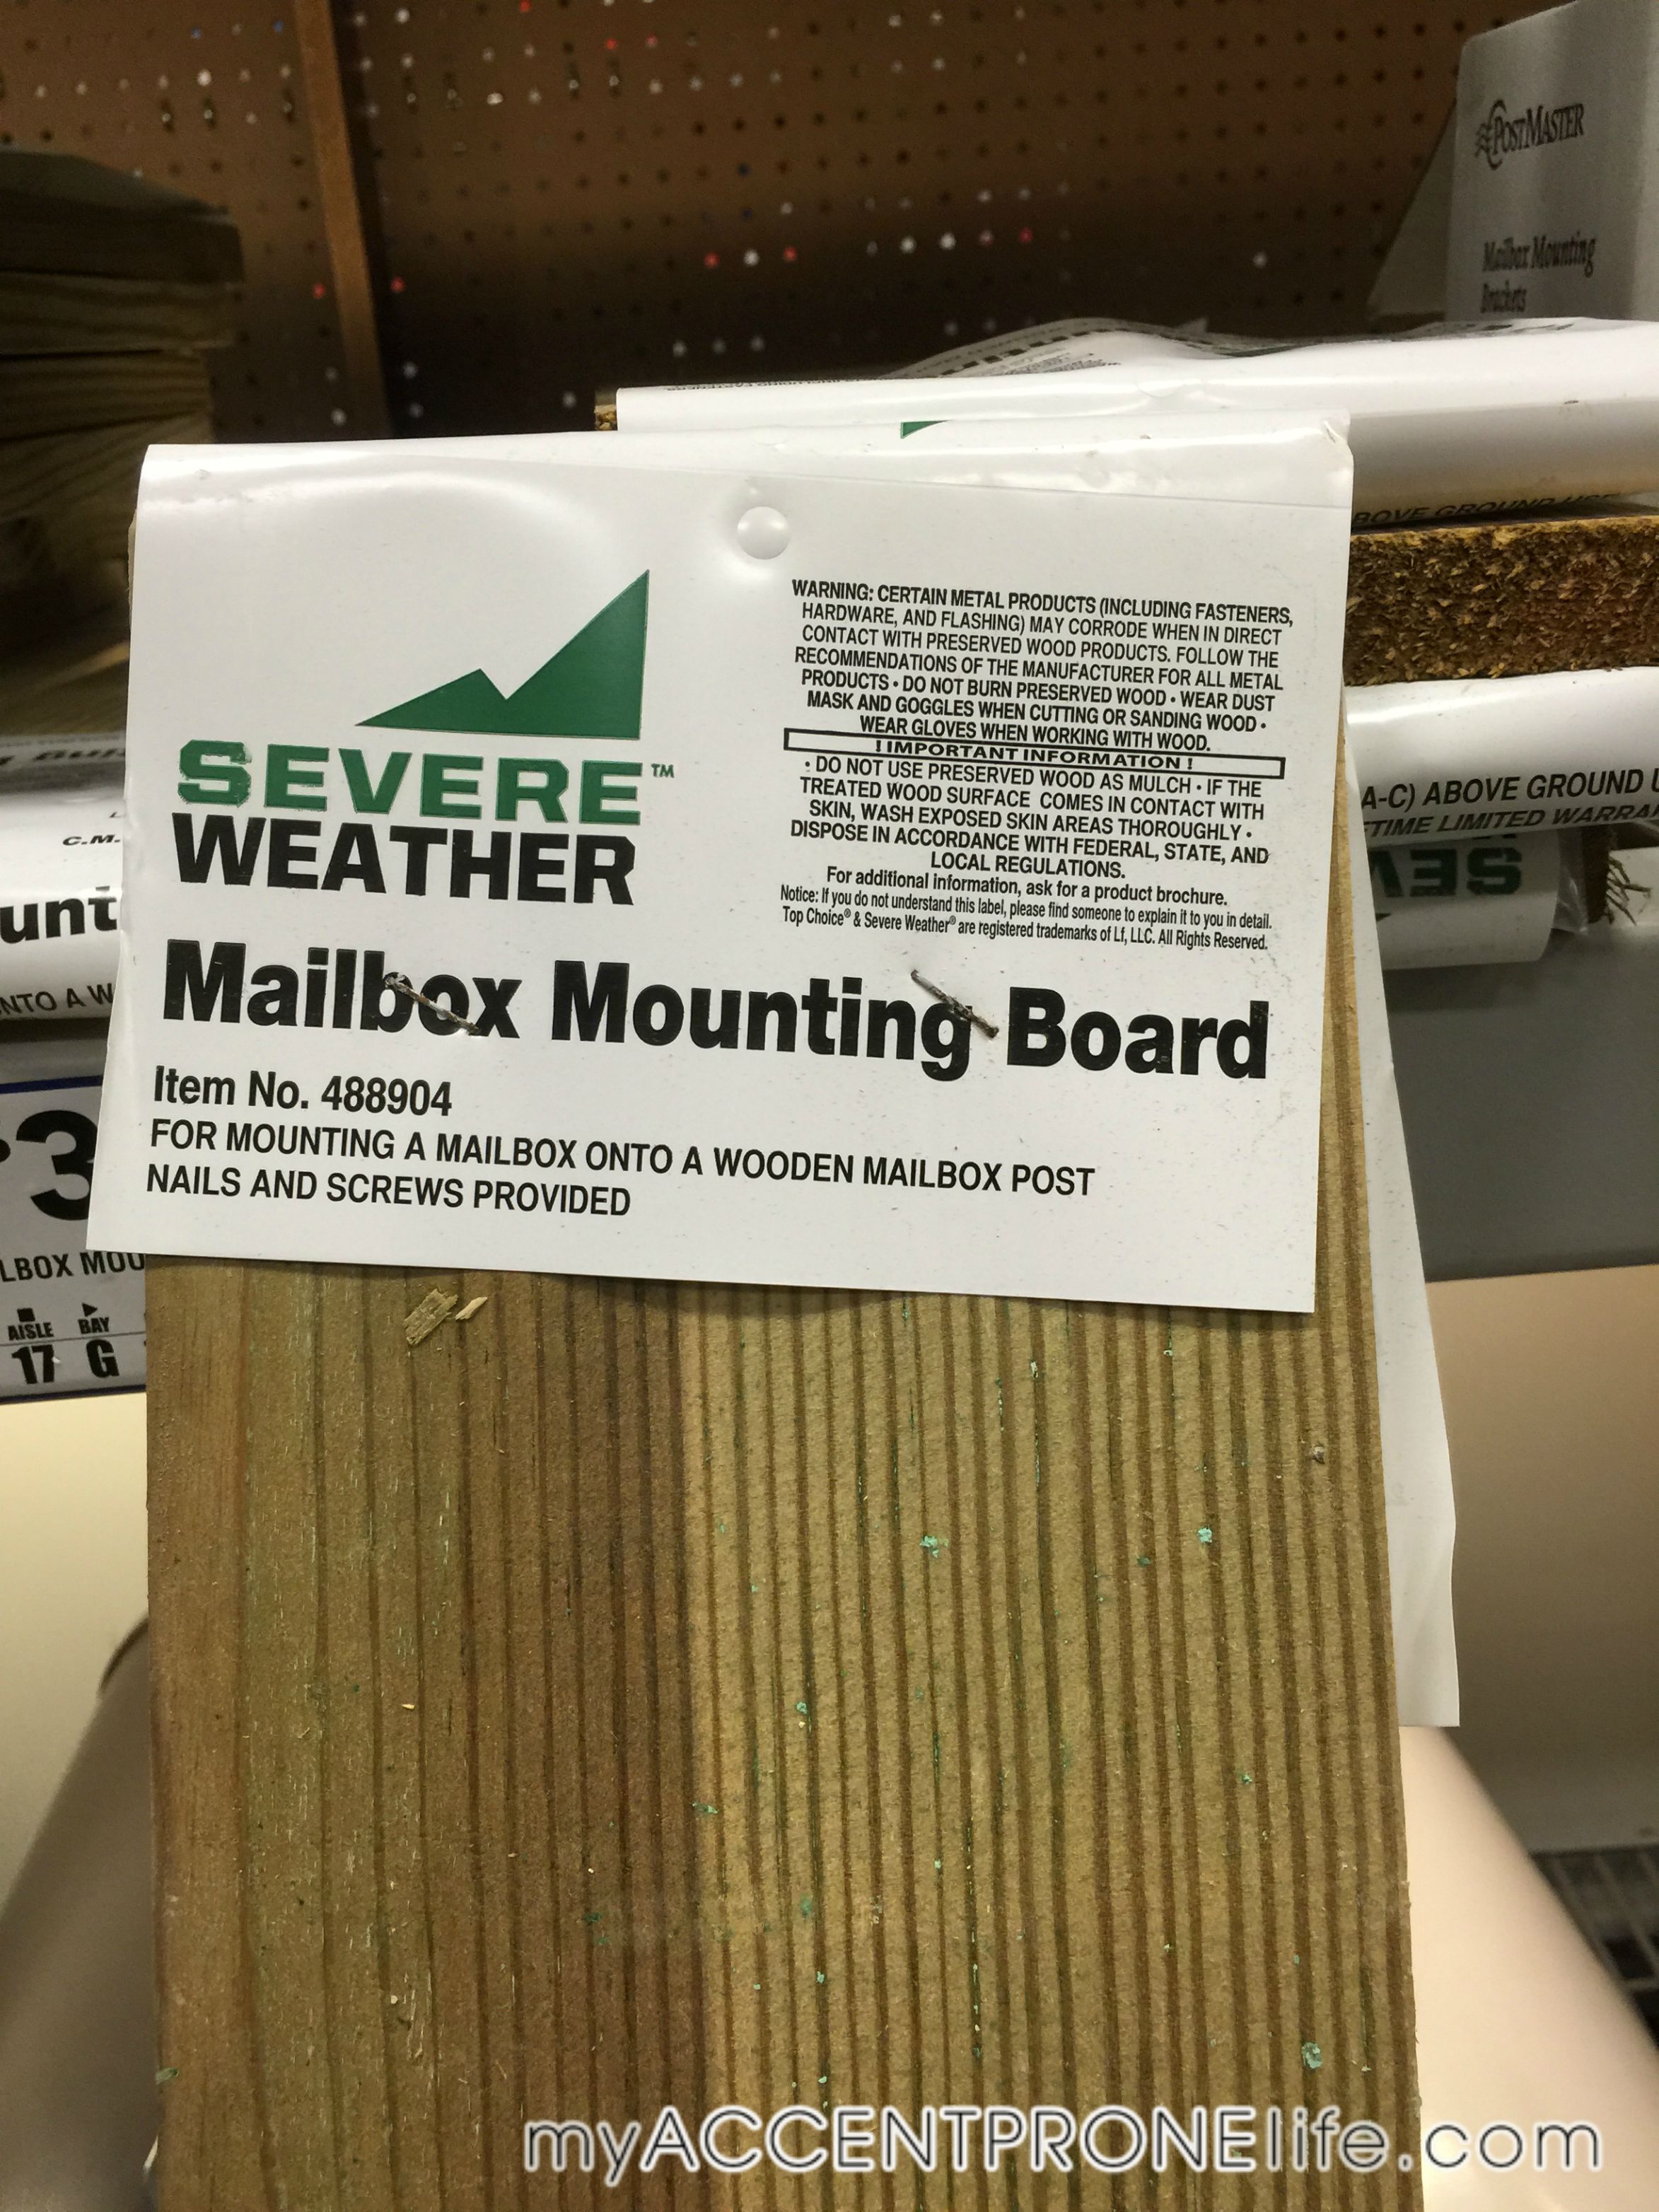
Materials needed: (8) 2x4x8 treated lumber boards. 1 Strip of lattice in 2ftx8ft. 2 mailbox mount boards. 1 classic postmaster mailbox. Walnut Deck Stain. 2 sets of Numbers. Chain and 4 eye hooks. Wood screws. Power Grab Silicon.

All of the materials cost us around $120.

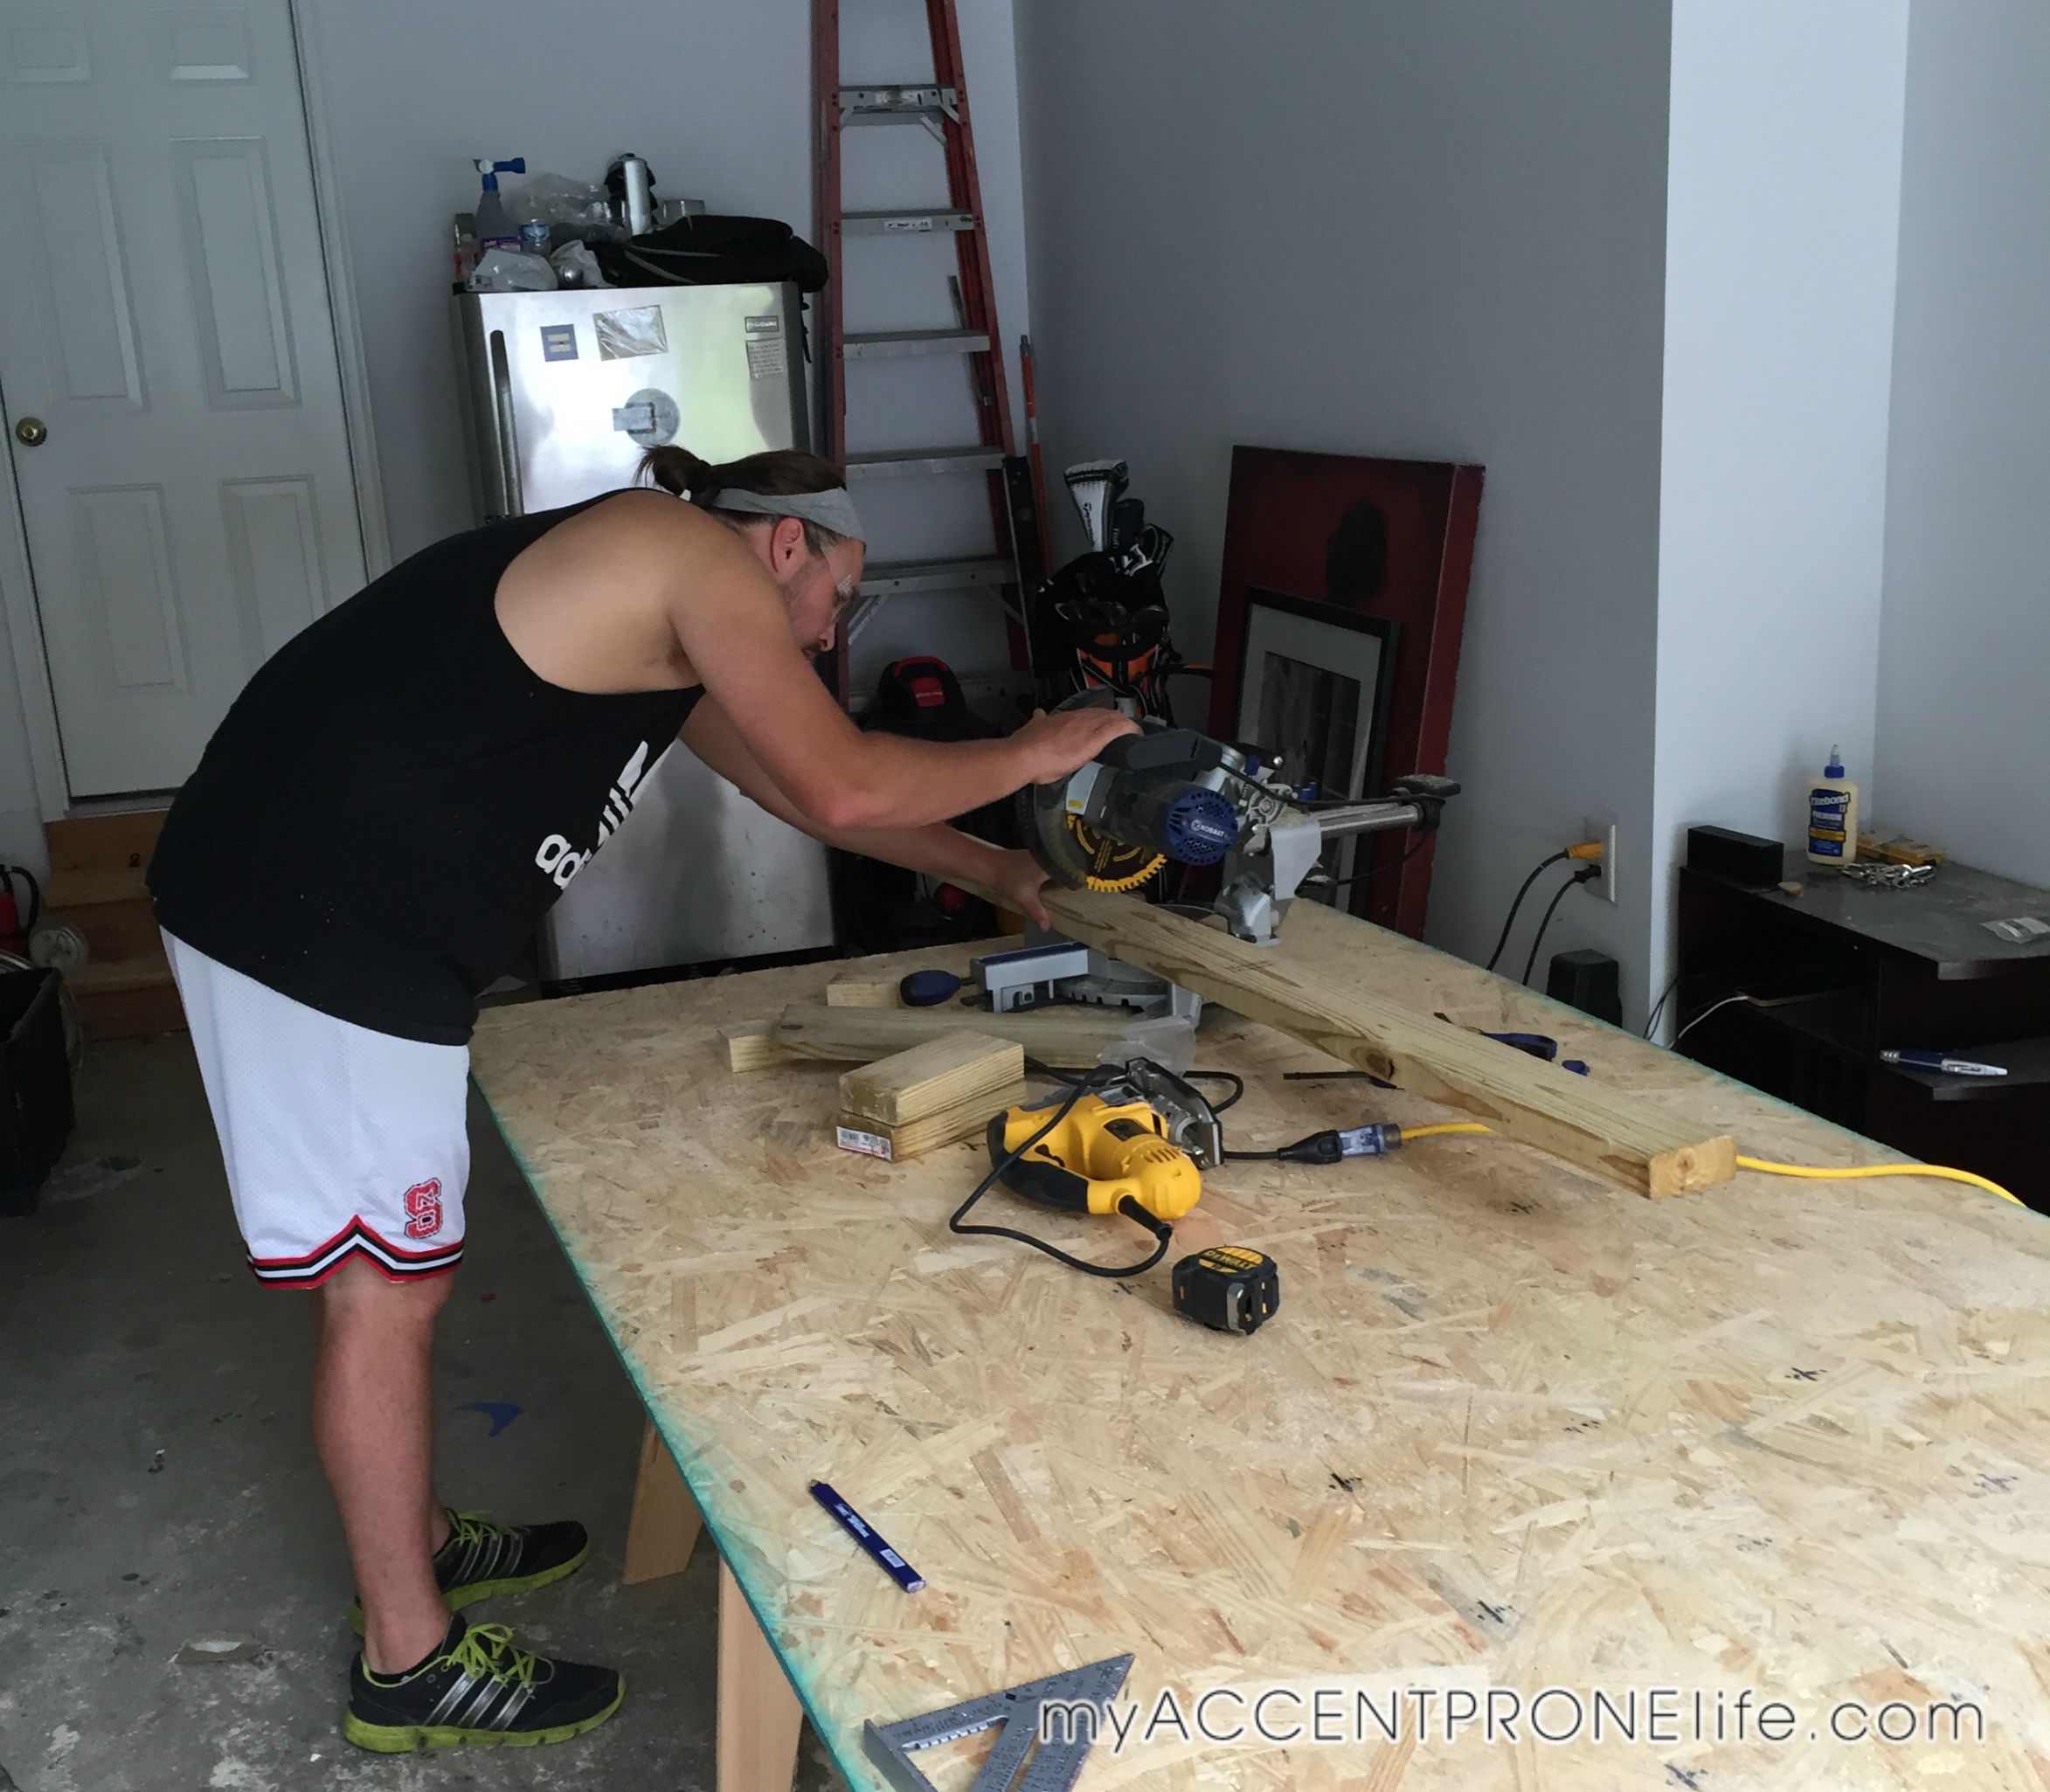
Tools Needed- pencil, speed square,safety goggles, tape measurer, brad nailer (optional for hammer), jig saw, circular saw (optional for hand saw), chop saw, pocket hole jig, post hole digger. The optional tools can be substituted for less expensive tools, but the optional tools will make the job easier.

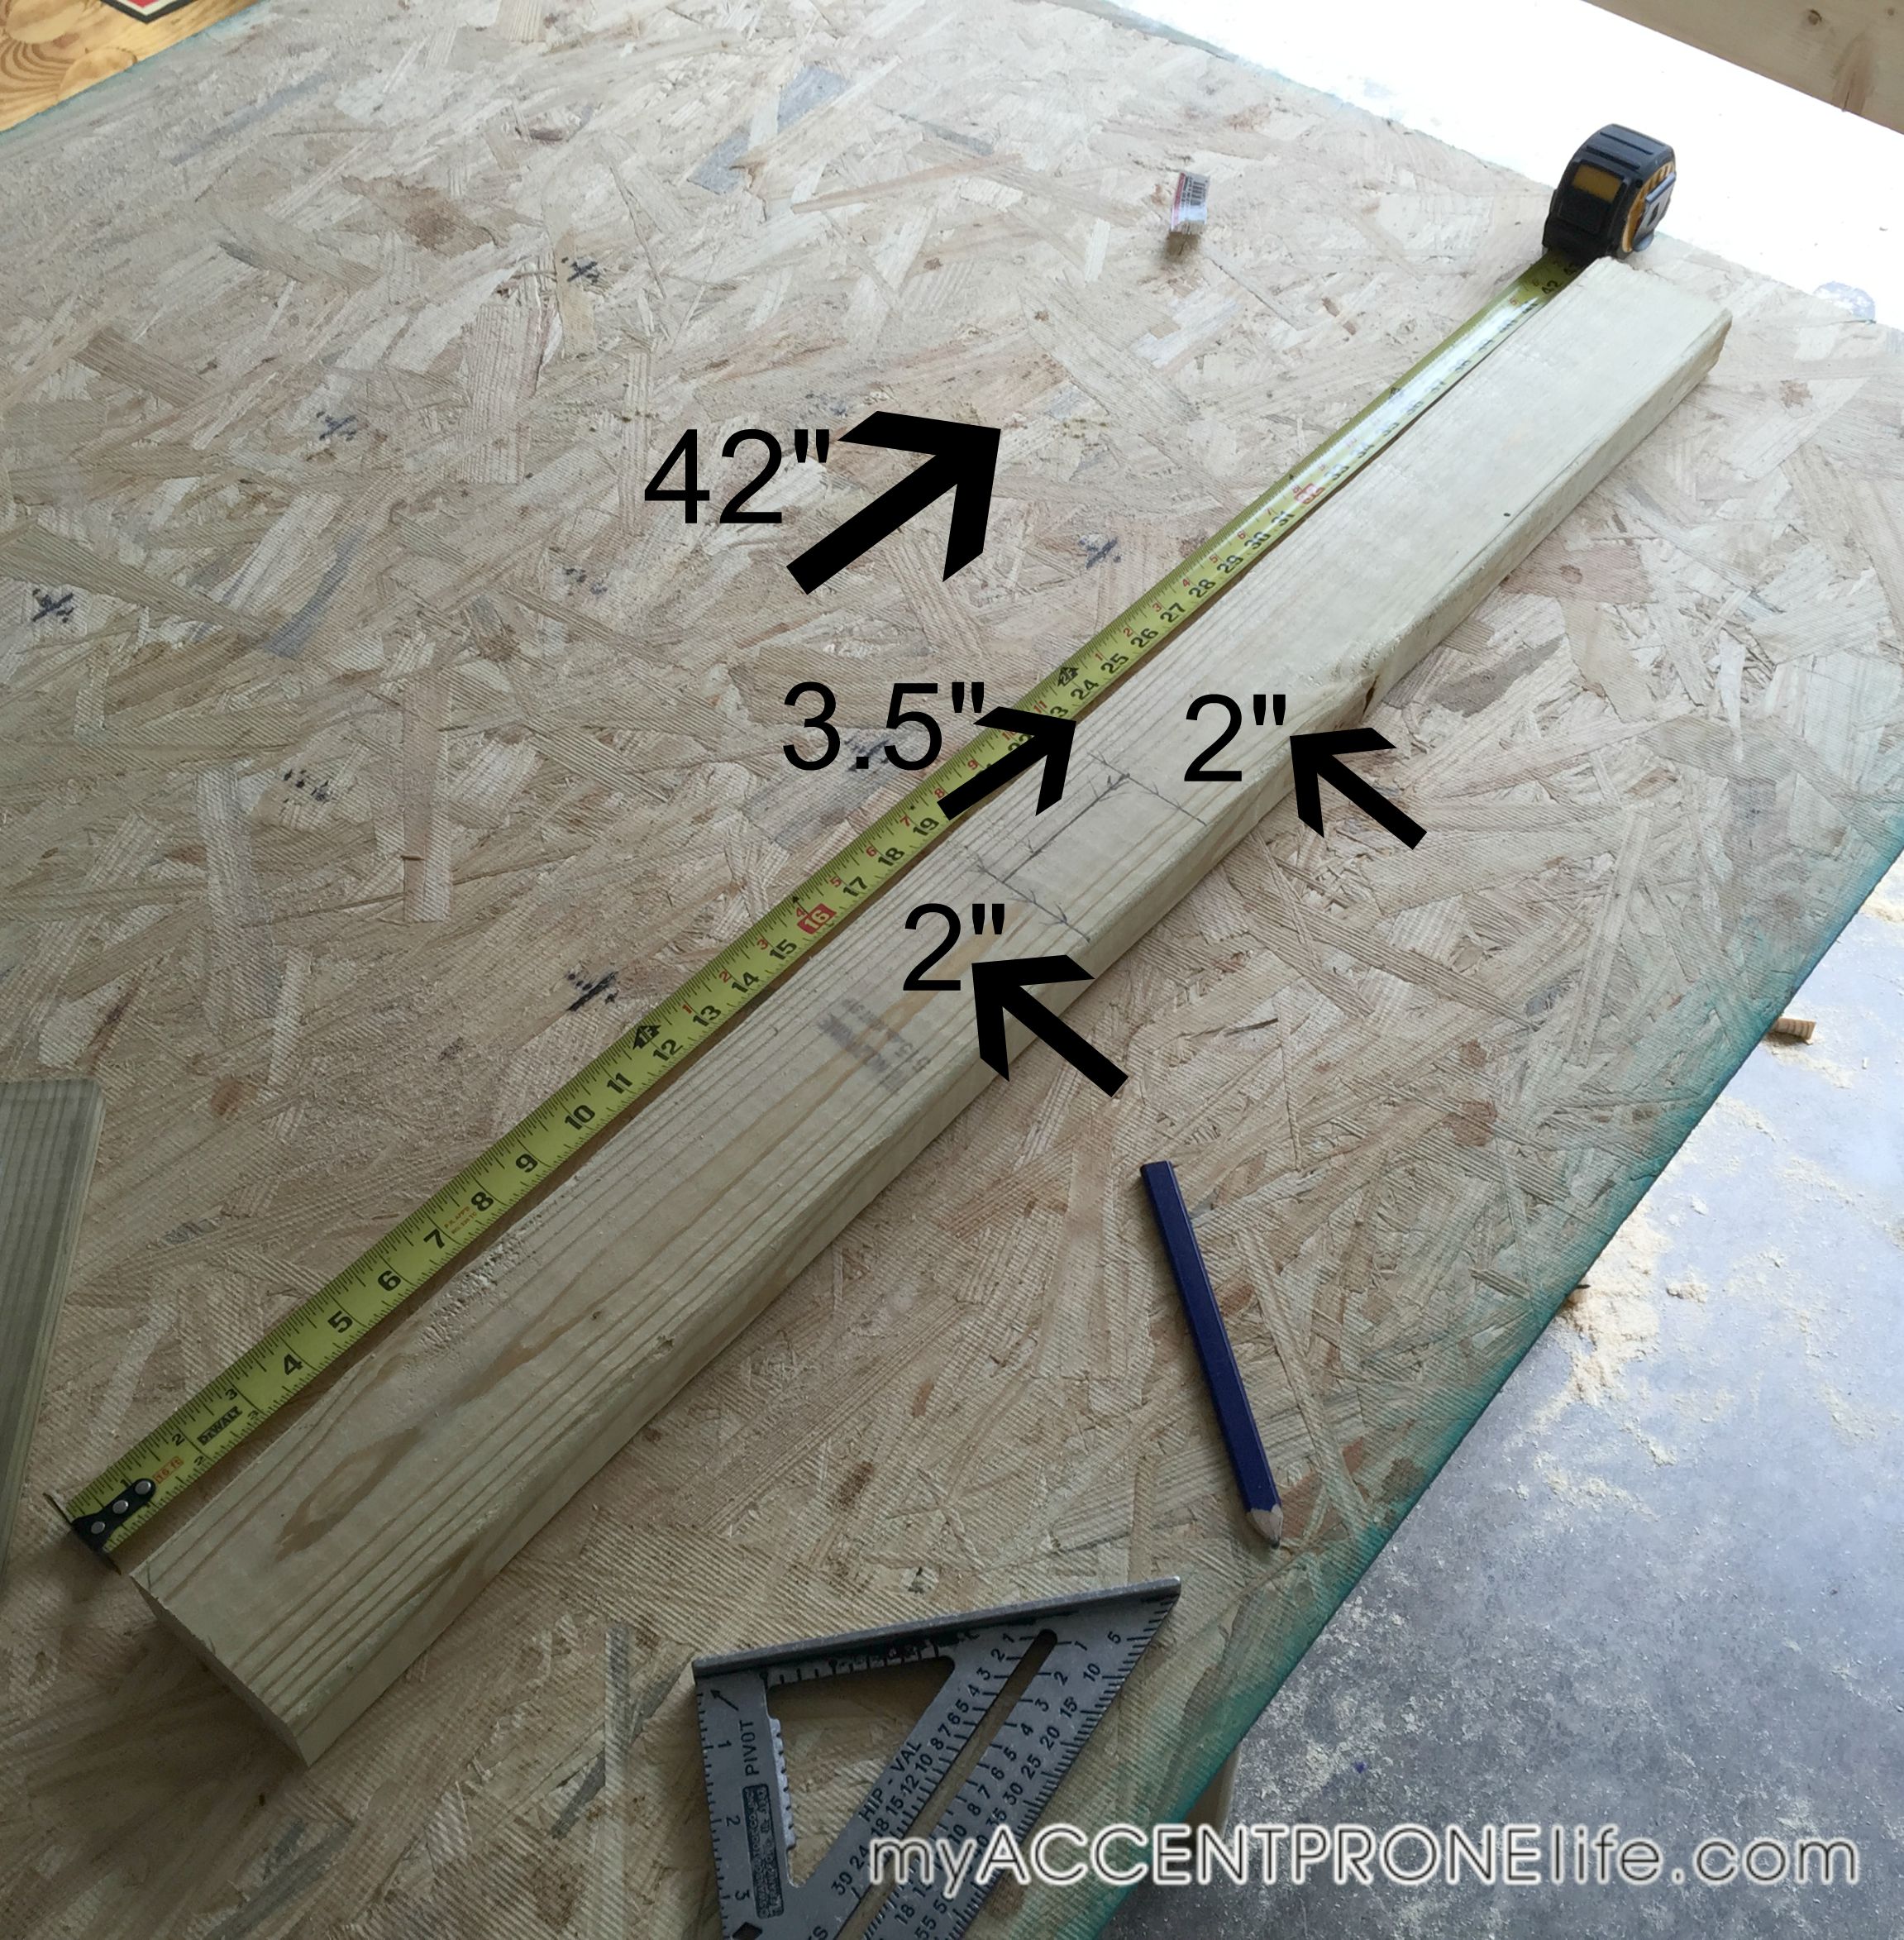
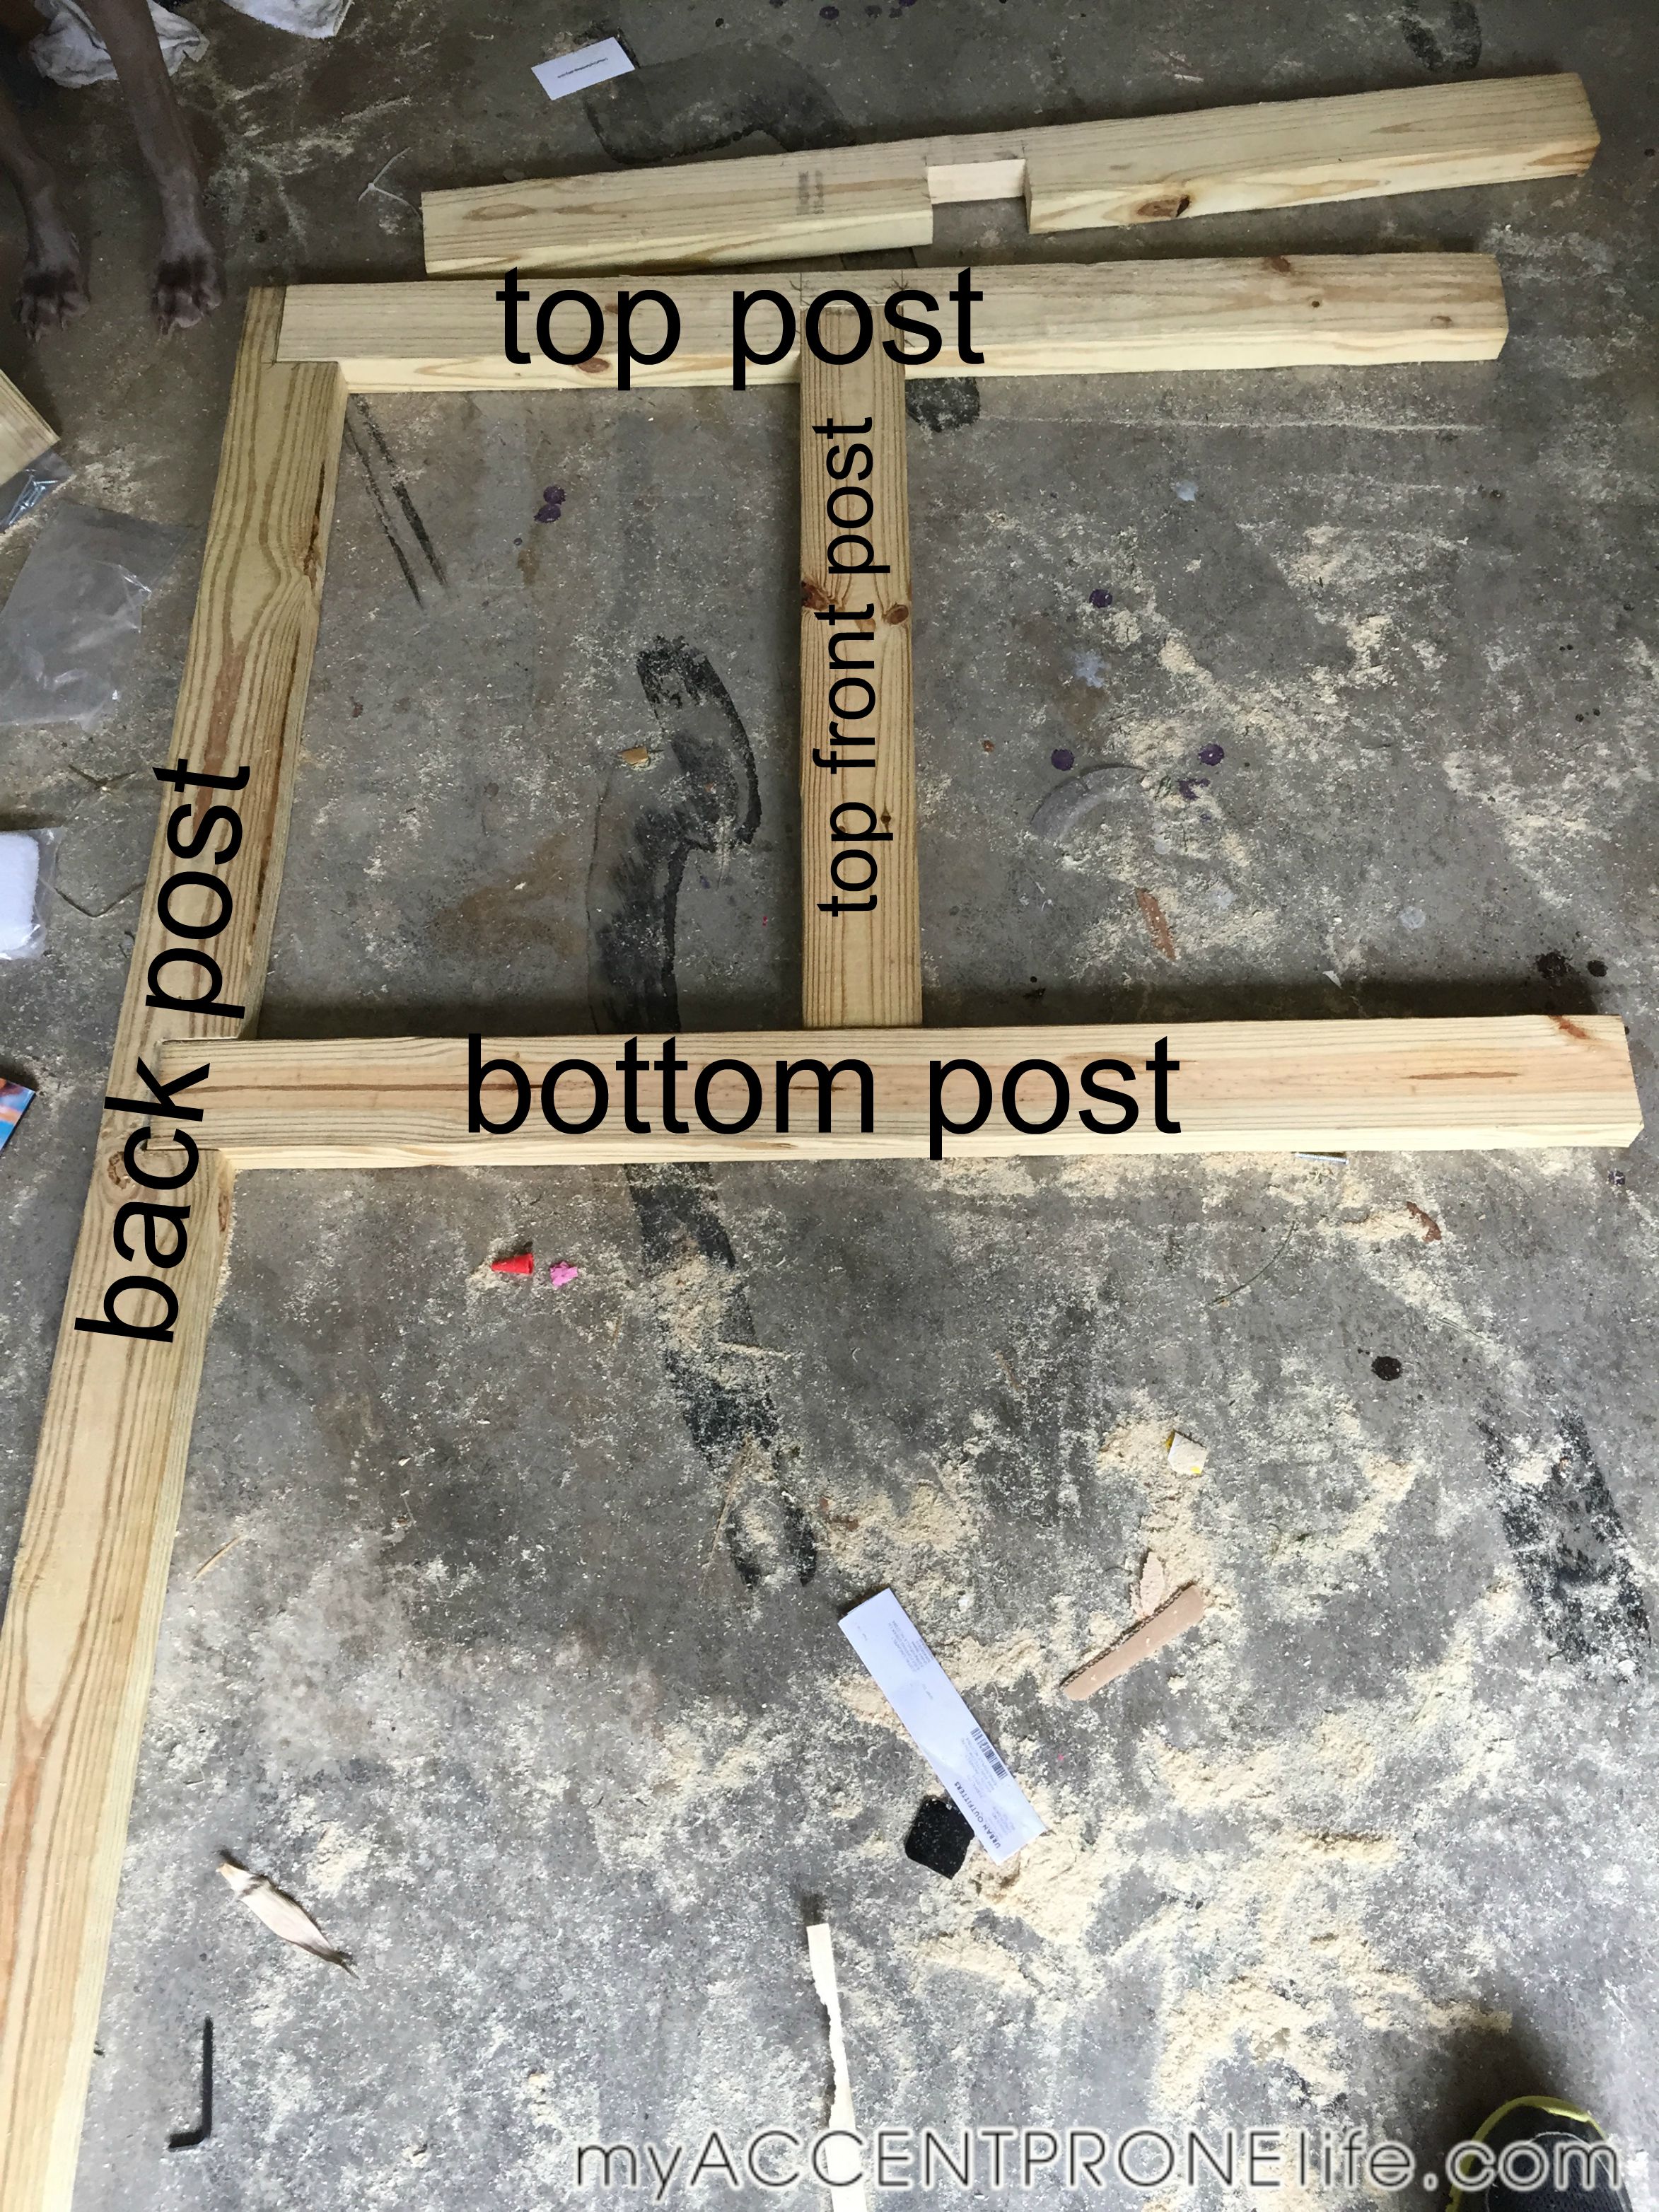
Step 1- Using the chop saw, cut 6″ off of 2 of the 8 ft boards which will become the backposts. Take these 2 boards and use a jigsaw to cut notches out of each of them. At the top of the post you will want to measure out a 3.5 high x 2.25 wide rectangle. This notch will be used for holding the top horizontal post. This needs to be done to both of the backposts, which will be connected later on.

topnotchpic


topnotchcut


topnotchfits

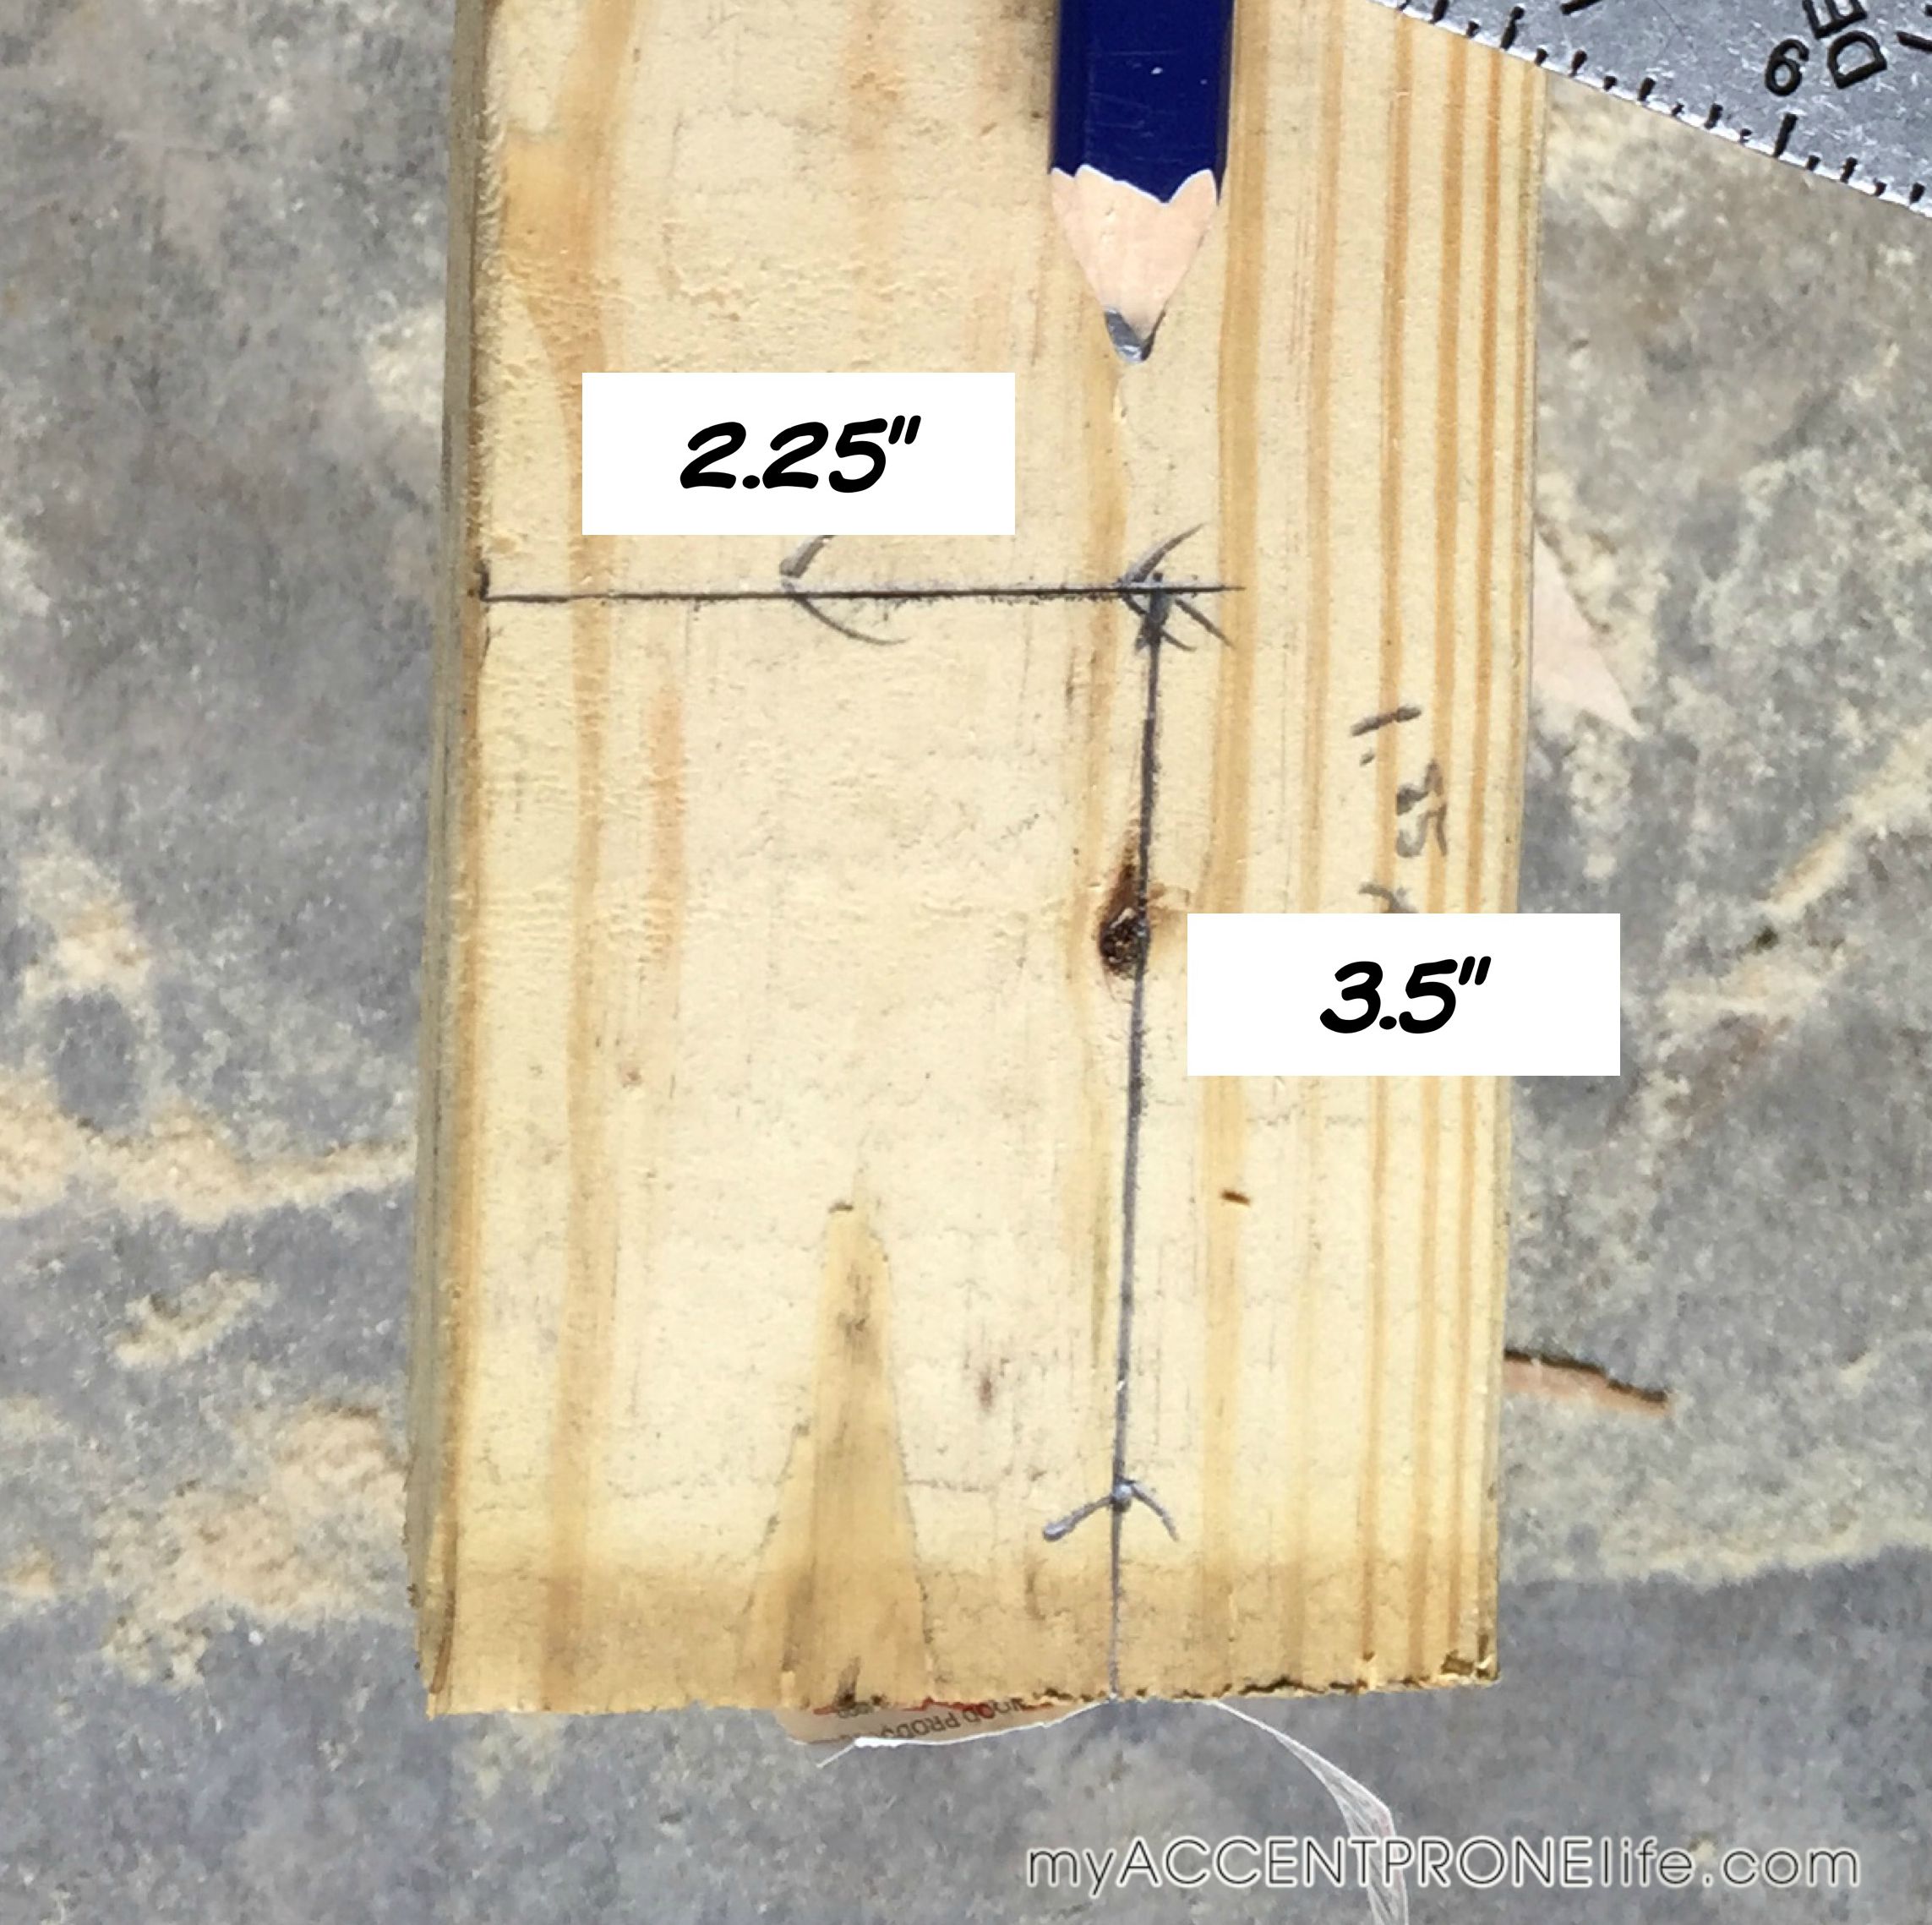
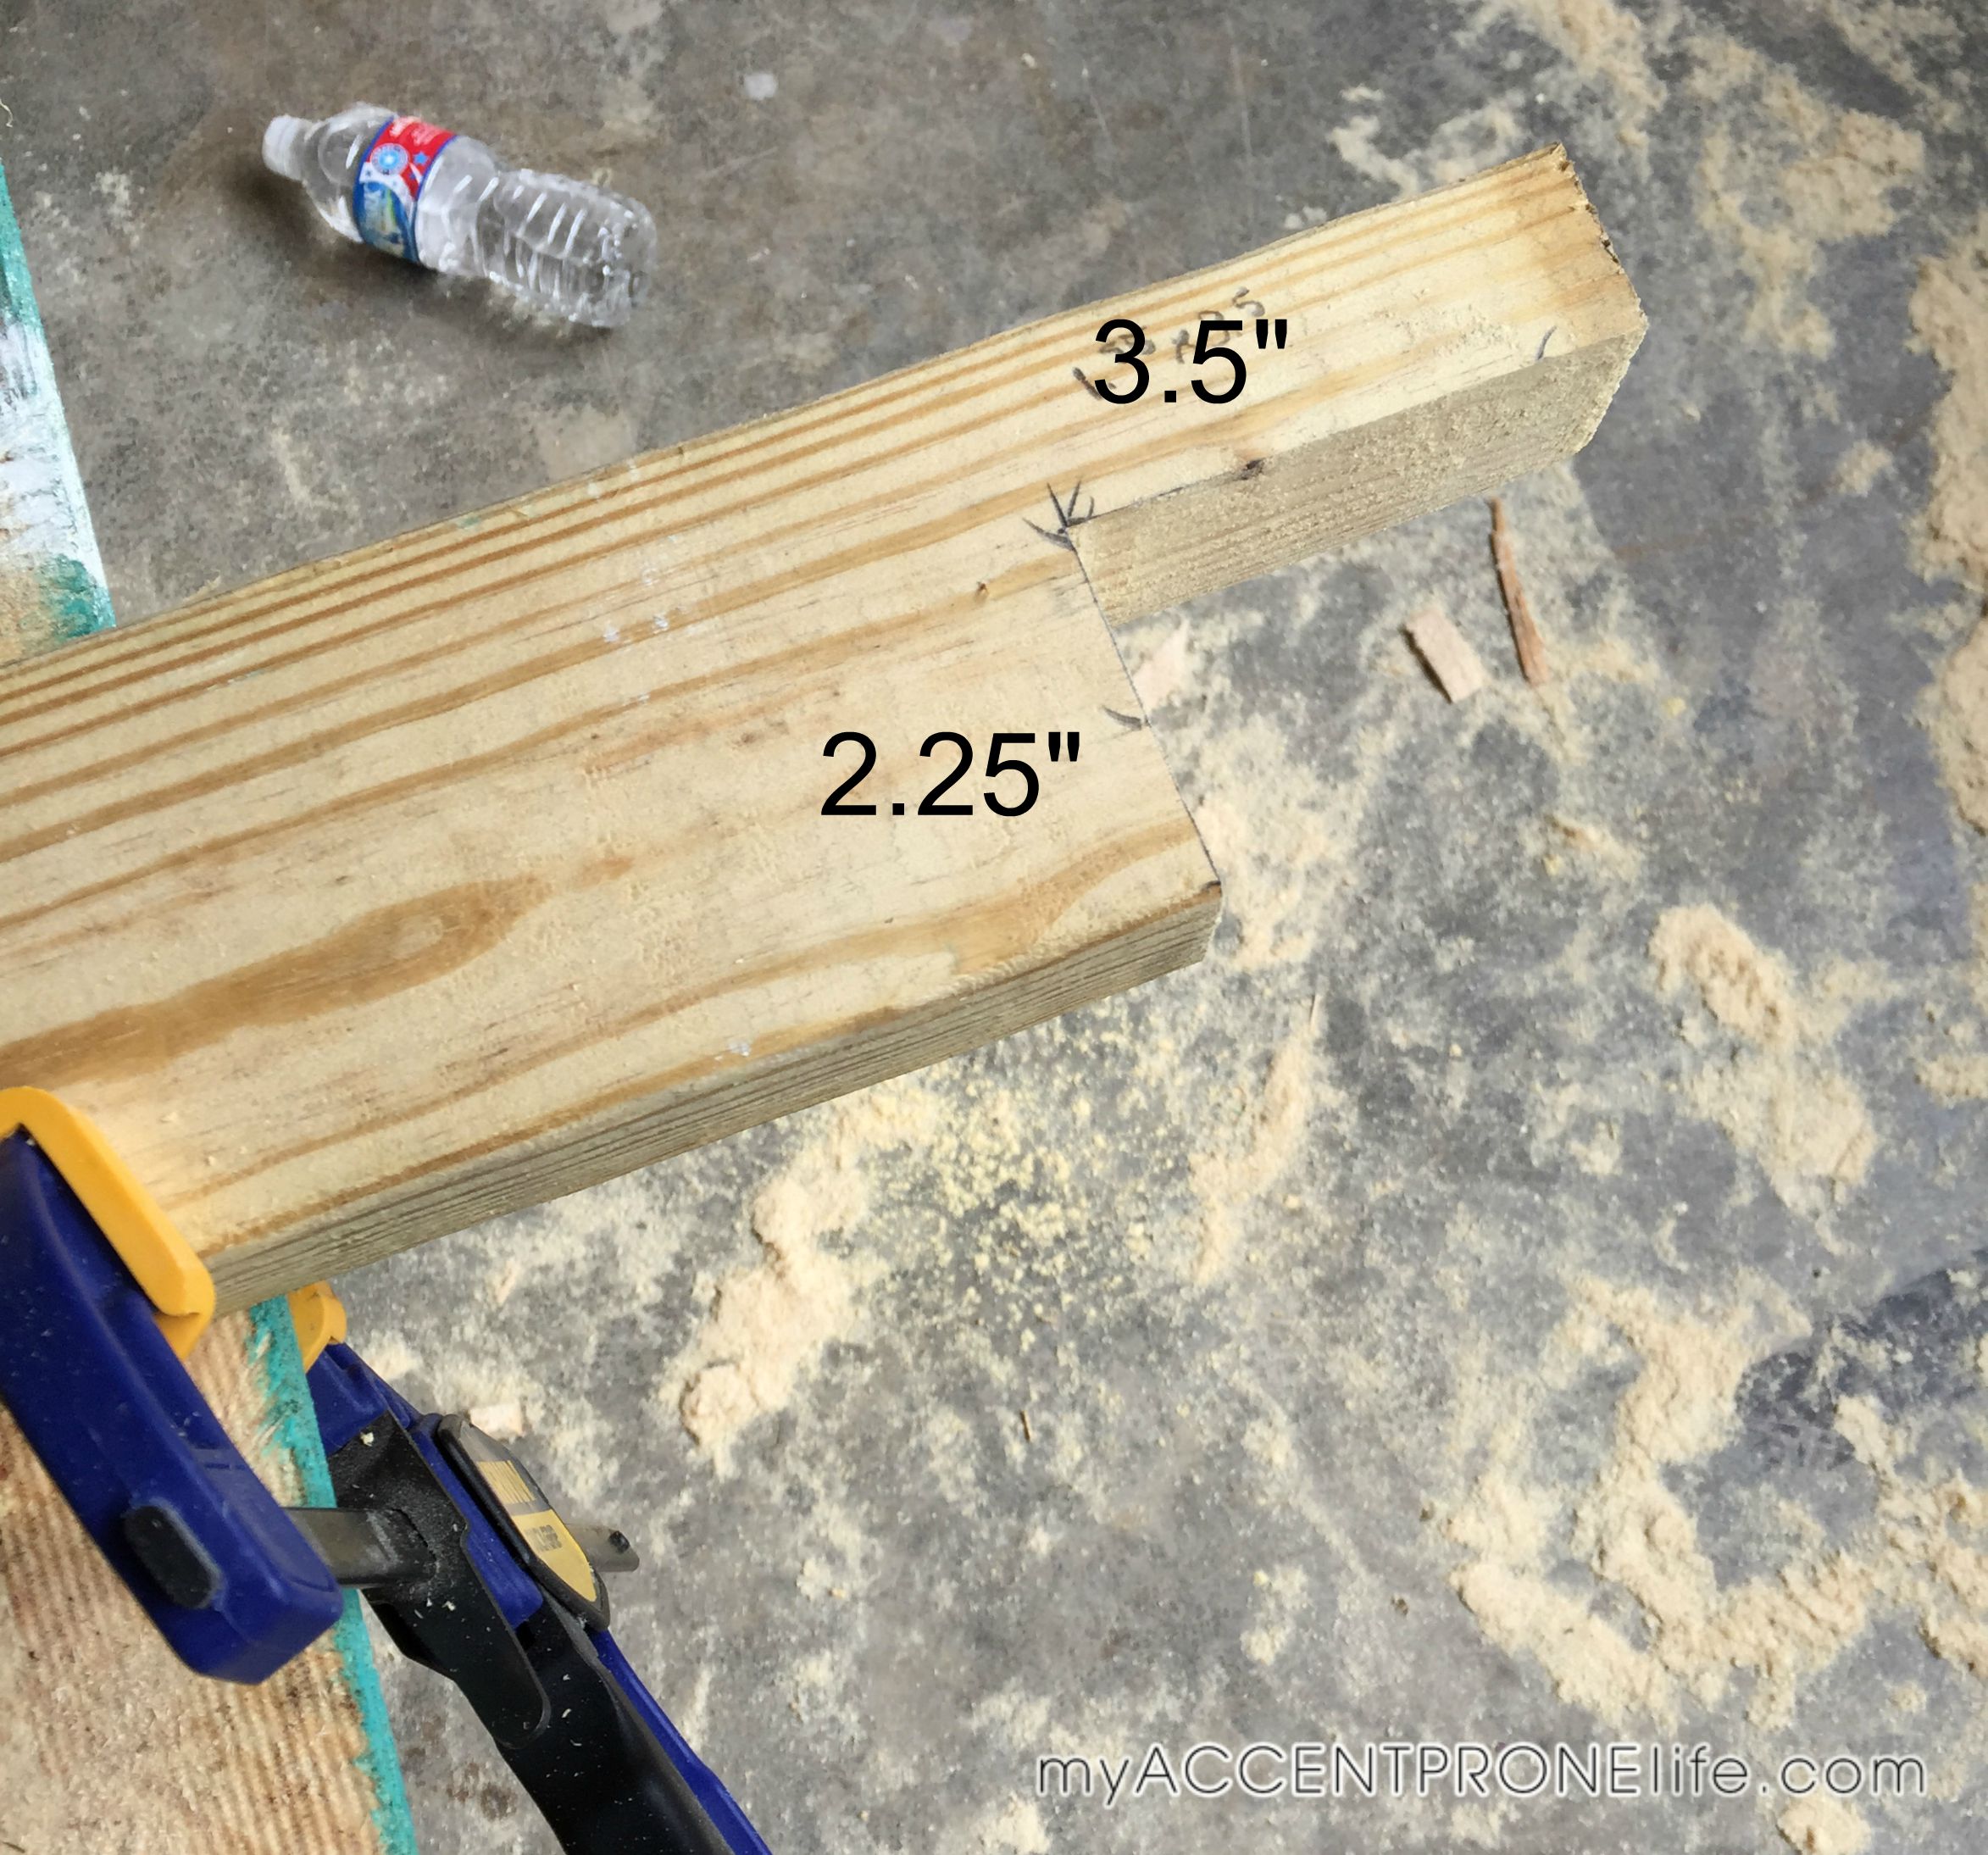
(the picture above shows why you are cutting out the notch, and how the top post will fit into the back post.)

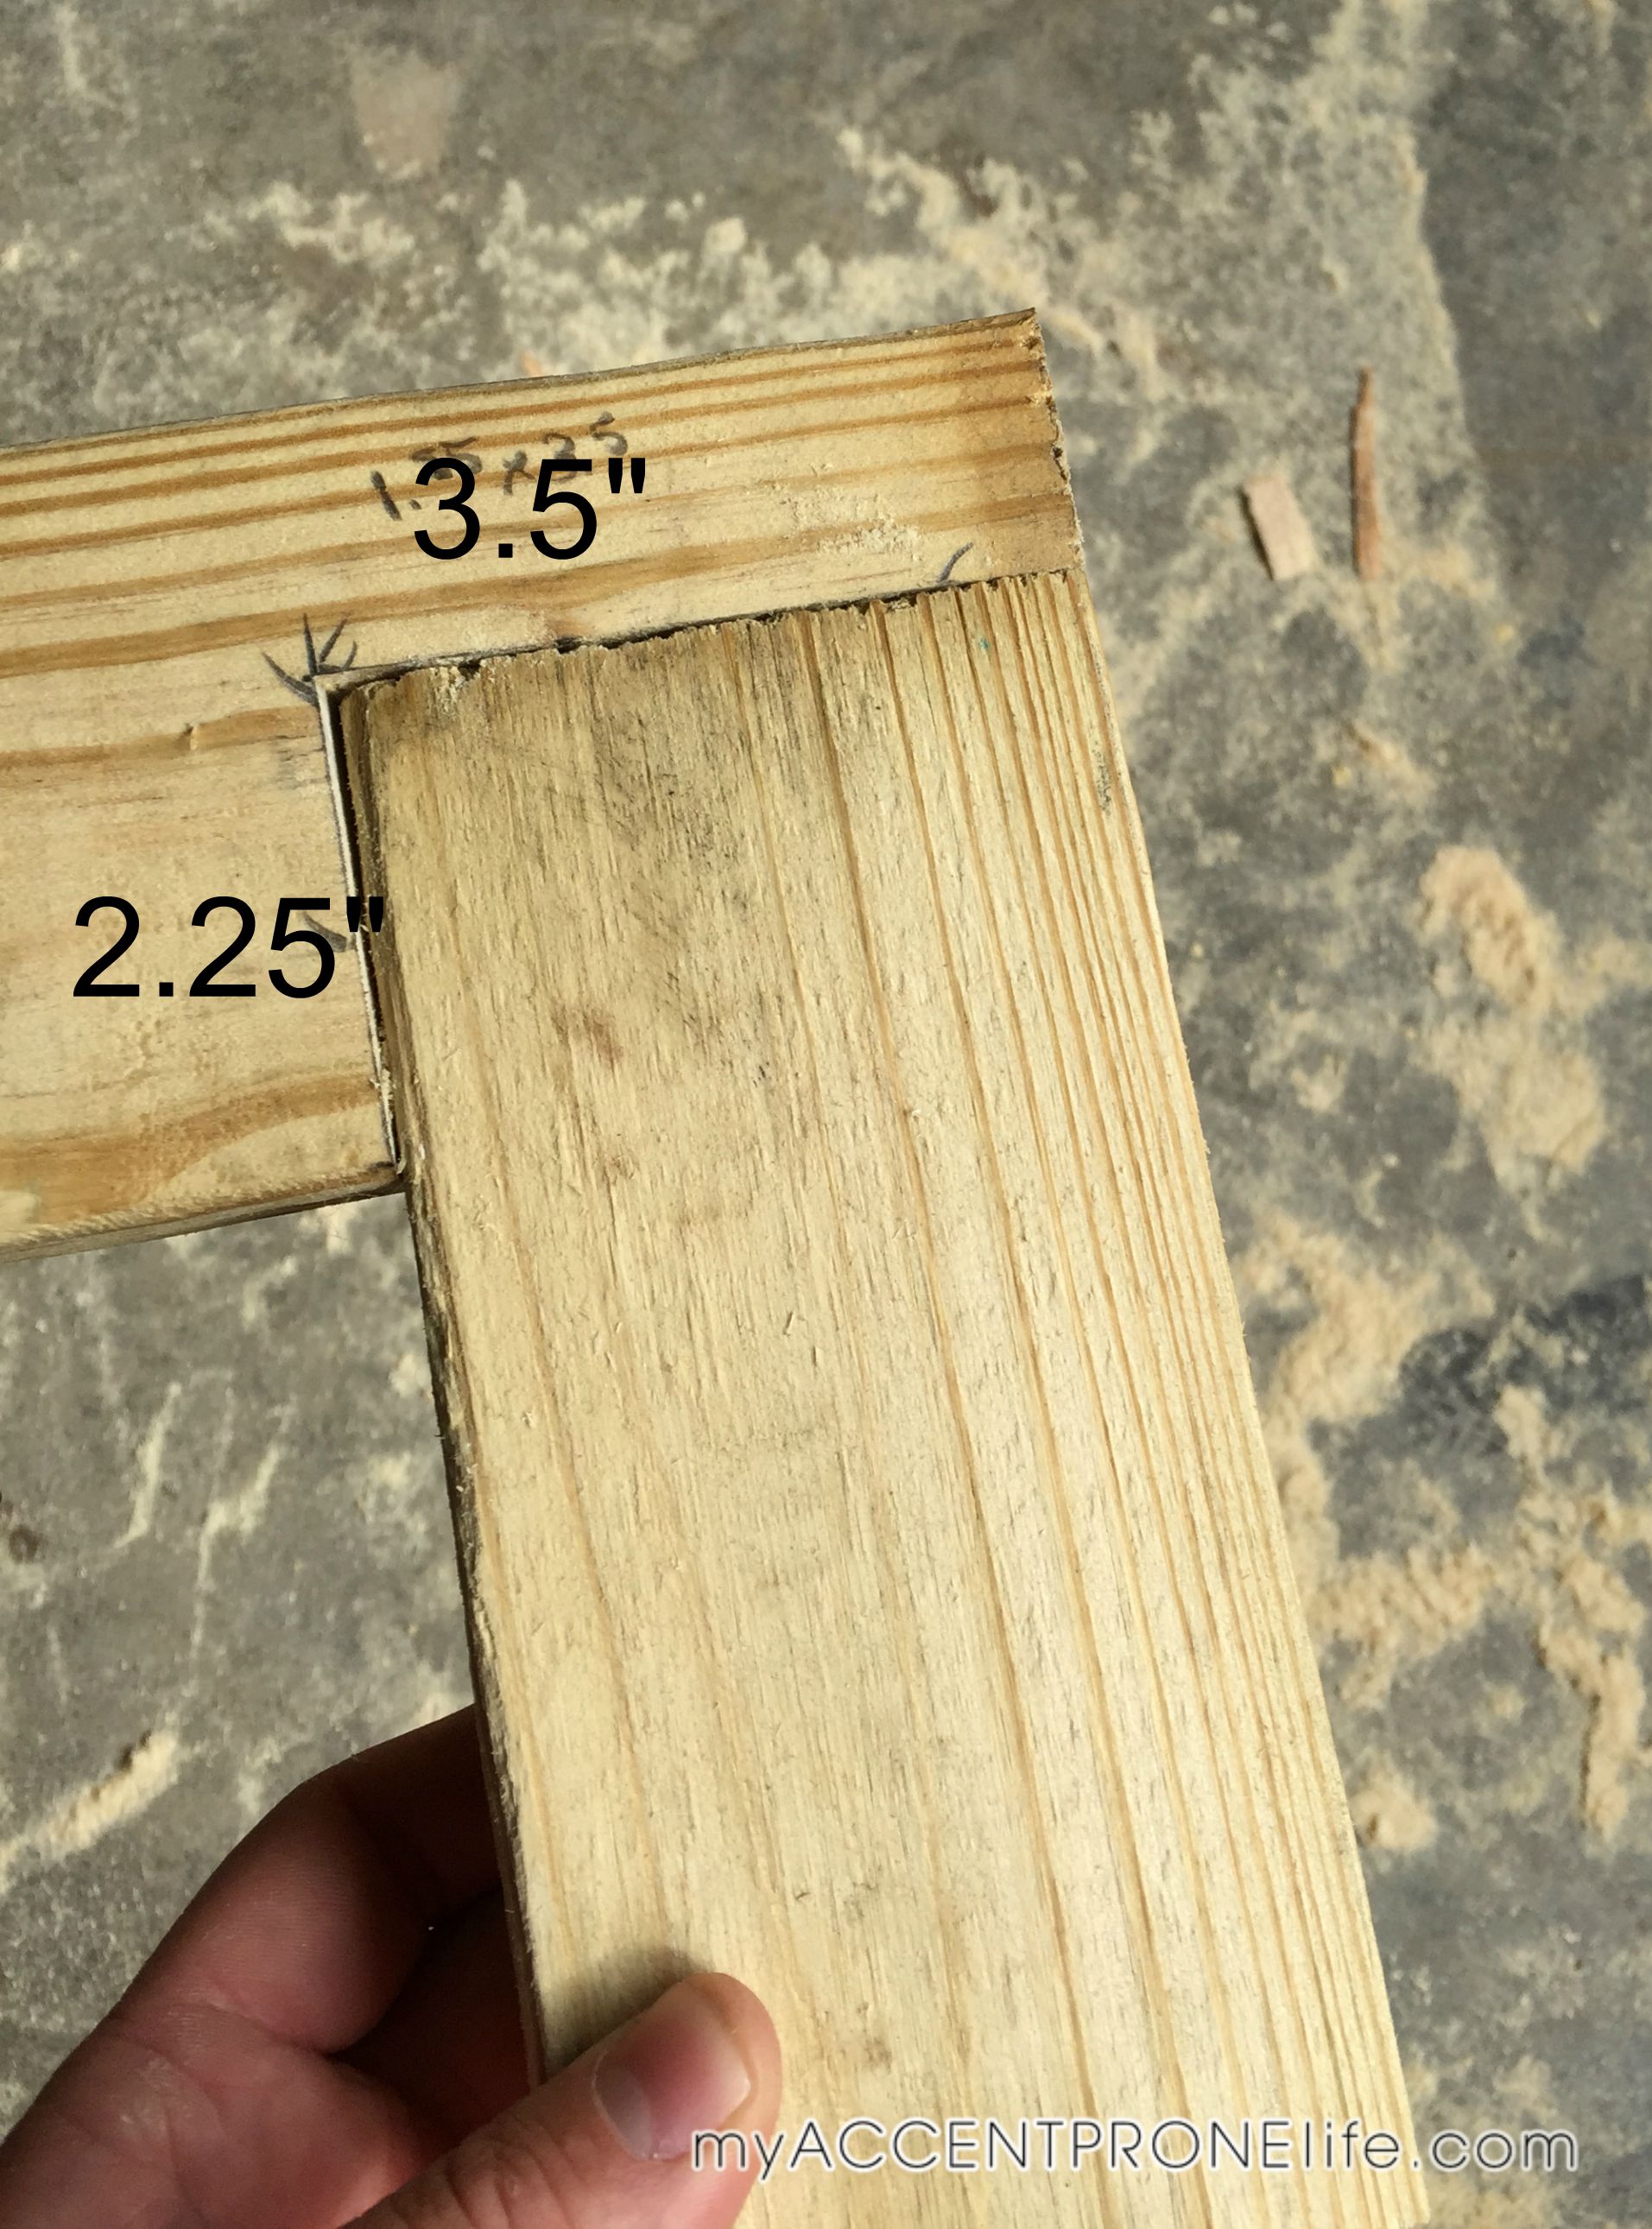
Step 2- Cut the middle notches out of the same back posts. 29″ down from the top of the post, cut a 3.5″ down x 2.25″ wide notch. So you will start the notch at 29″ from the top of the post, down to 32.5″ from the top of the post. You will do this step twice on the 2 different boards from step 1.

middlenotchcut


(After completing steps 1 and 2, you should have 2 boards that line up with the same notches cut out as shown in the picture below.)

topandmiddlelineup

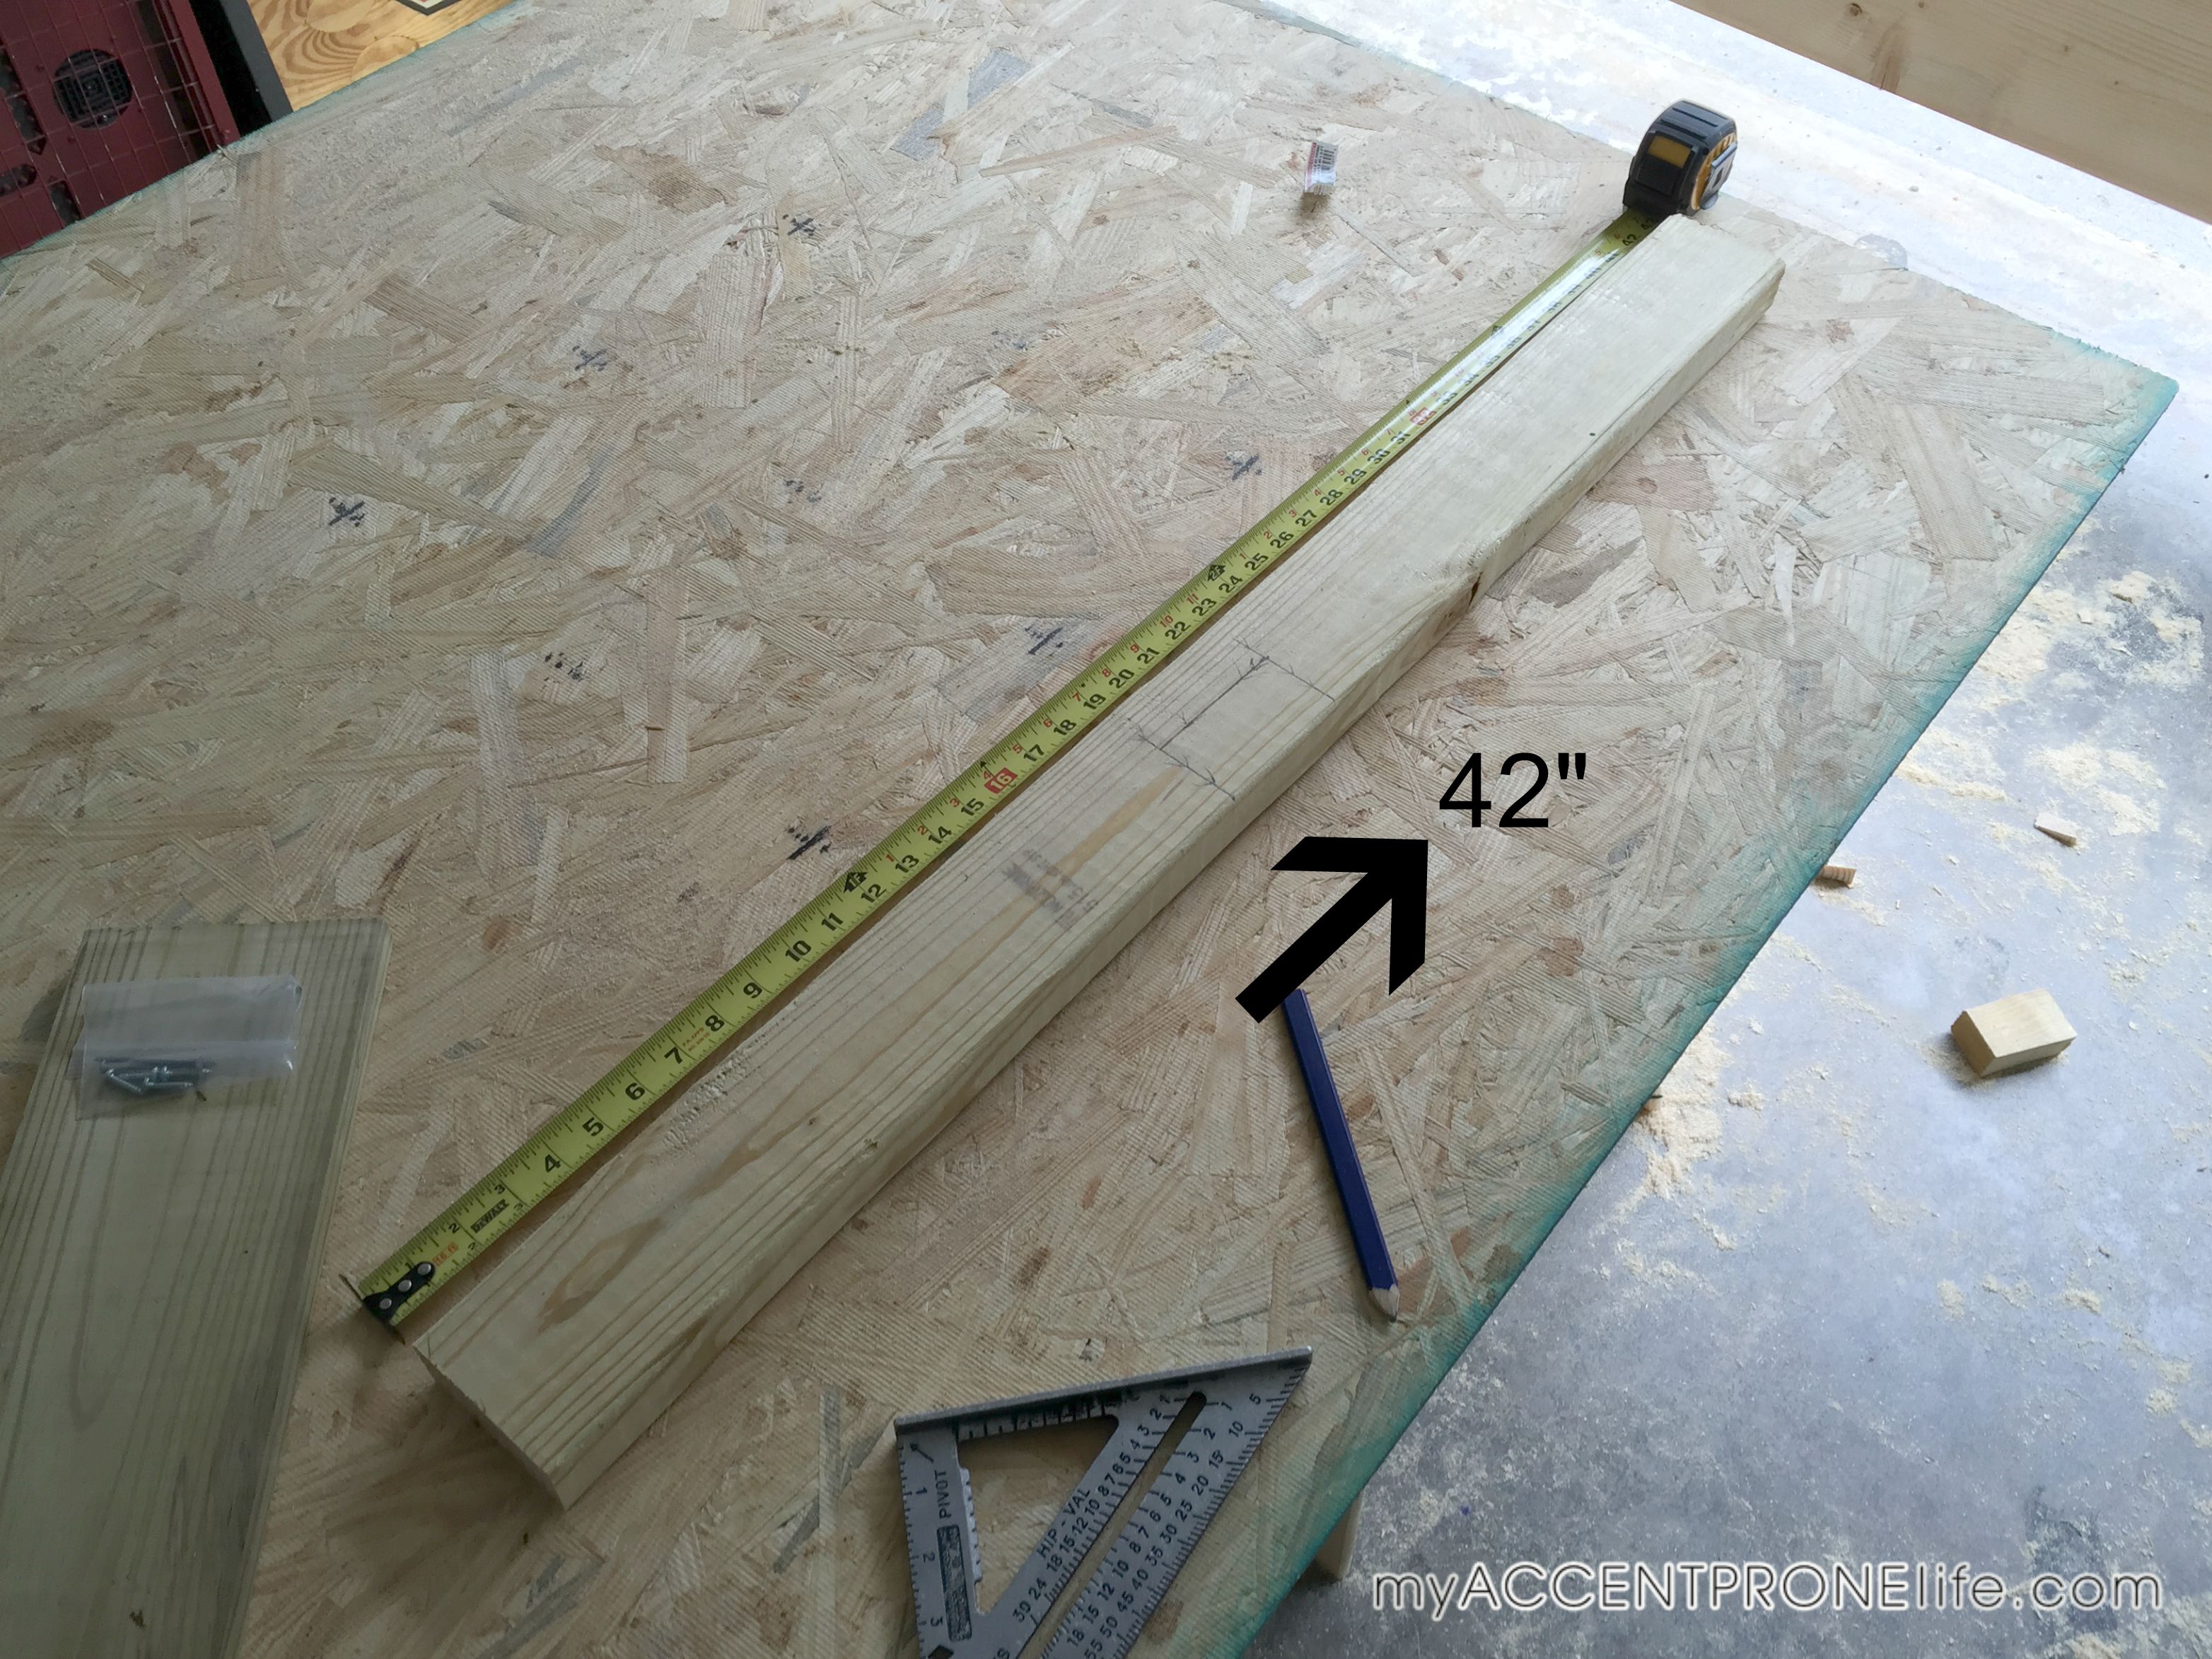
Step 3- Using the chop saw, cut 2 horizontal top posts. These will be cut 42″ boards.

42post


justinchopsaw


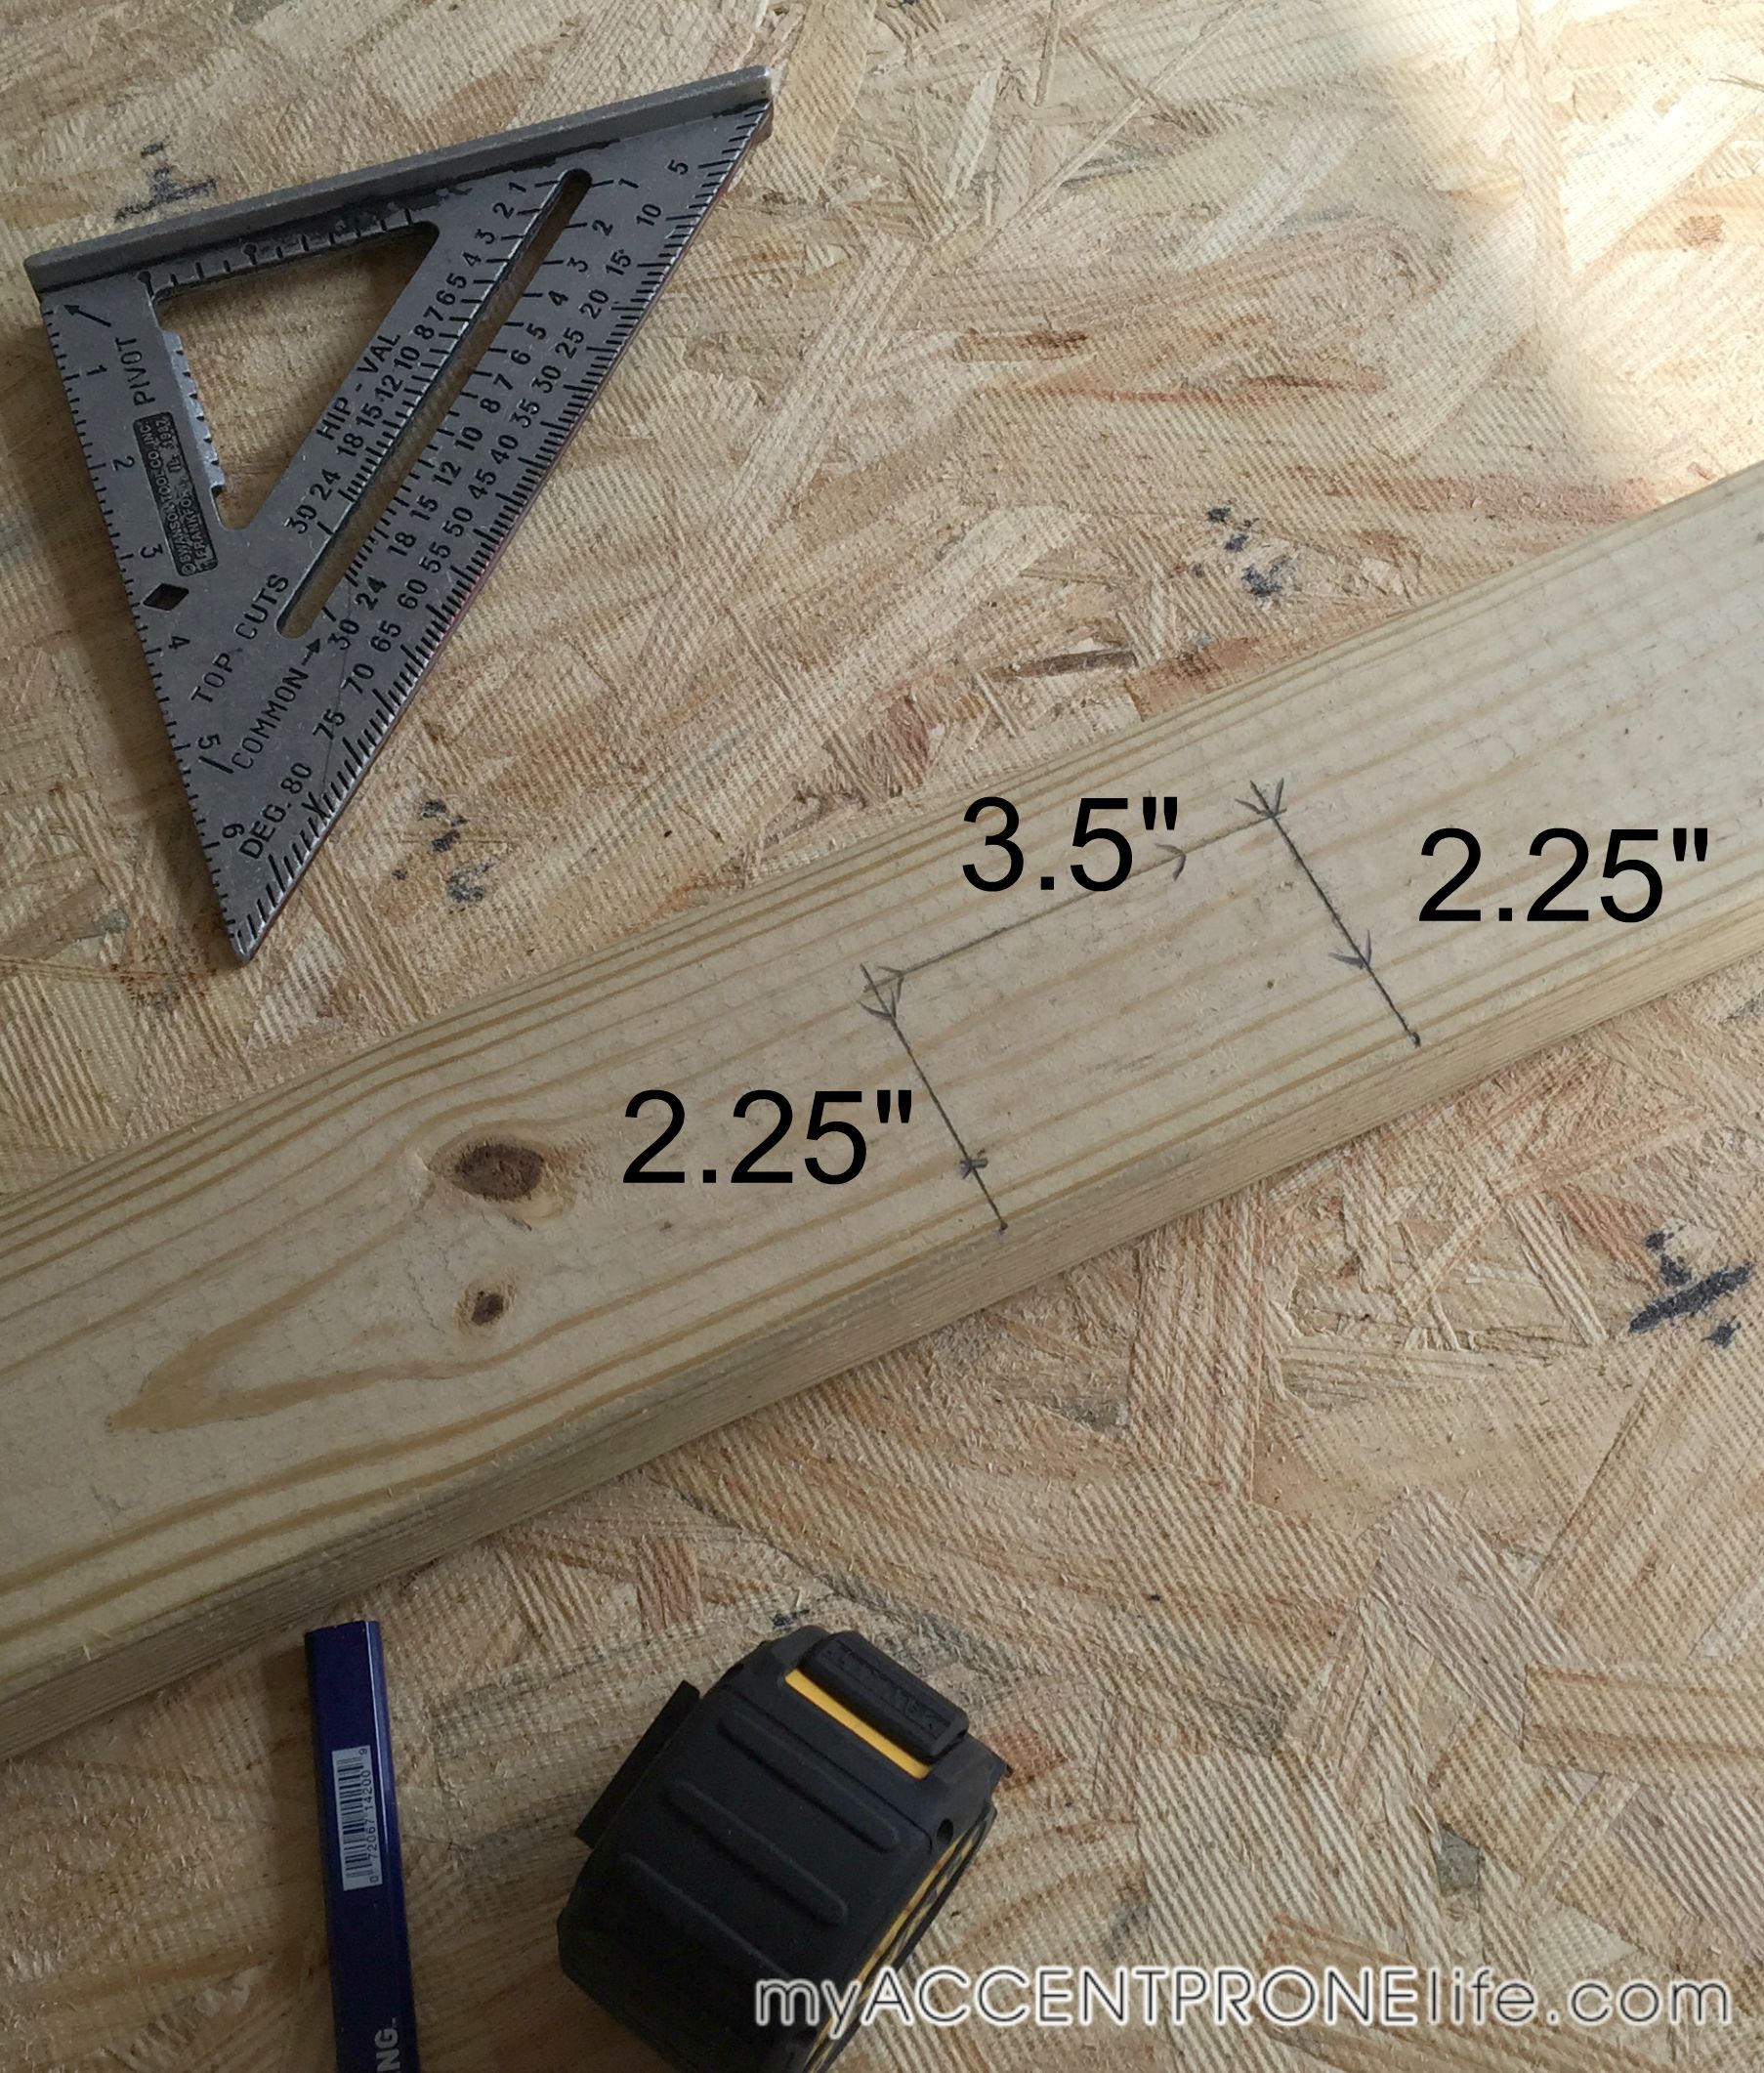
Step 4- Using the 42″ boards, starting at 20.5″ down, cut a 3.5″x 2″ notch. You will do this twice on both of the 42″ boards.

42postcutnotch


Step 5- Cut 2 more 42″ boards. These are used to hold up the mailbox. You do not need to make any other cuts out of these.

Step 6- Cut 2 60″ boards. These are the front bottom posts.

Step 7-  Using a chop saw, cut 2 boards at 27.5″. These are the top front posts.

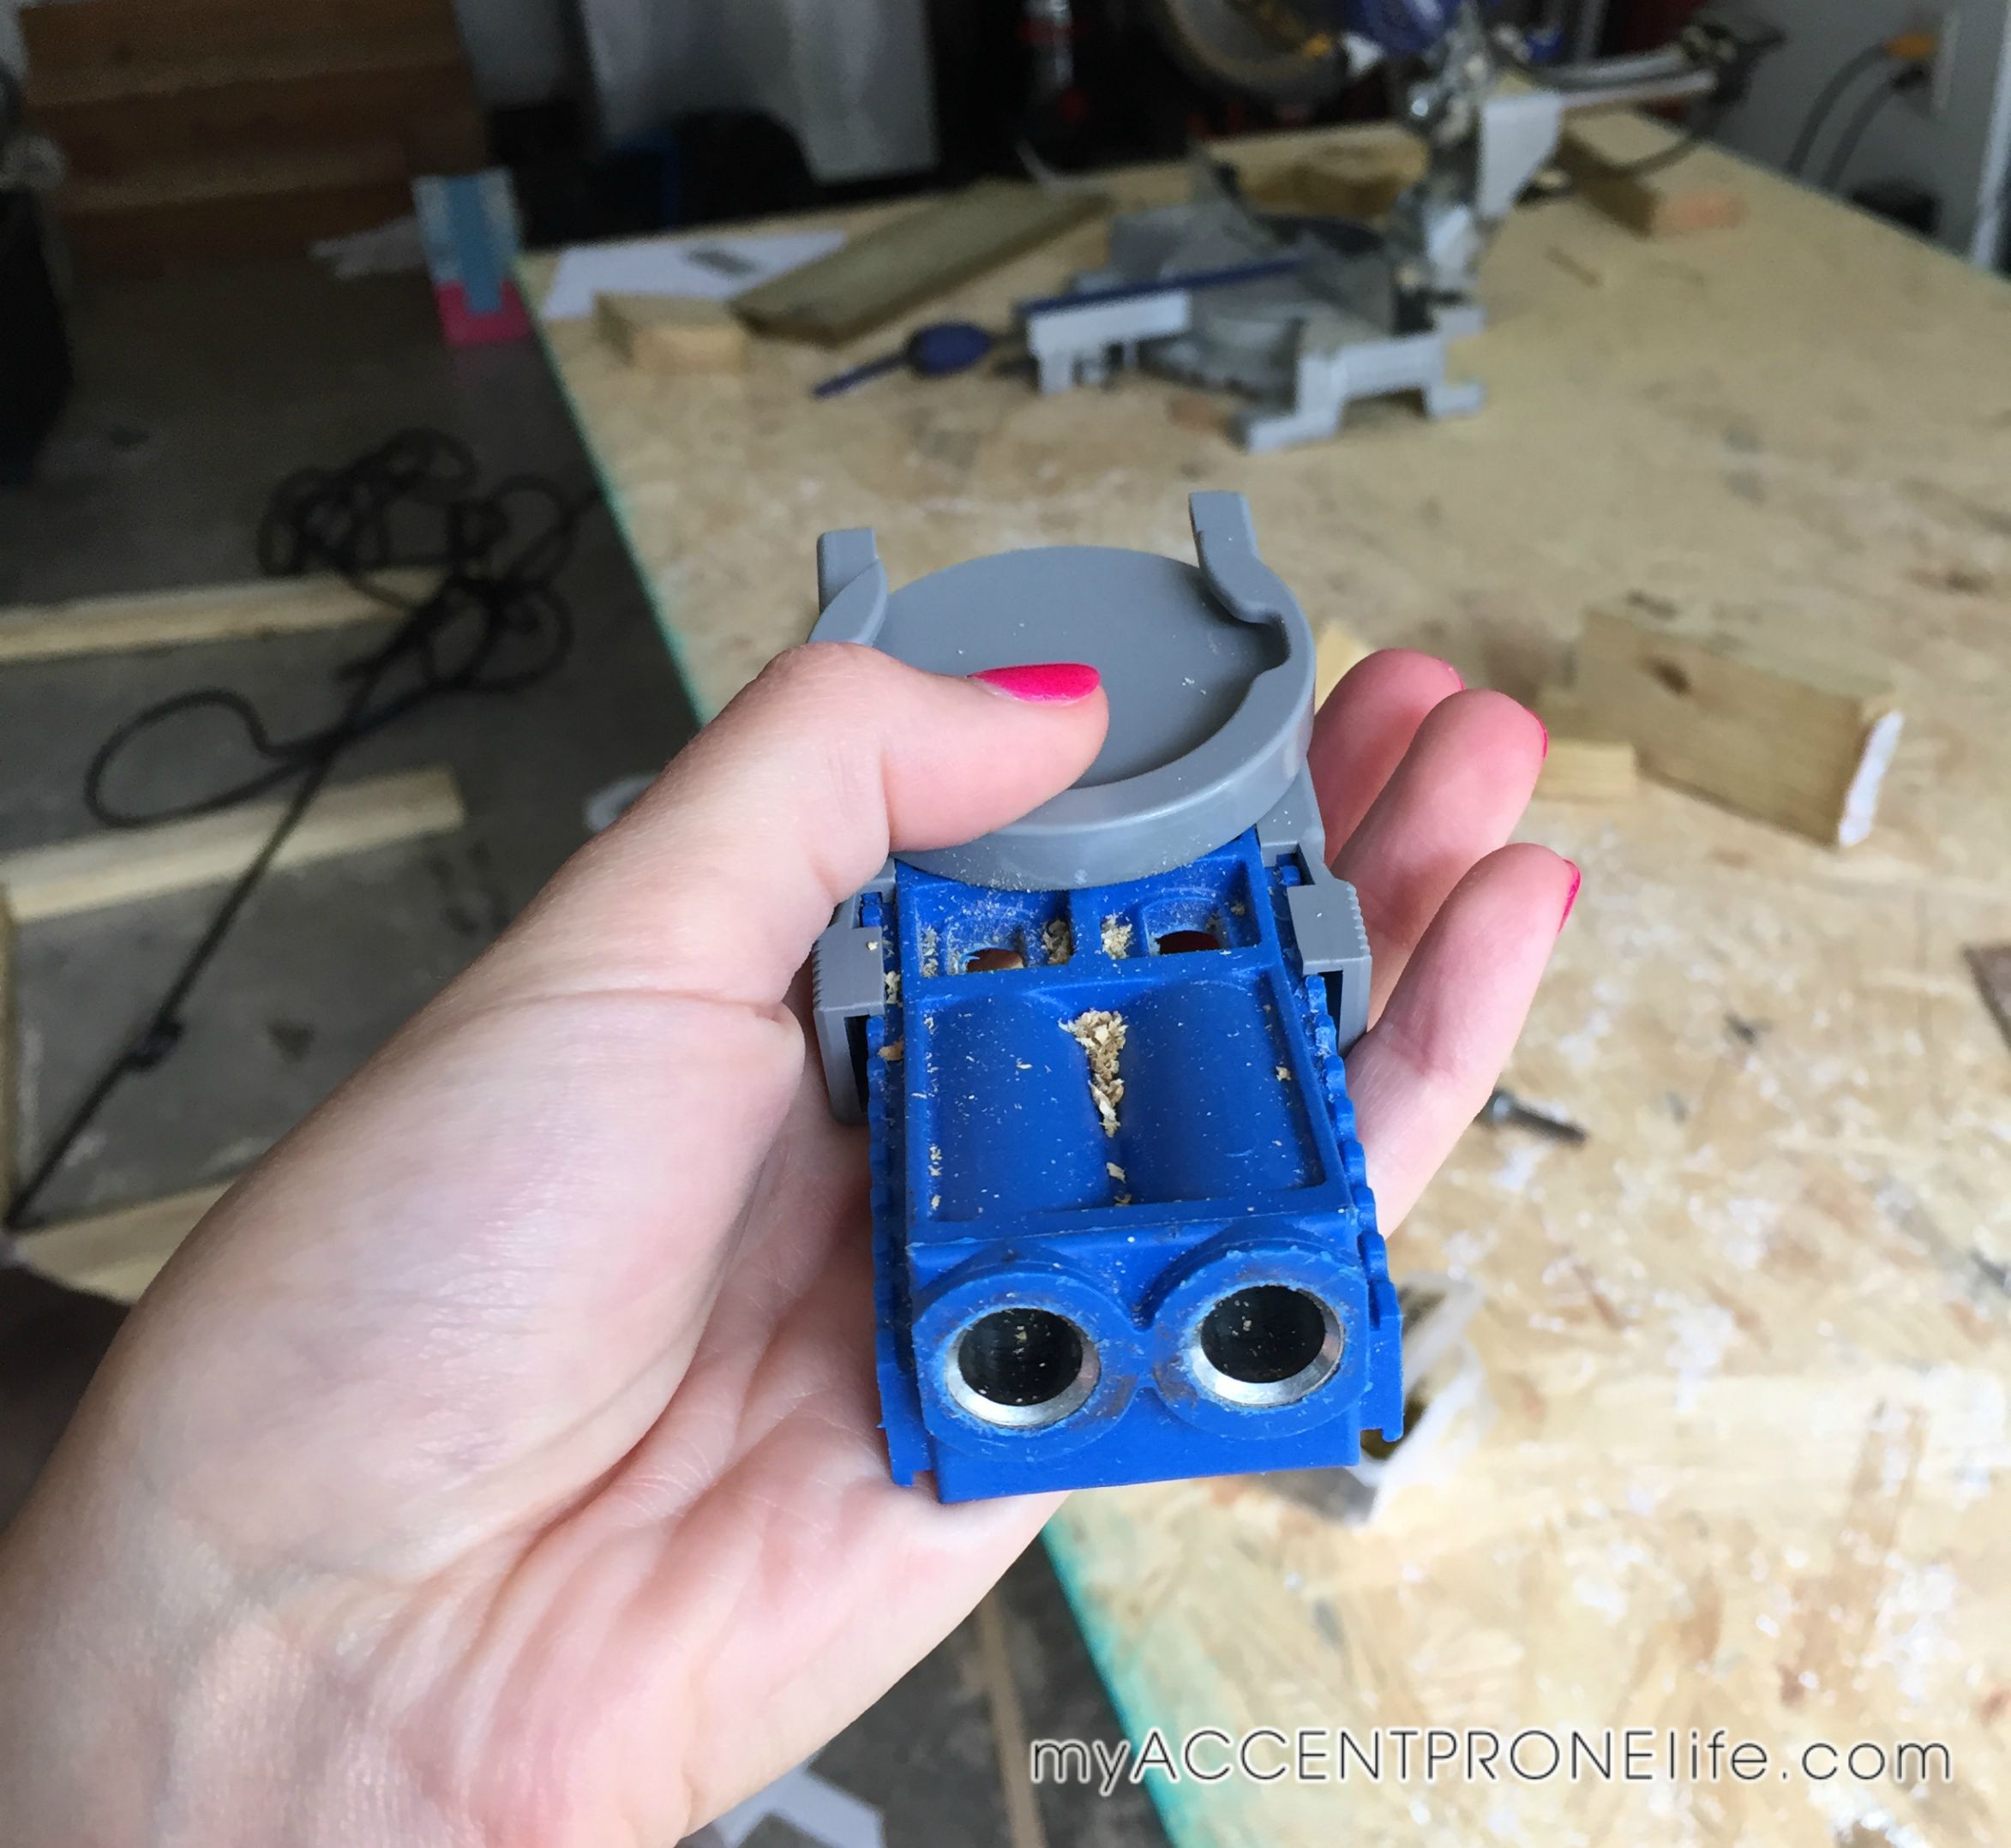
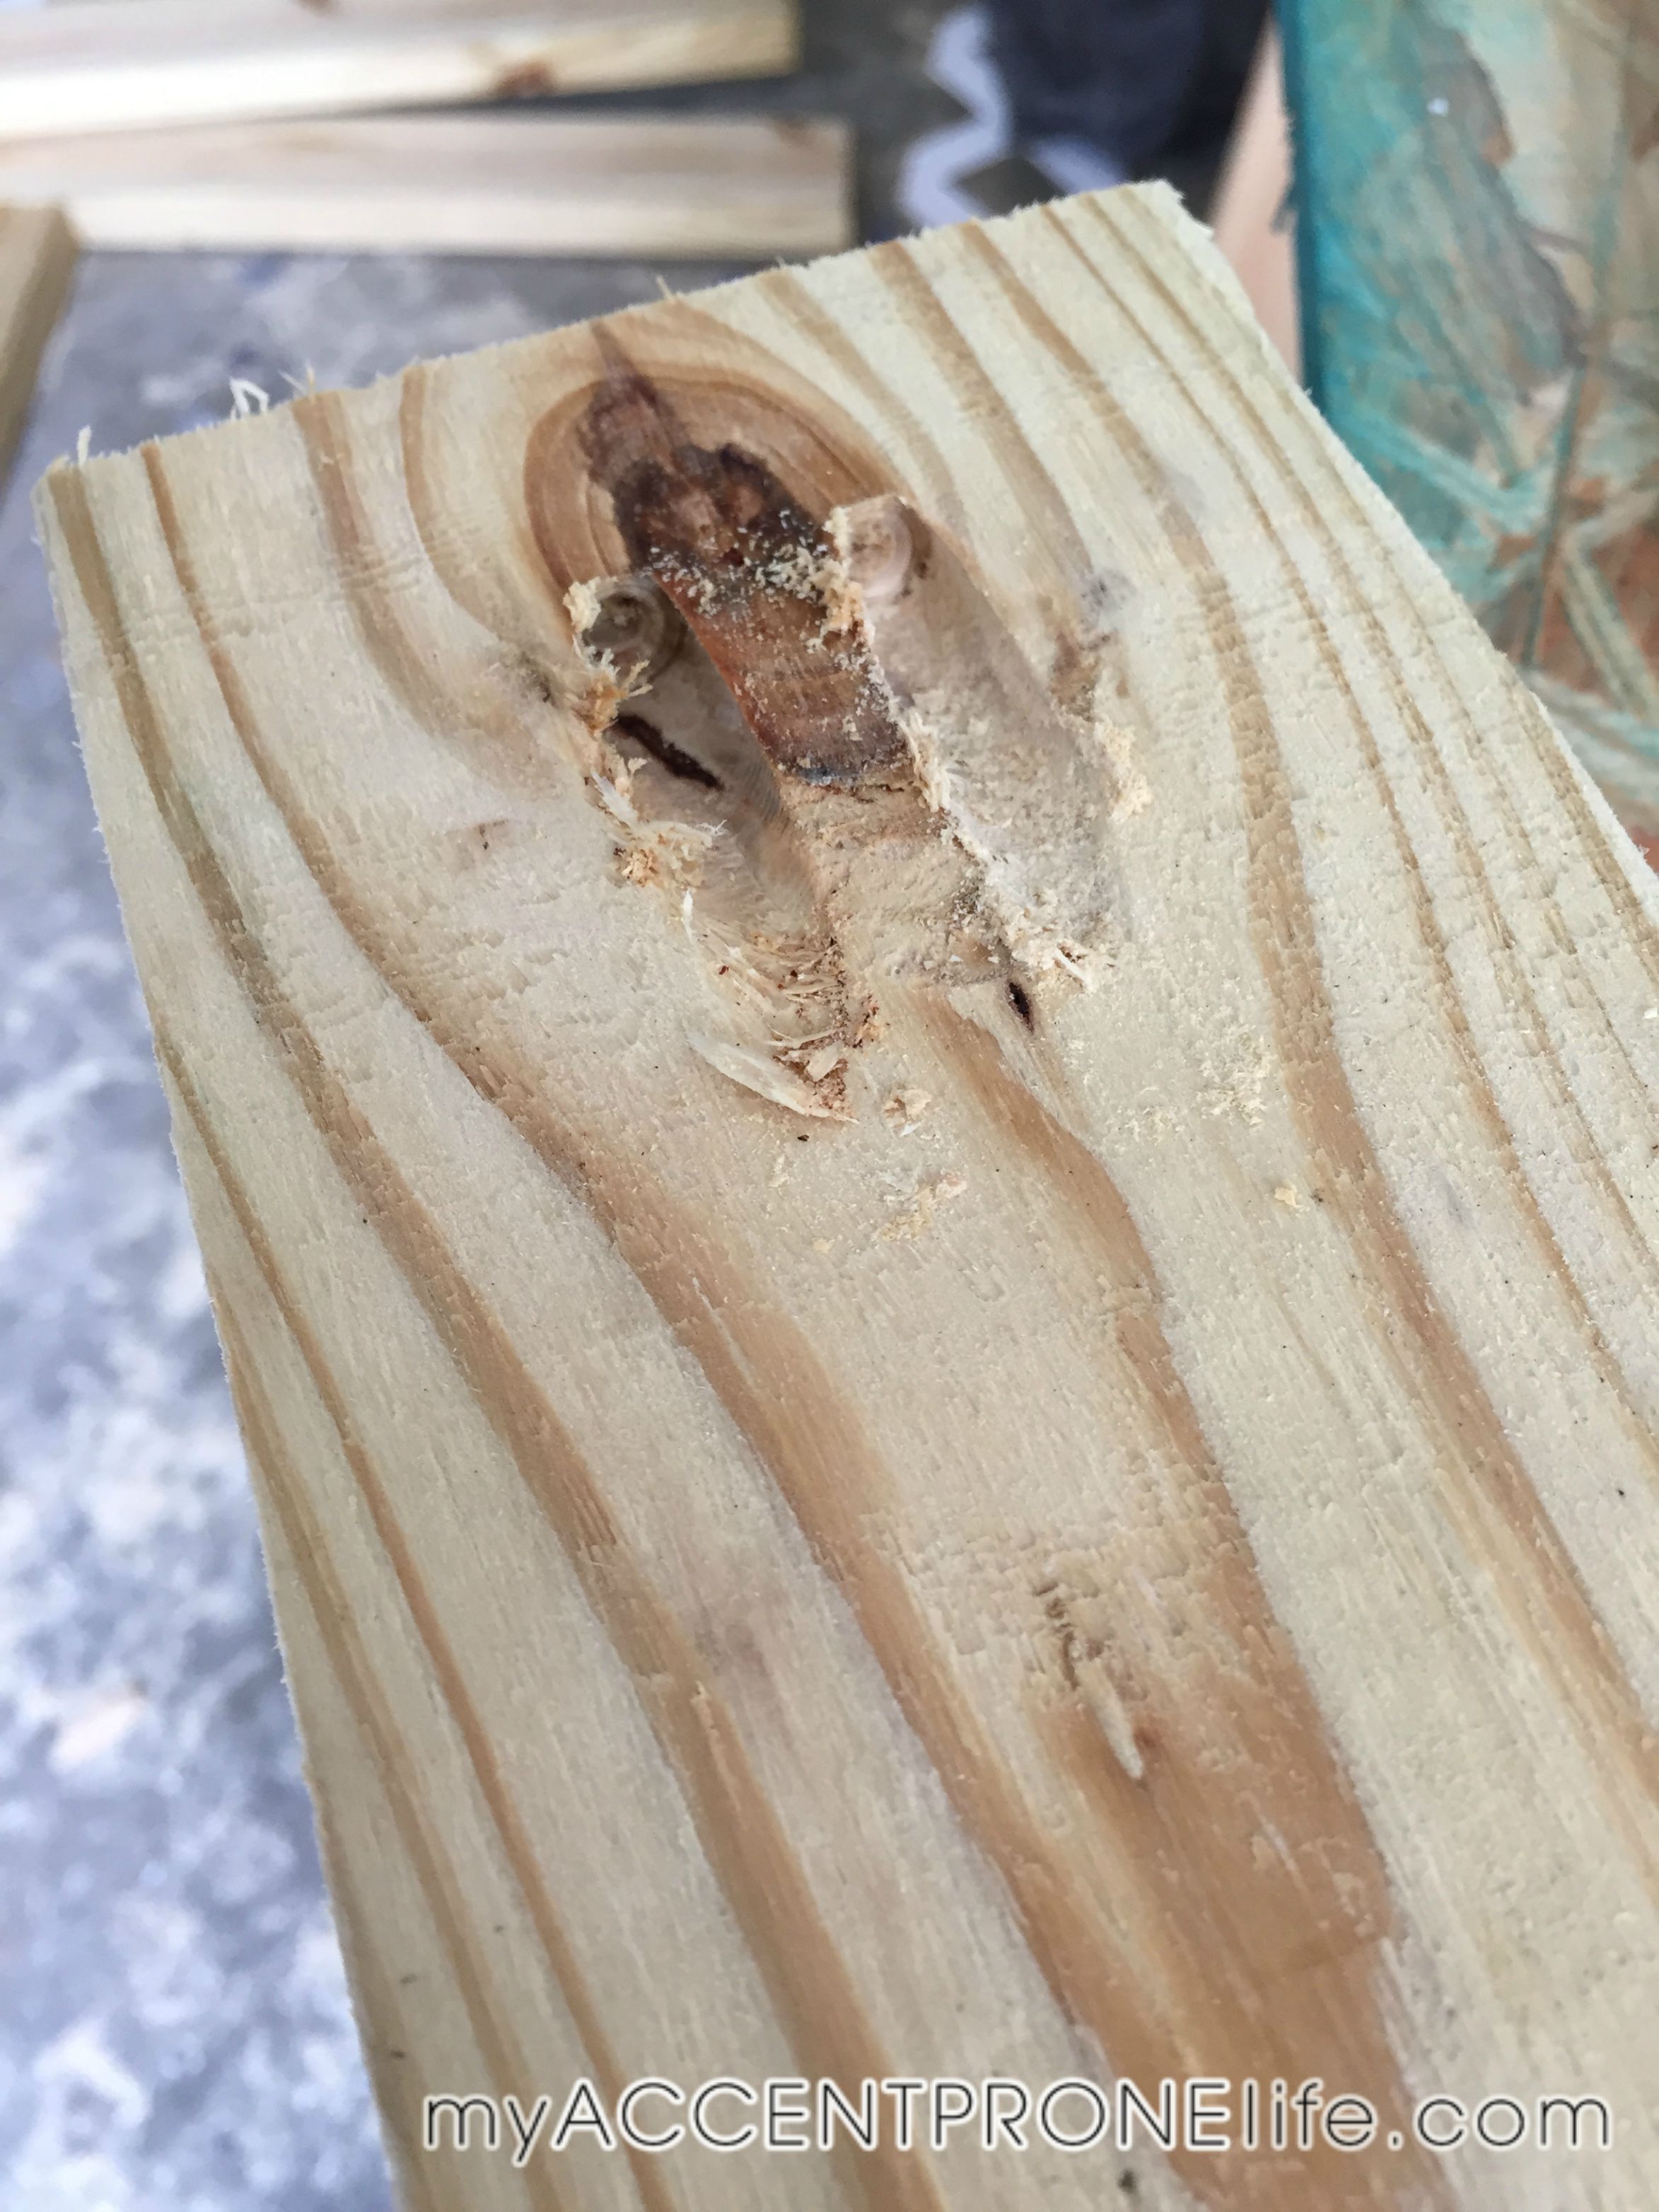
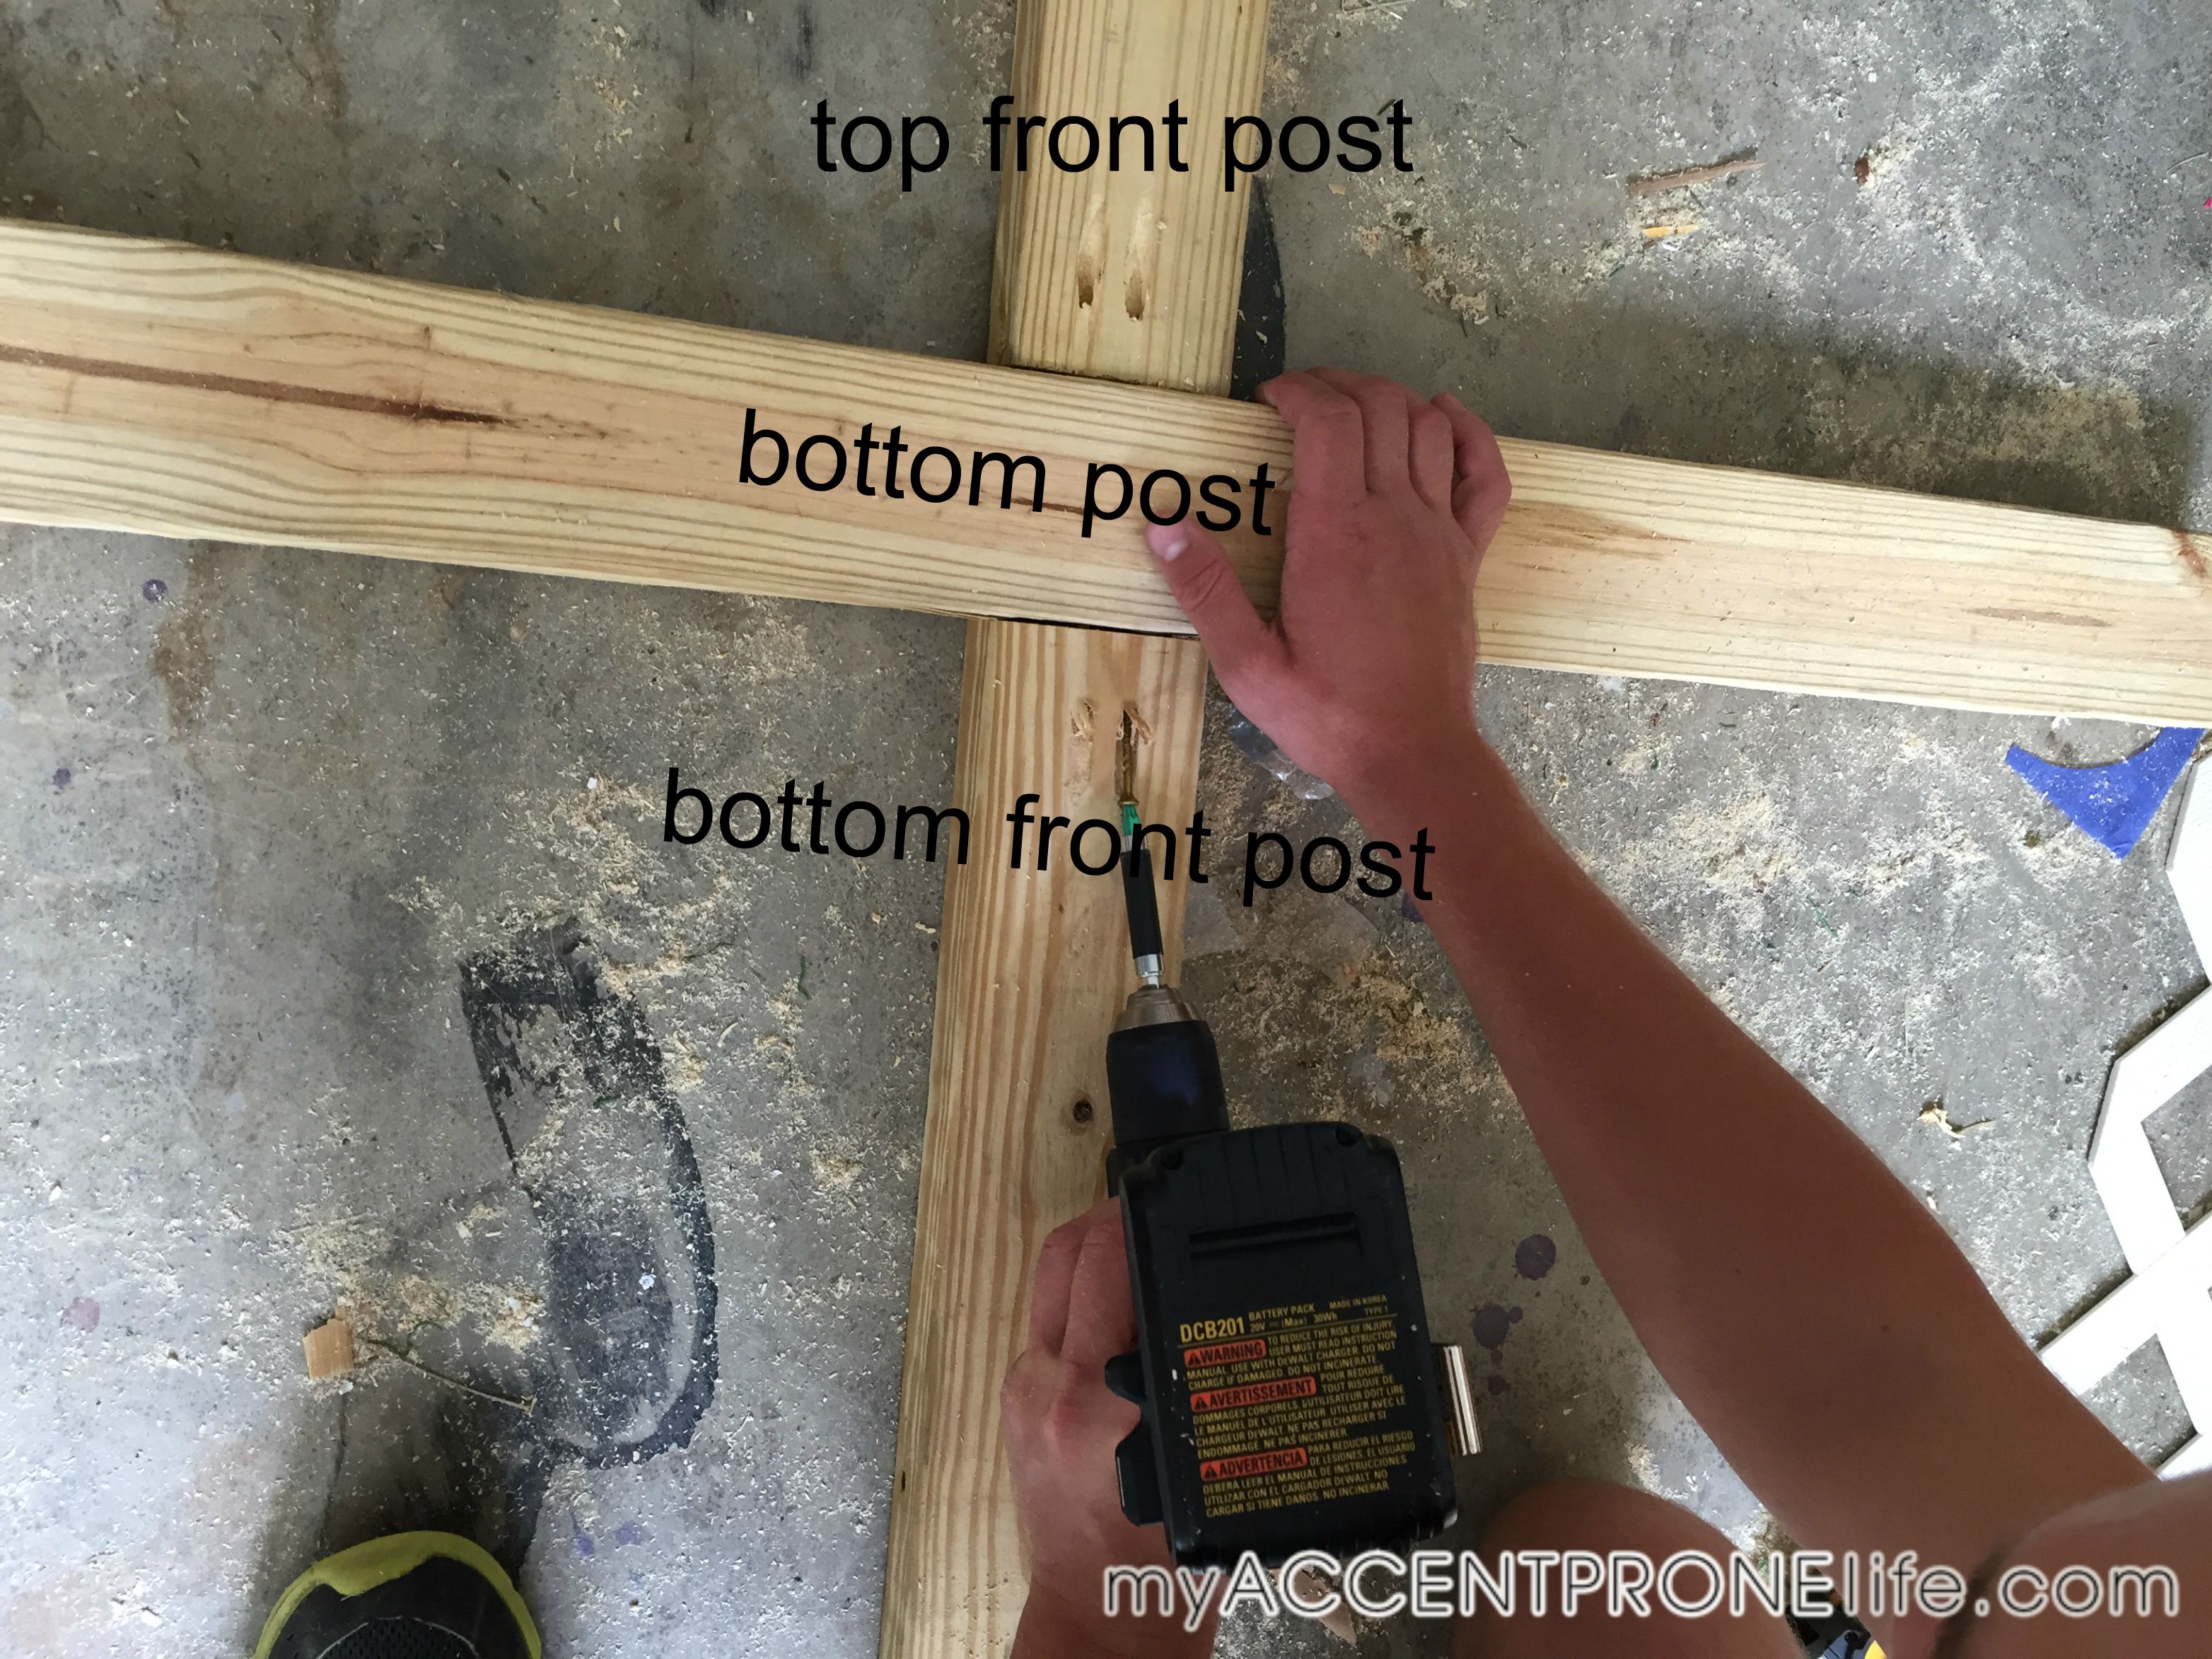
Step 8-  Now you are going to cut pocket holes using a pocket hole jig into the ends of the 27.5″ boards and the 60″ boards. Pocket holes are used to join boards without brackets.

pocketholejig


pocketholedrilling

pocketholes


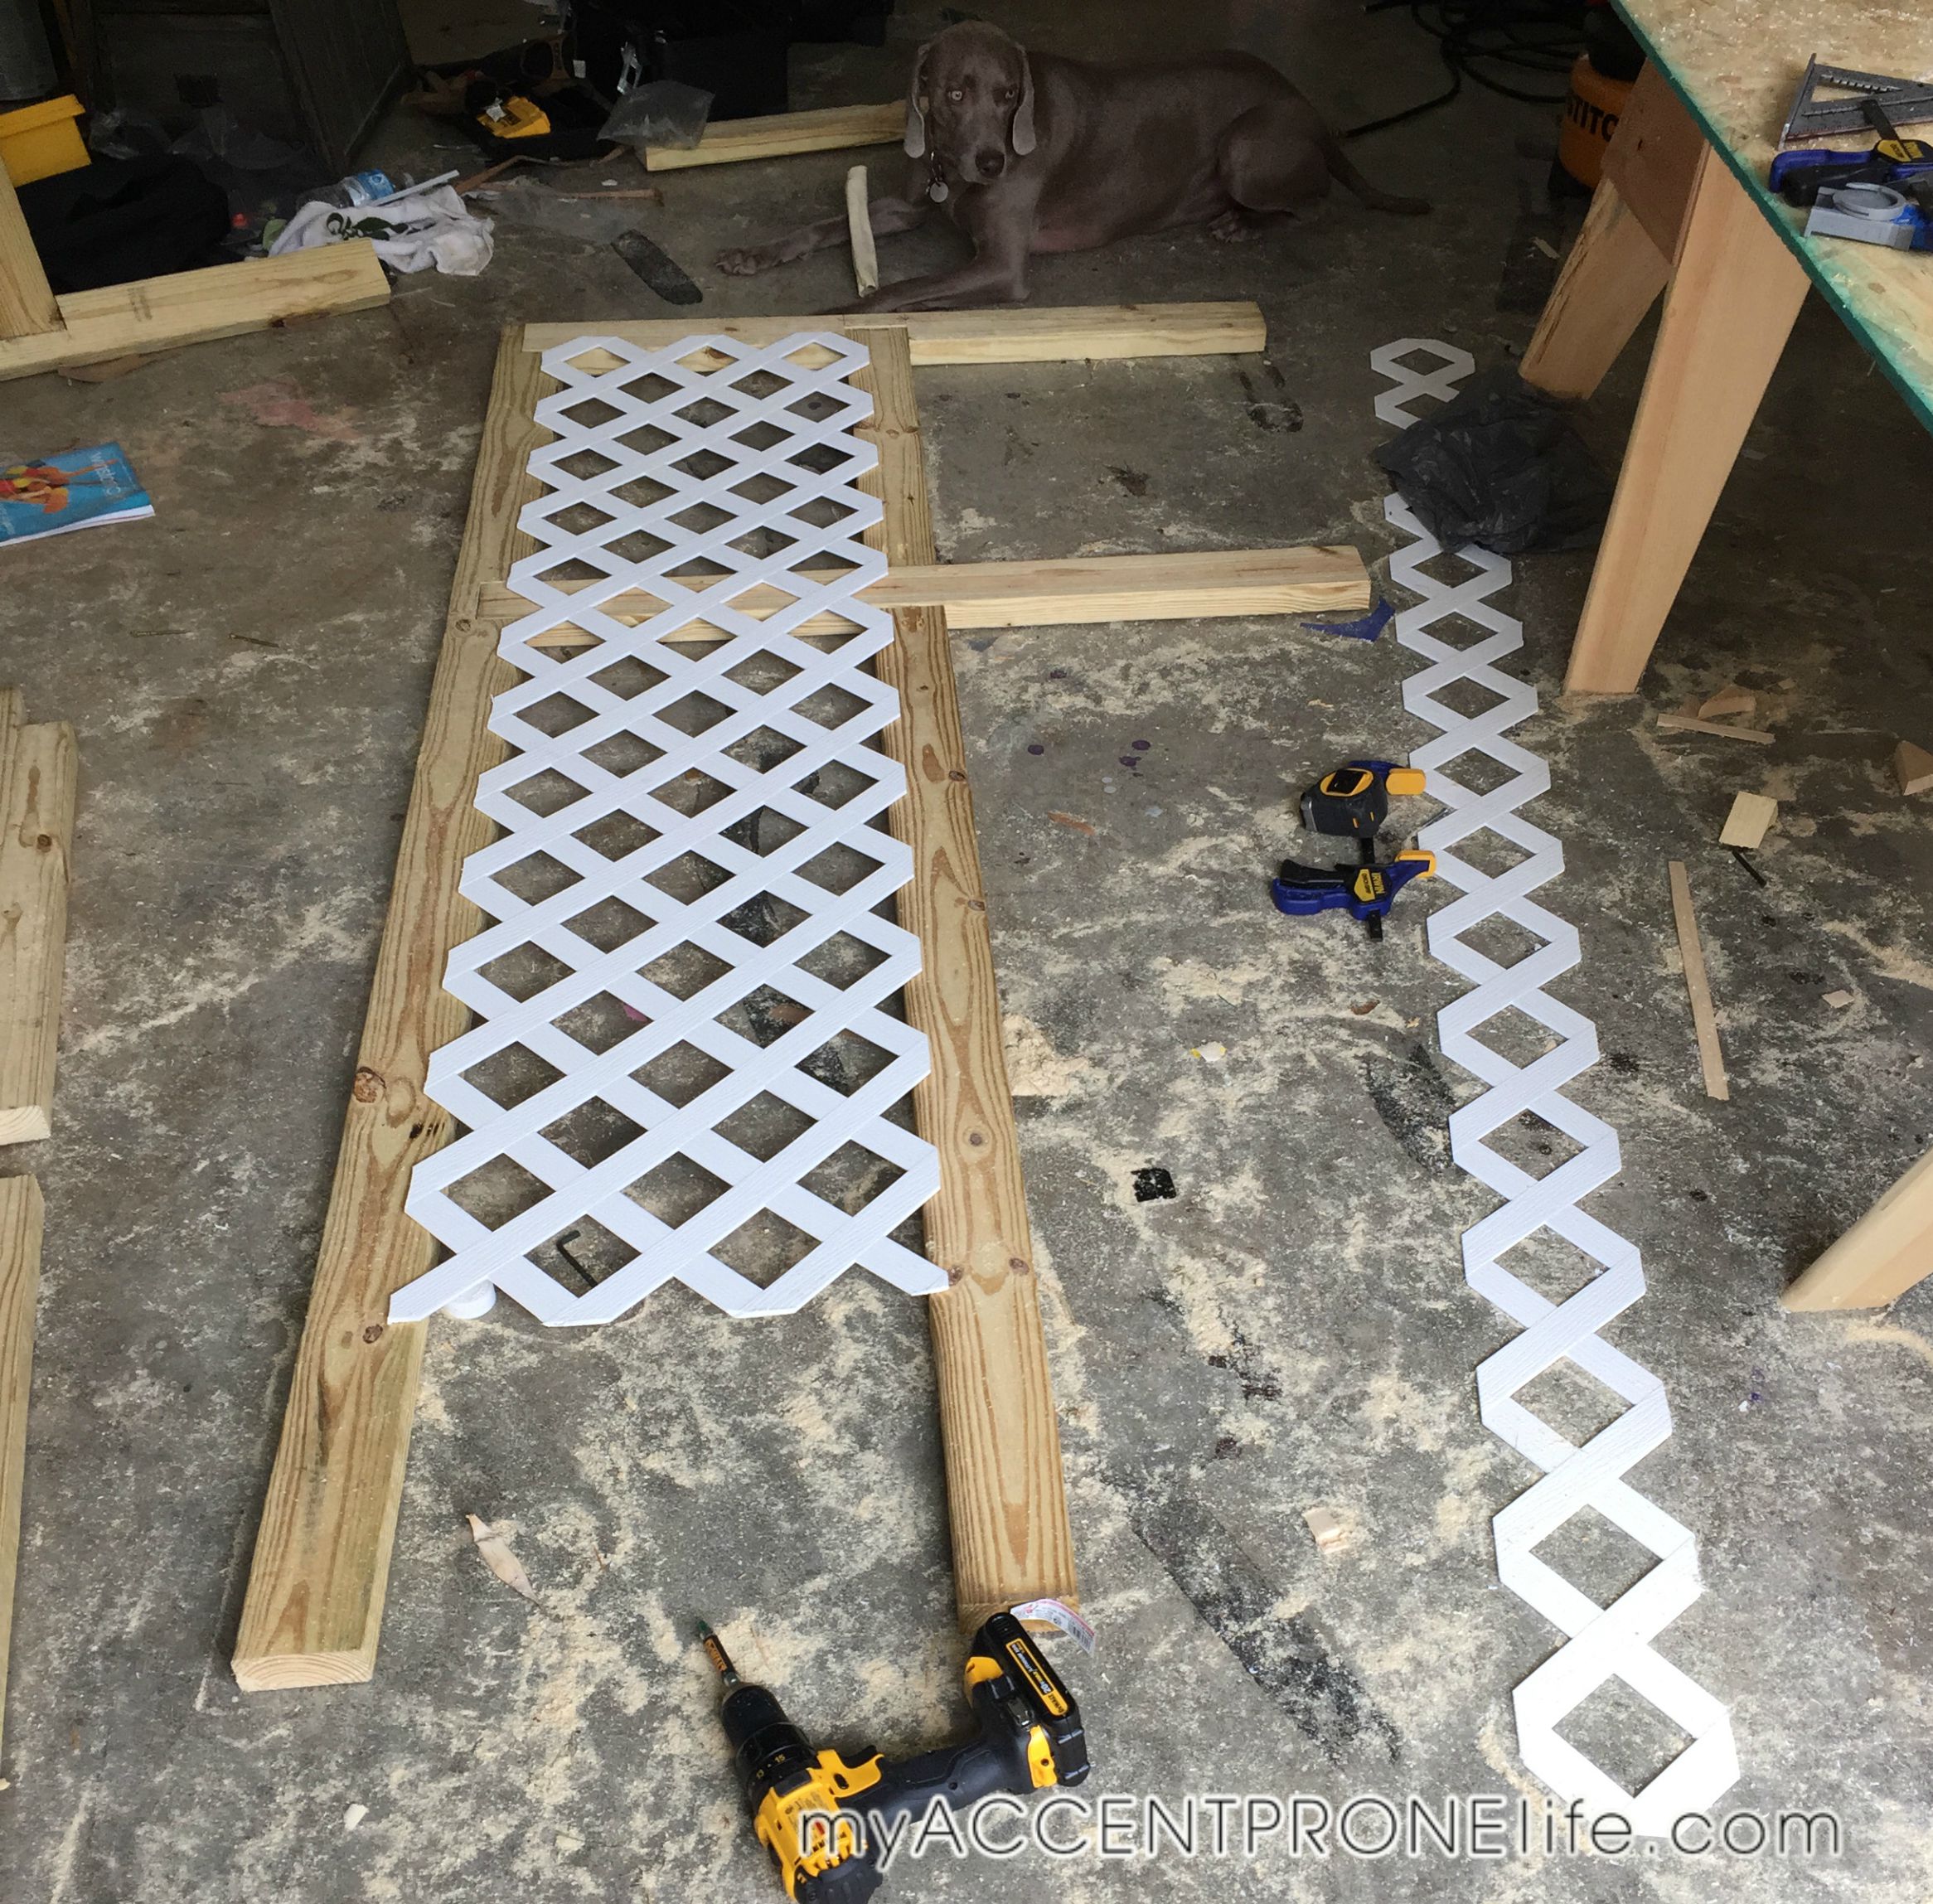
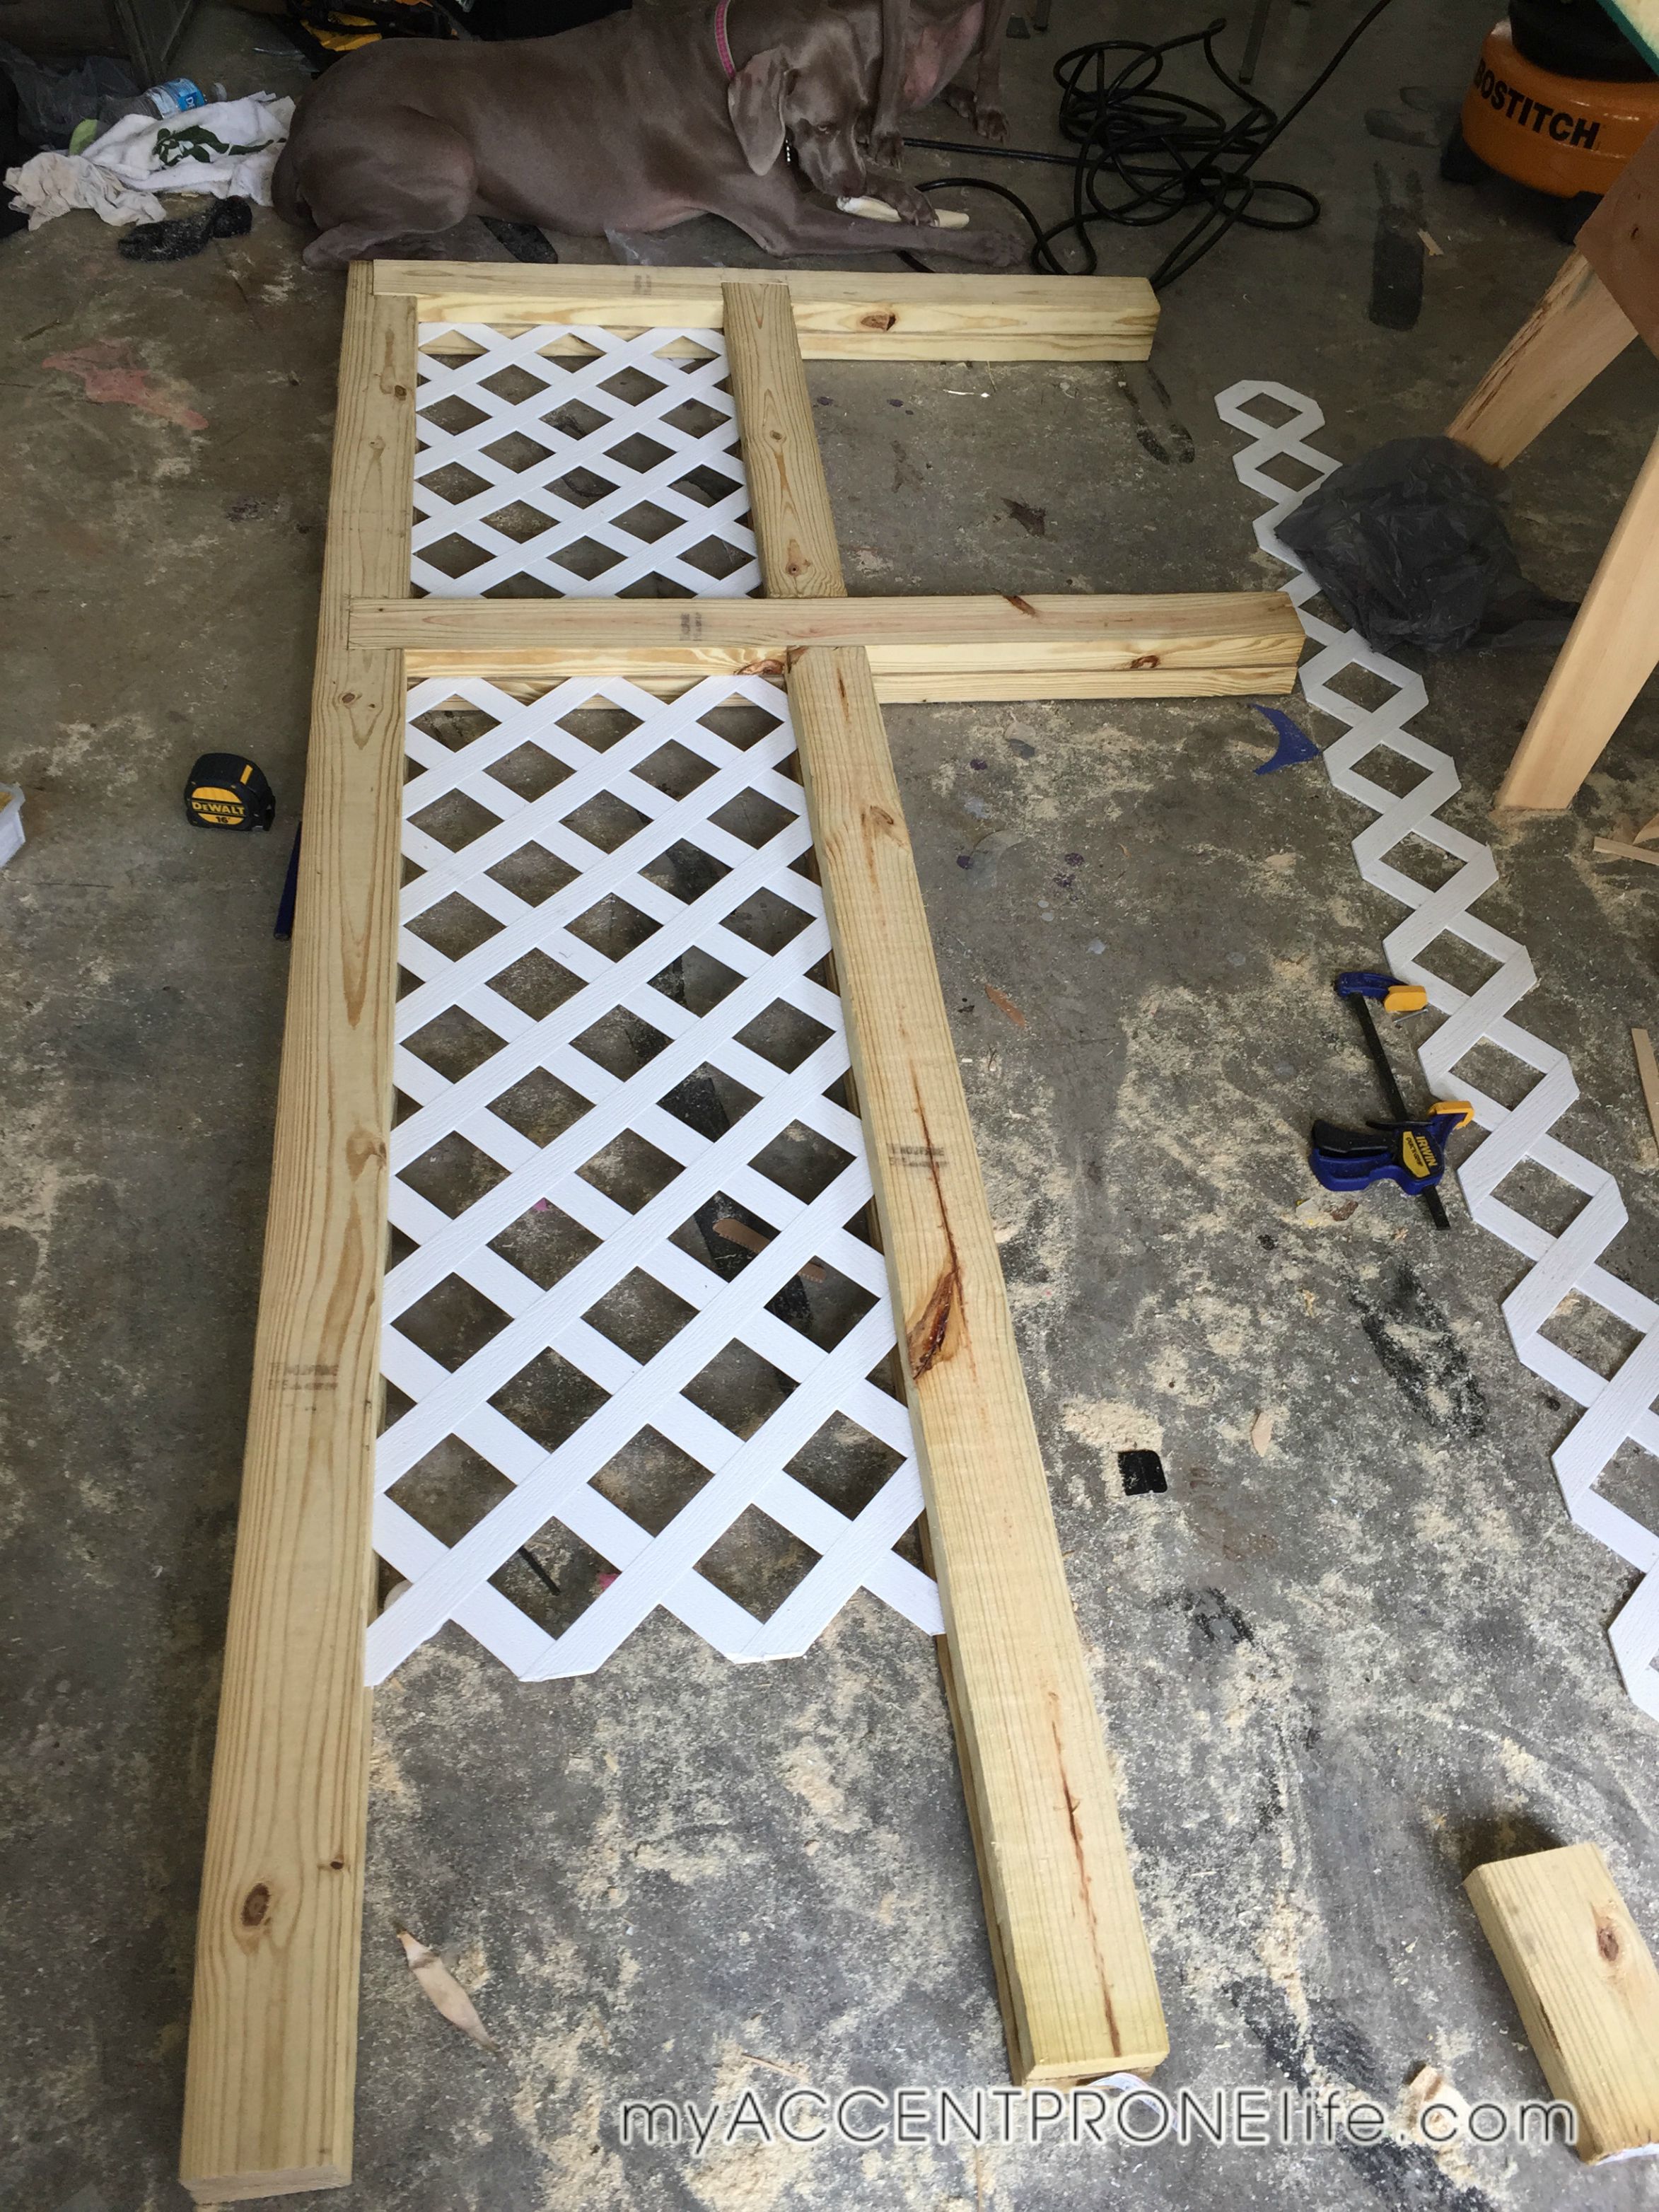
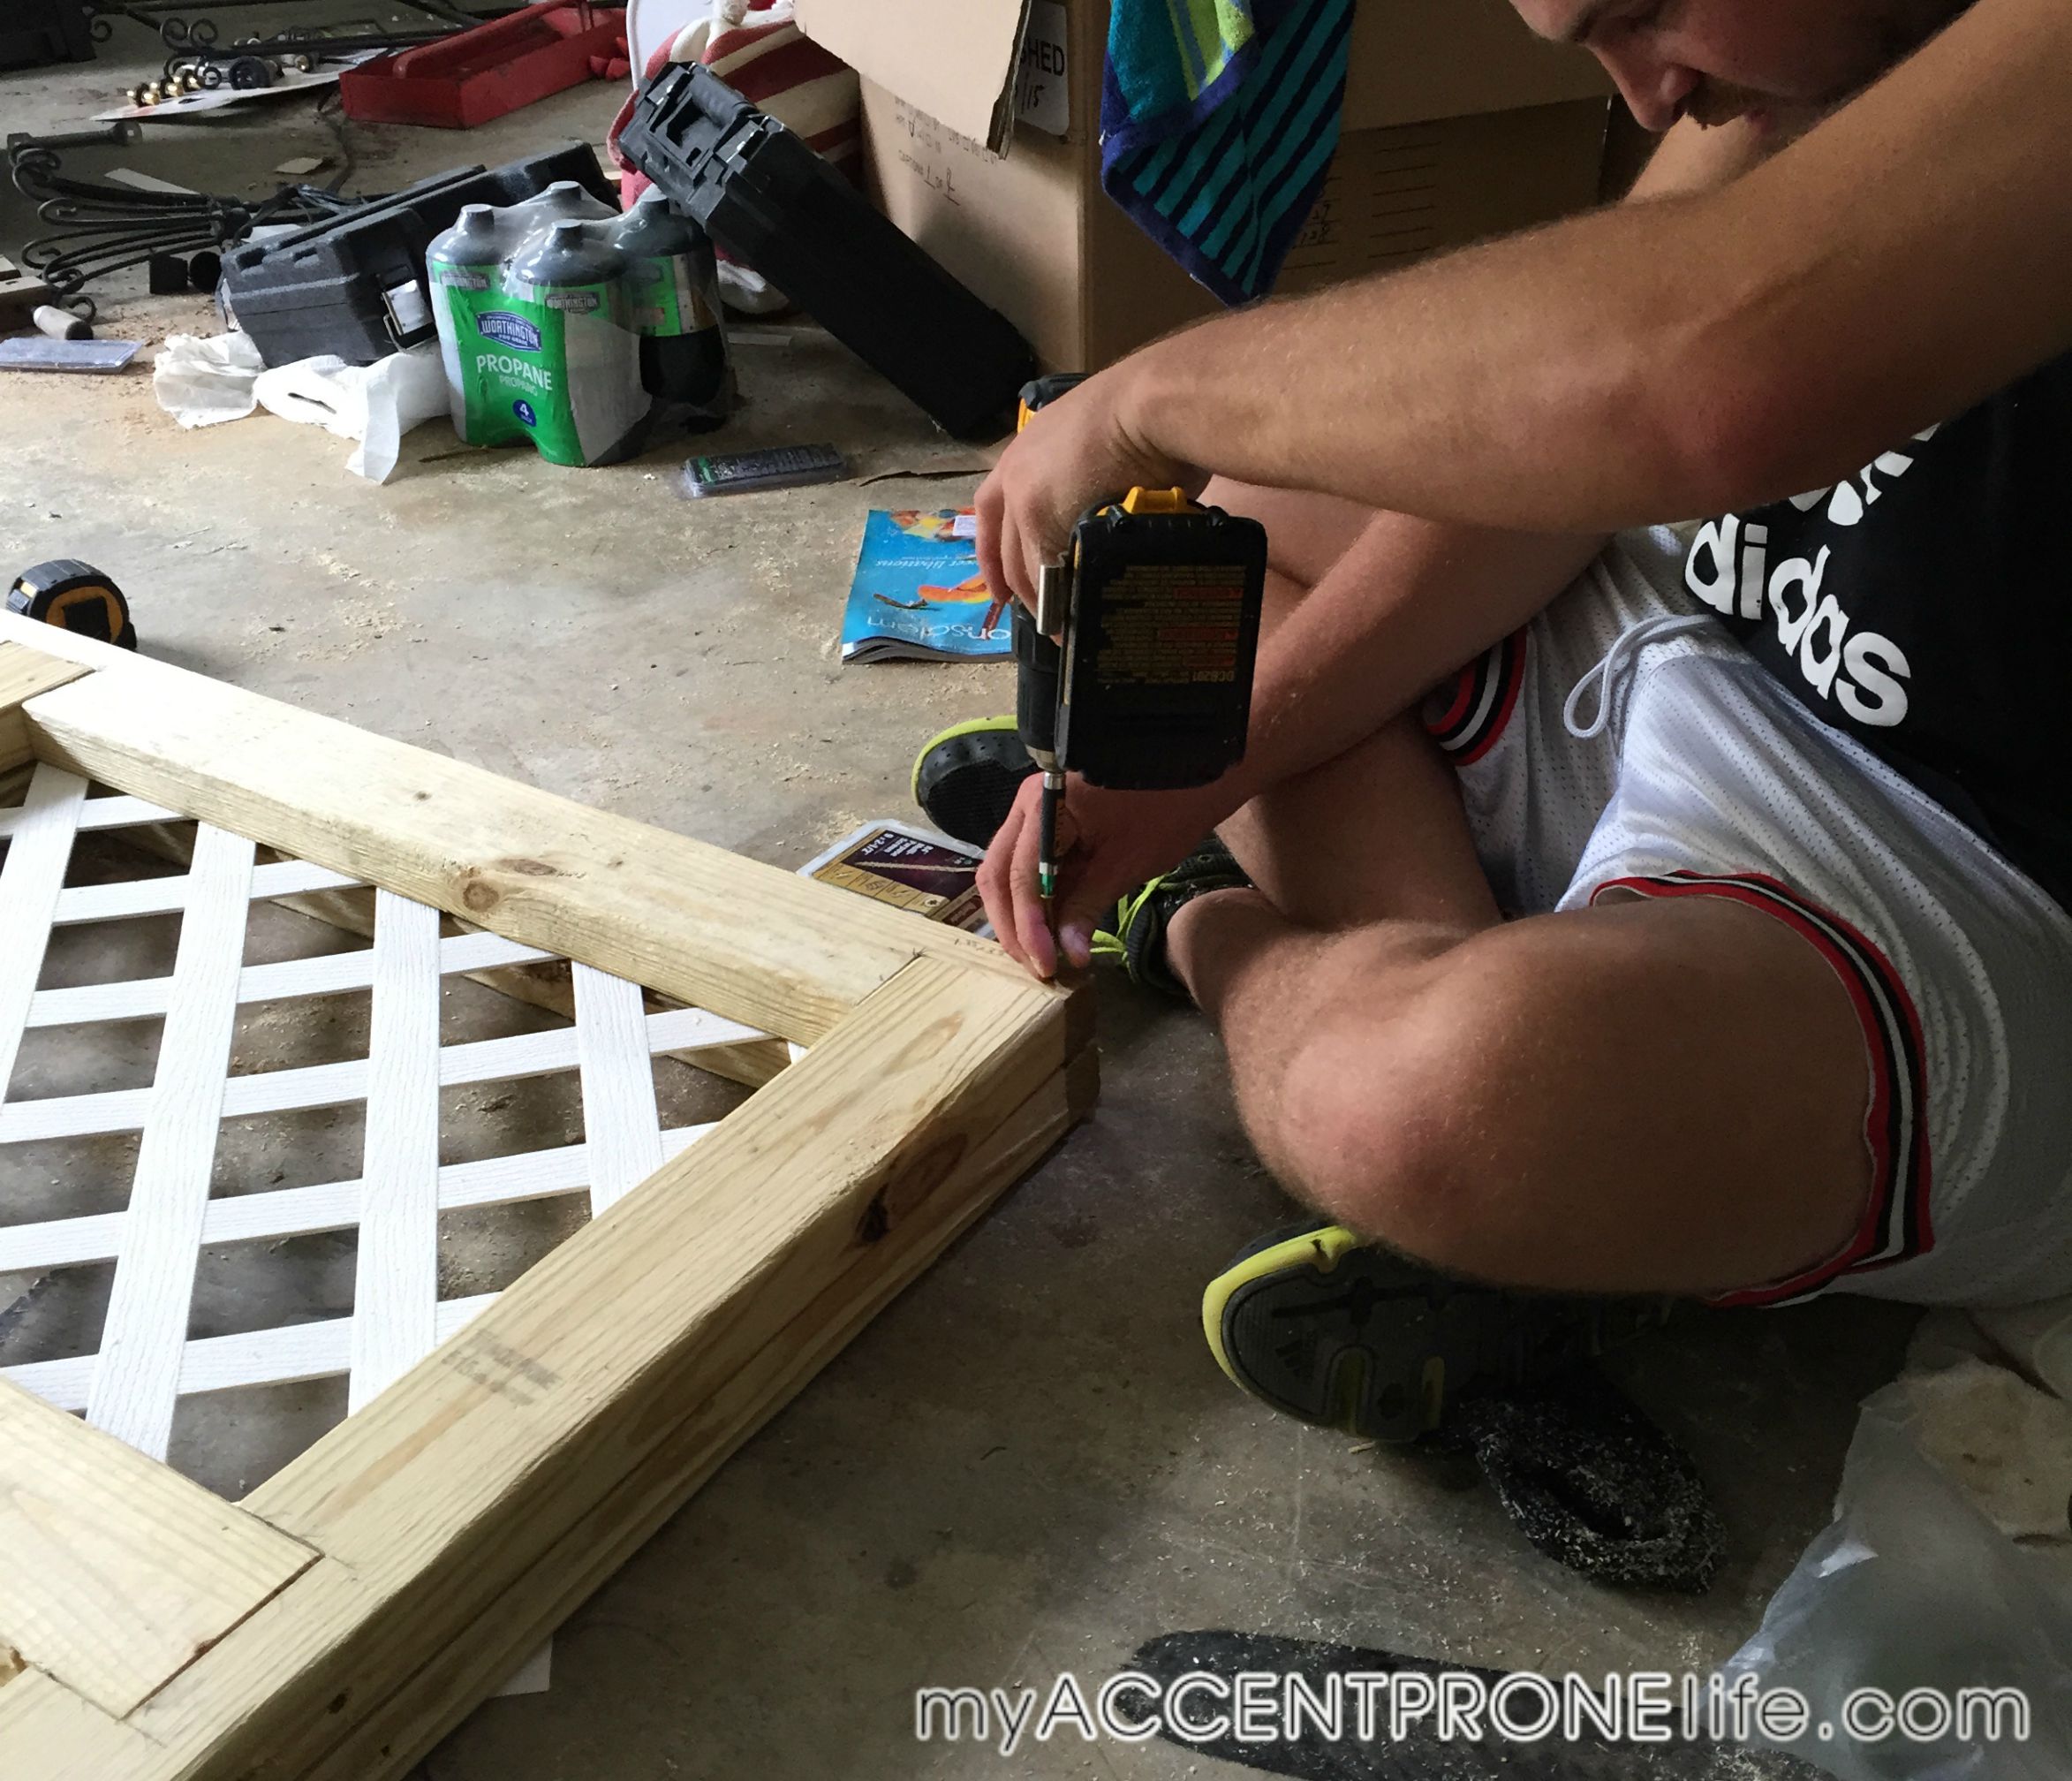
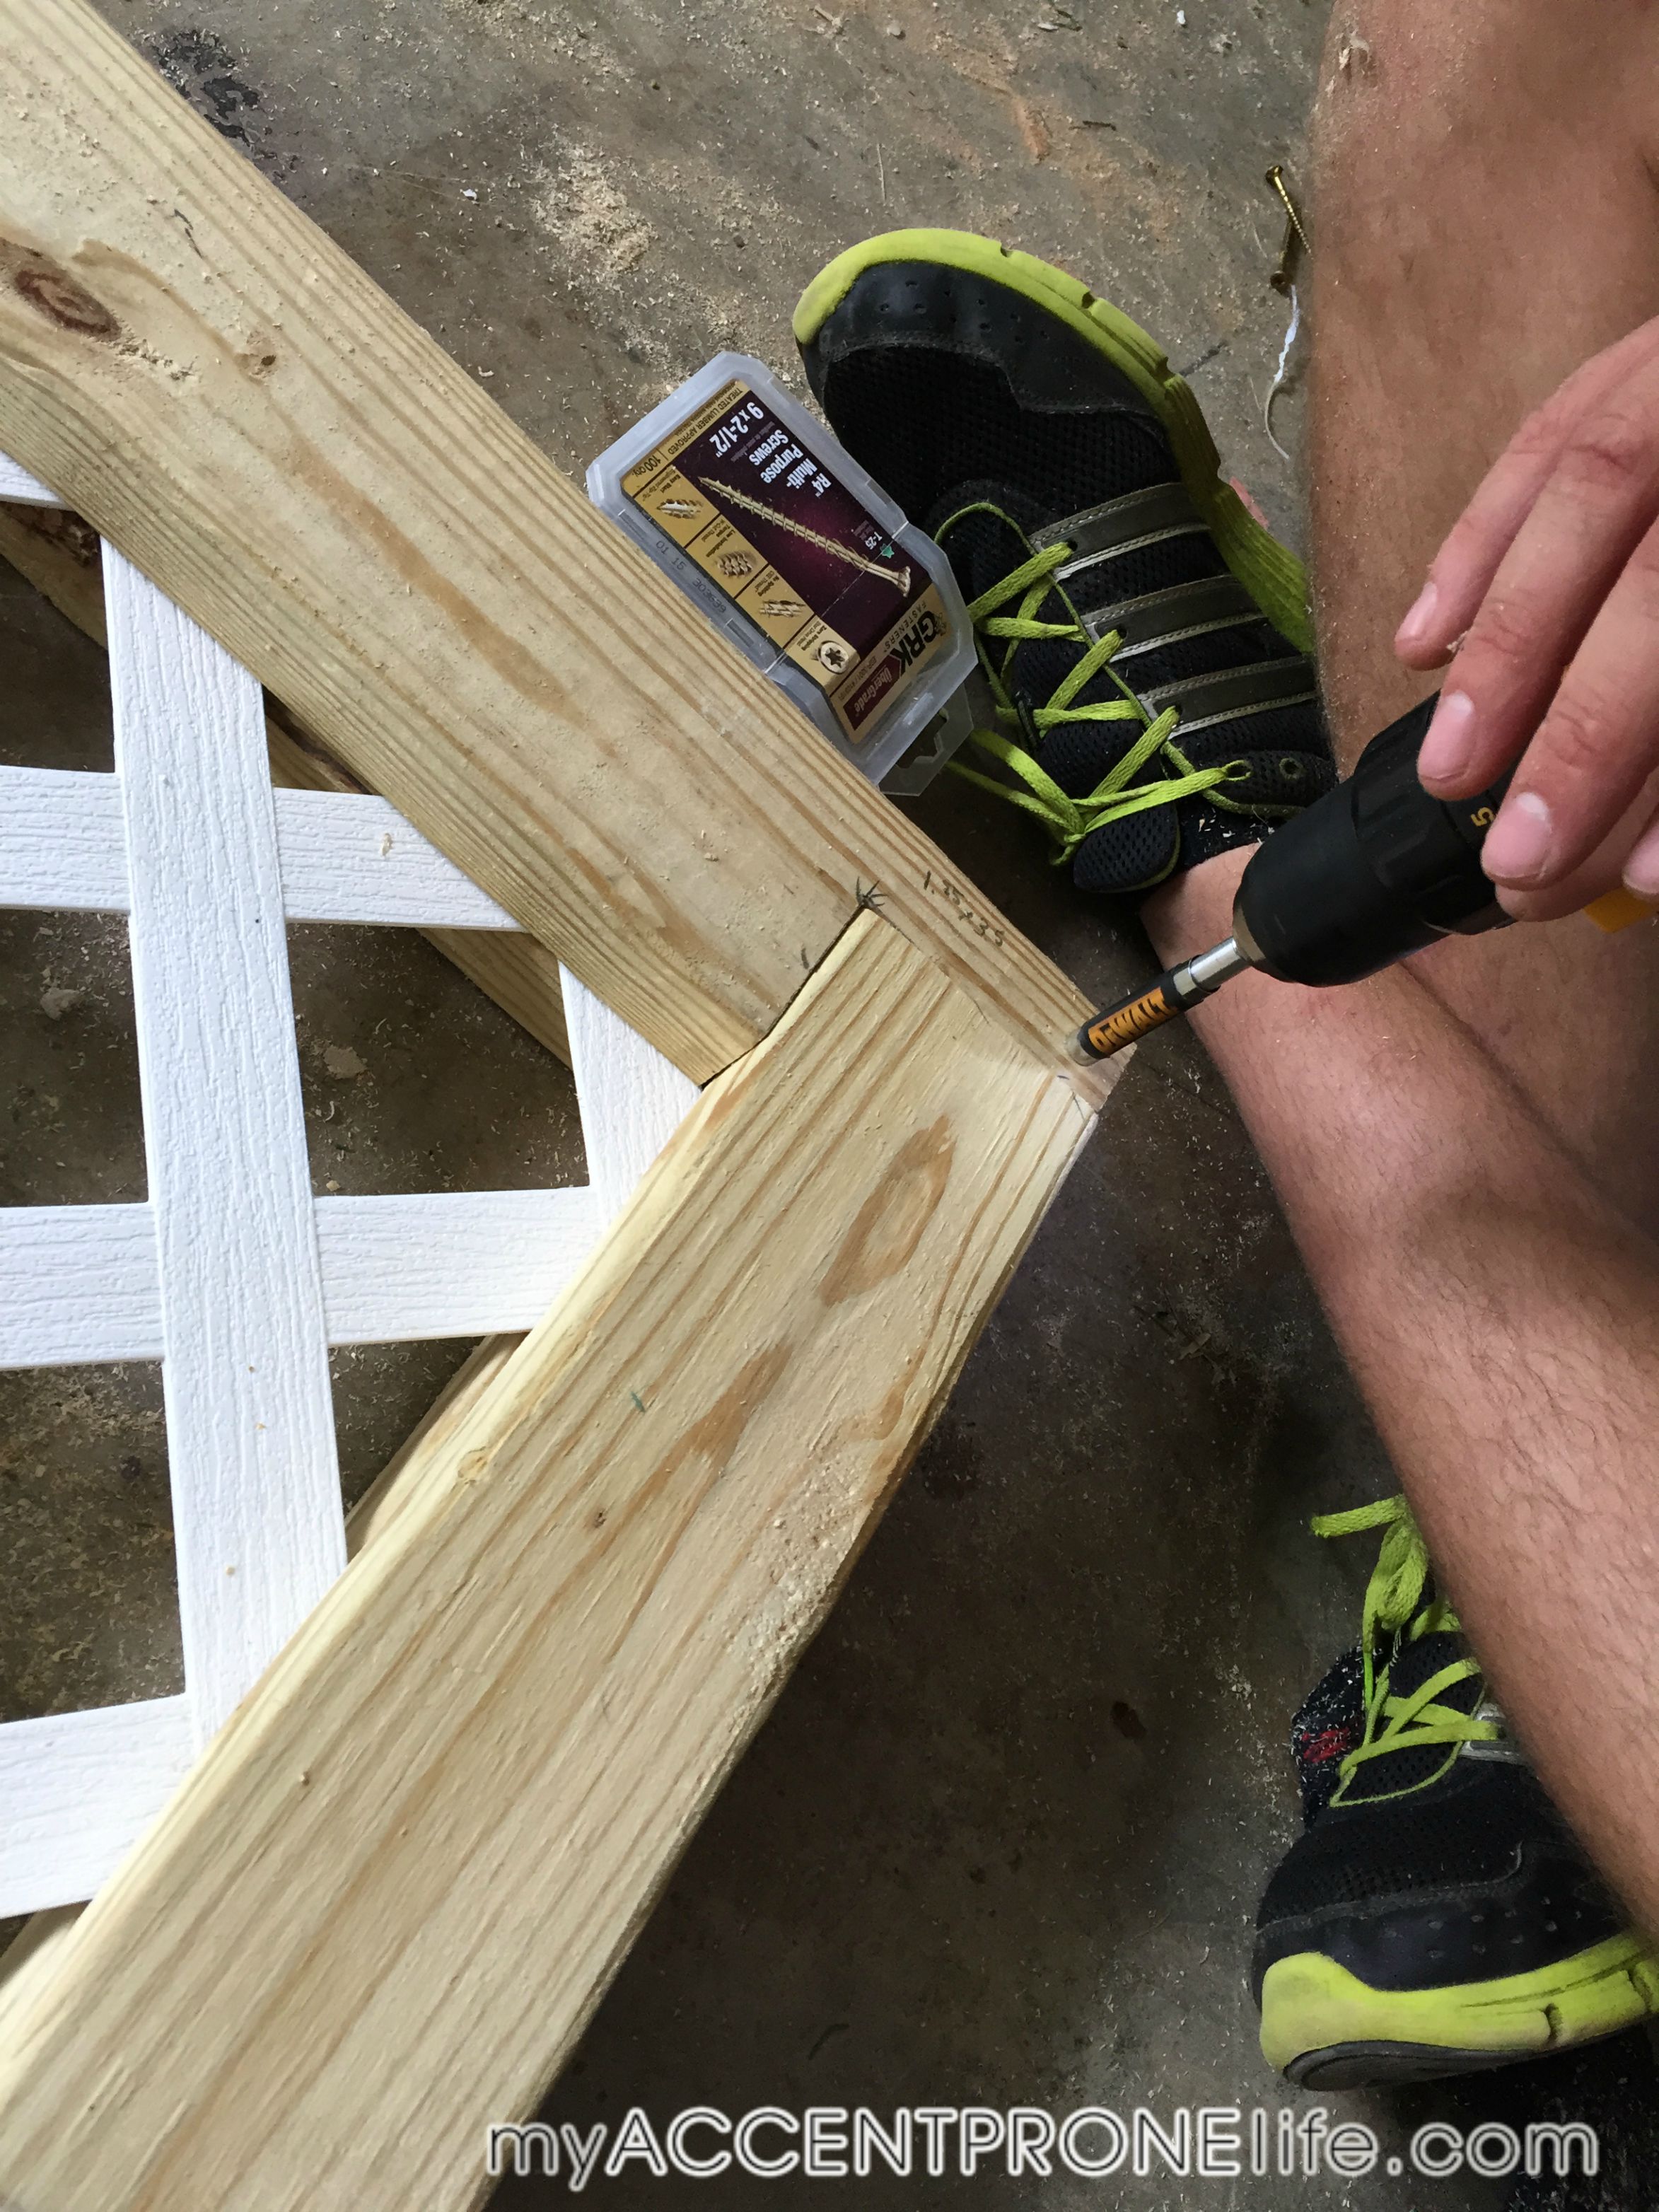
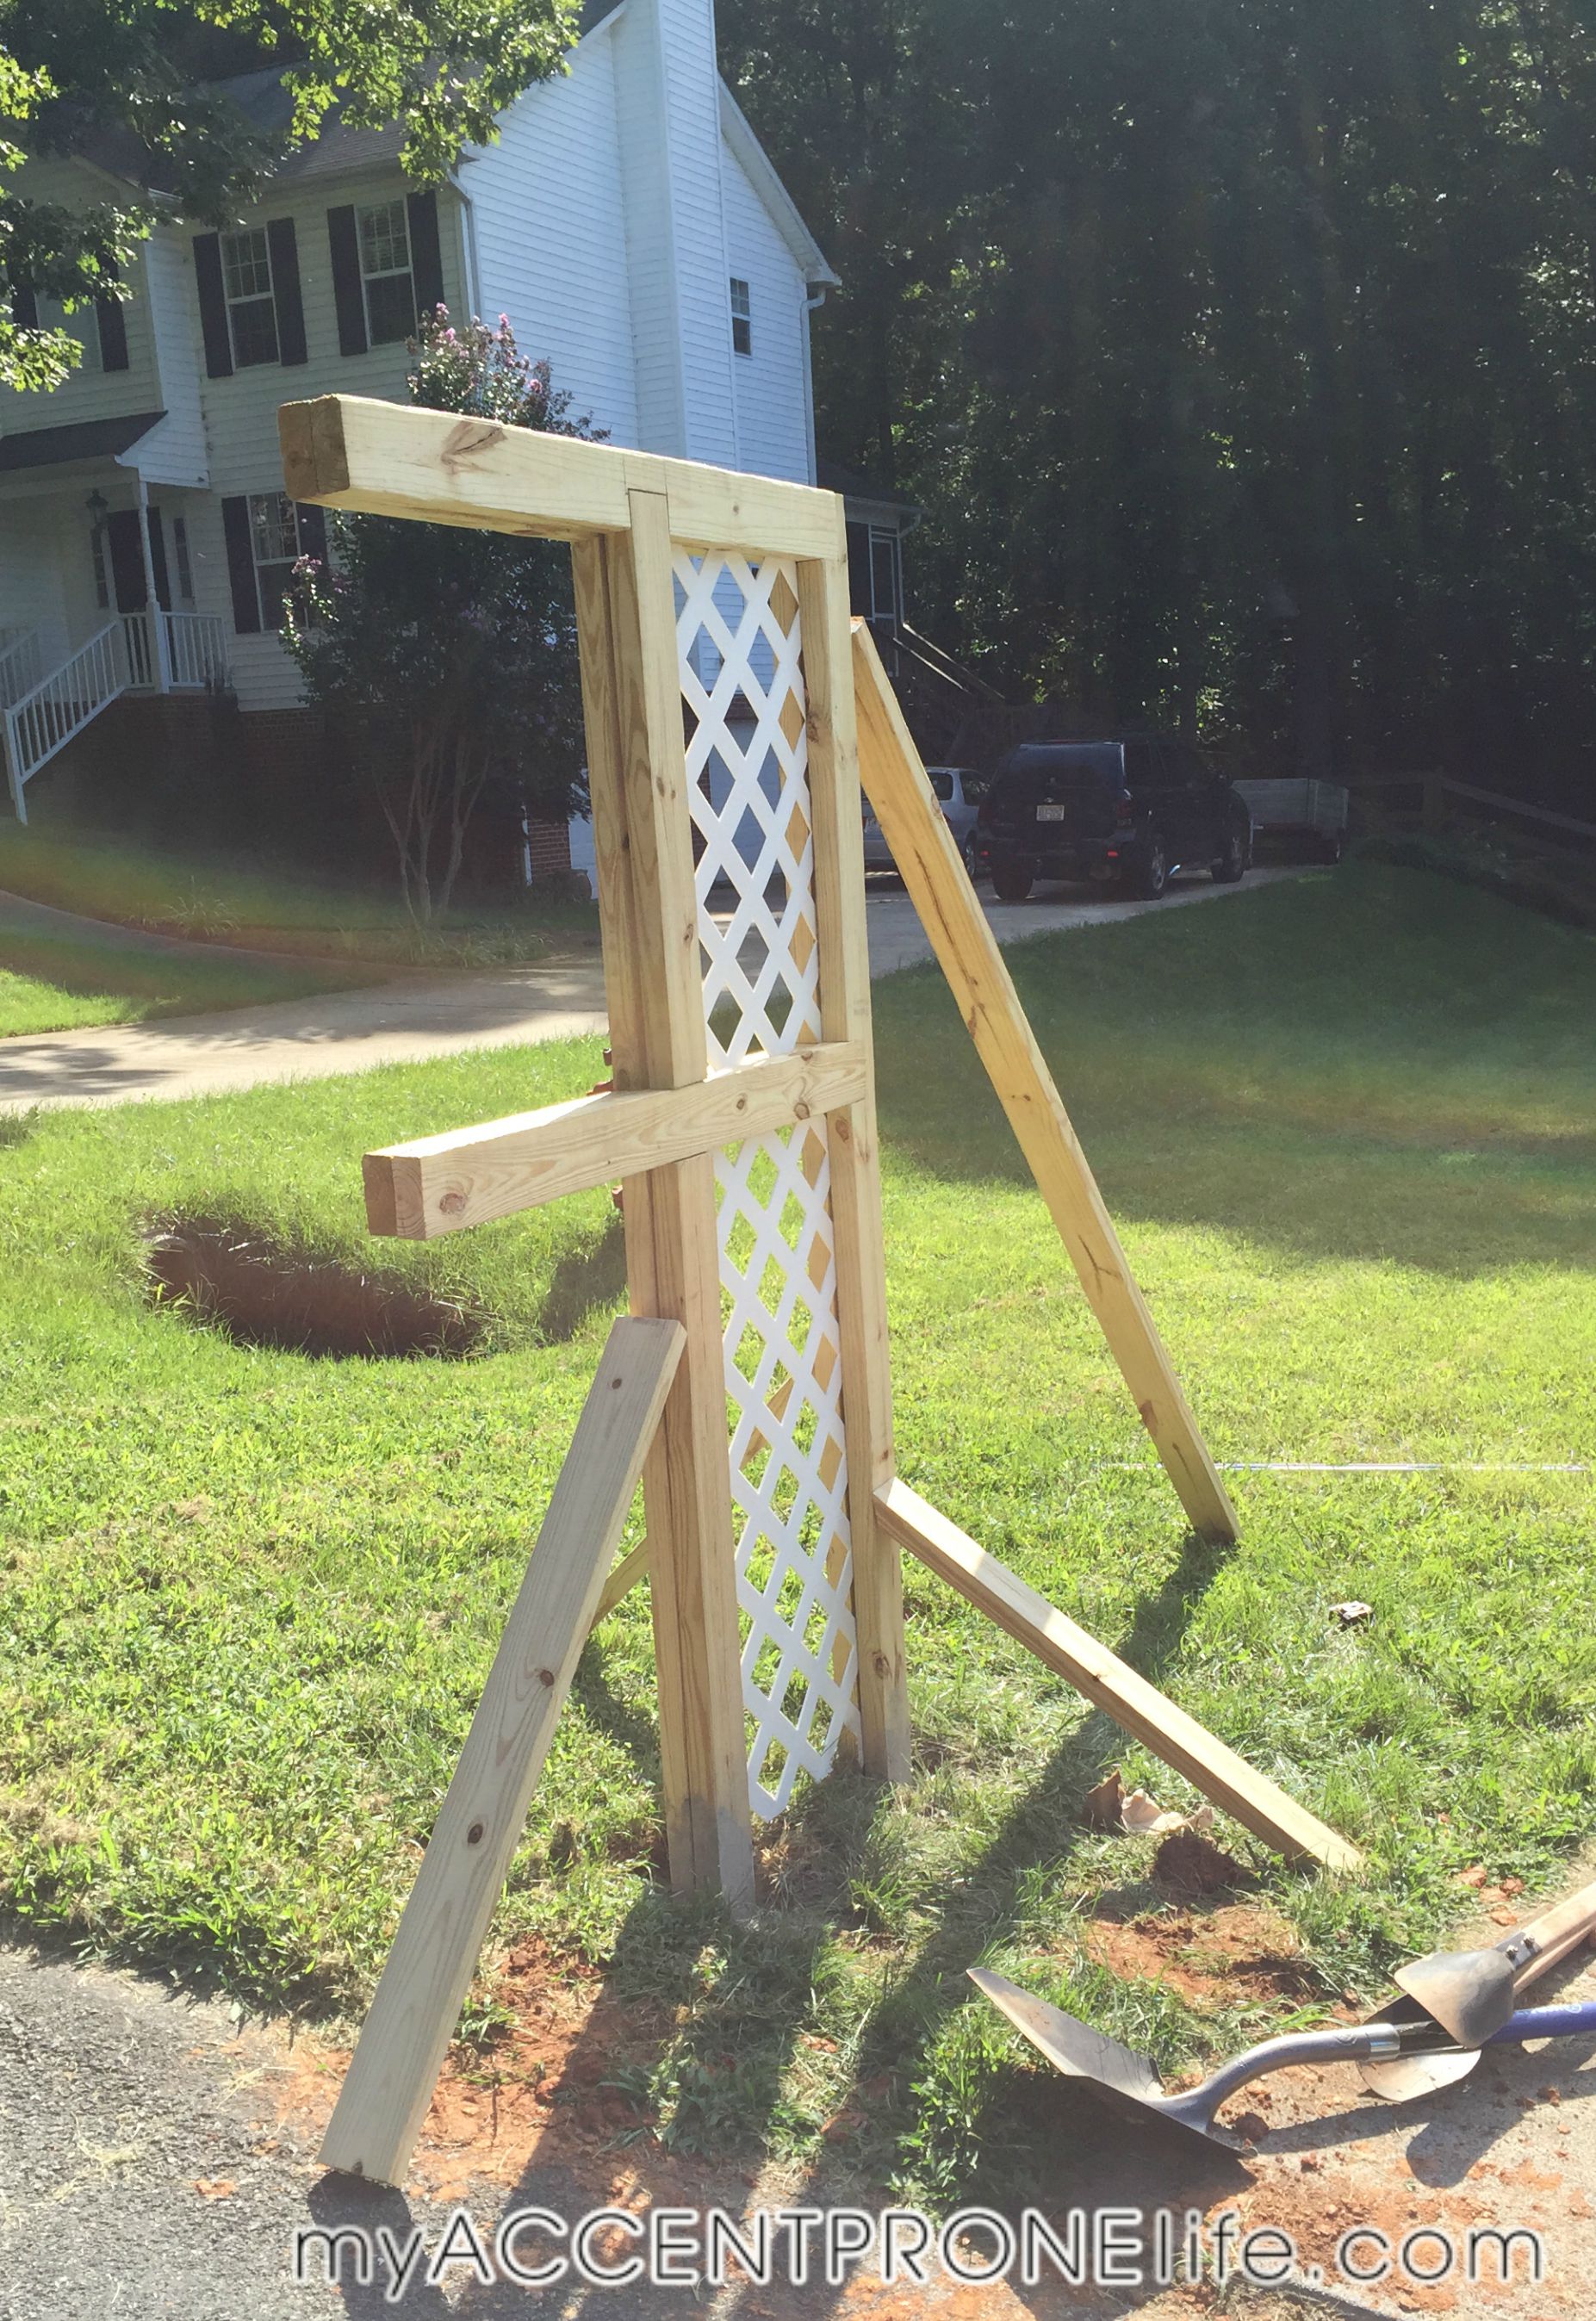
Step 9- Connect all the boards together with wood screws, making sure to put them where the notches connect. You will have 2 sets of the connected boards and the lattice will lay in the middle of the frames.

boards connecting

postsconnecting

Step 10- Cut the lattice to fit in between the frames. It was 24″ wide and we cut it down to 18″ wide, and it was 8ft high and we cut it down to 6 ft high. Secure it with brad nails.

latticeconnectedtoboards

Step 11- Lay the other frame on top of the first frame with the connected lattice. Connect the 2 with screws in the corner and a few along the side.

frames

connectframesscrews

connectcorner

screws

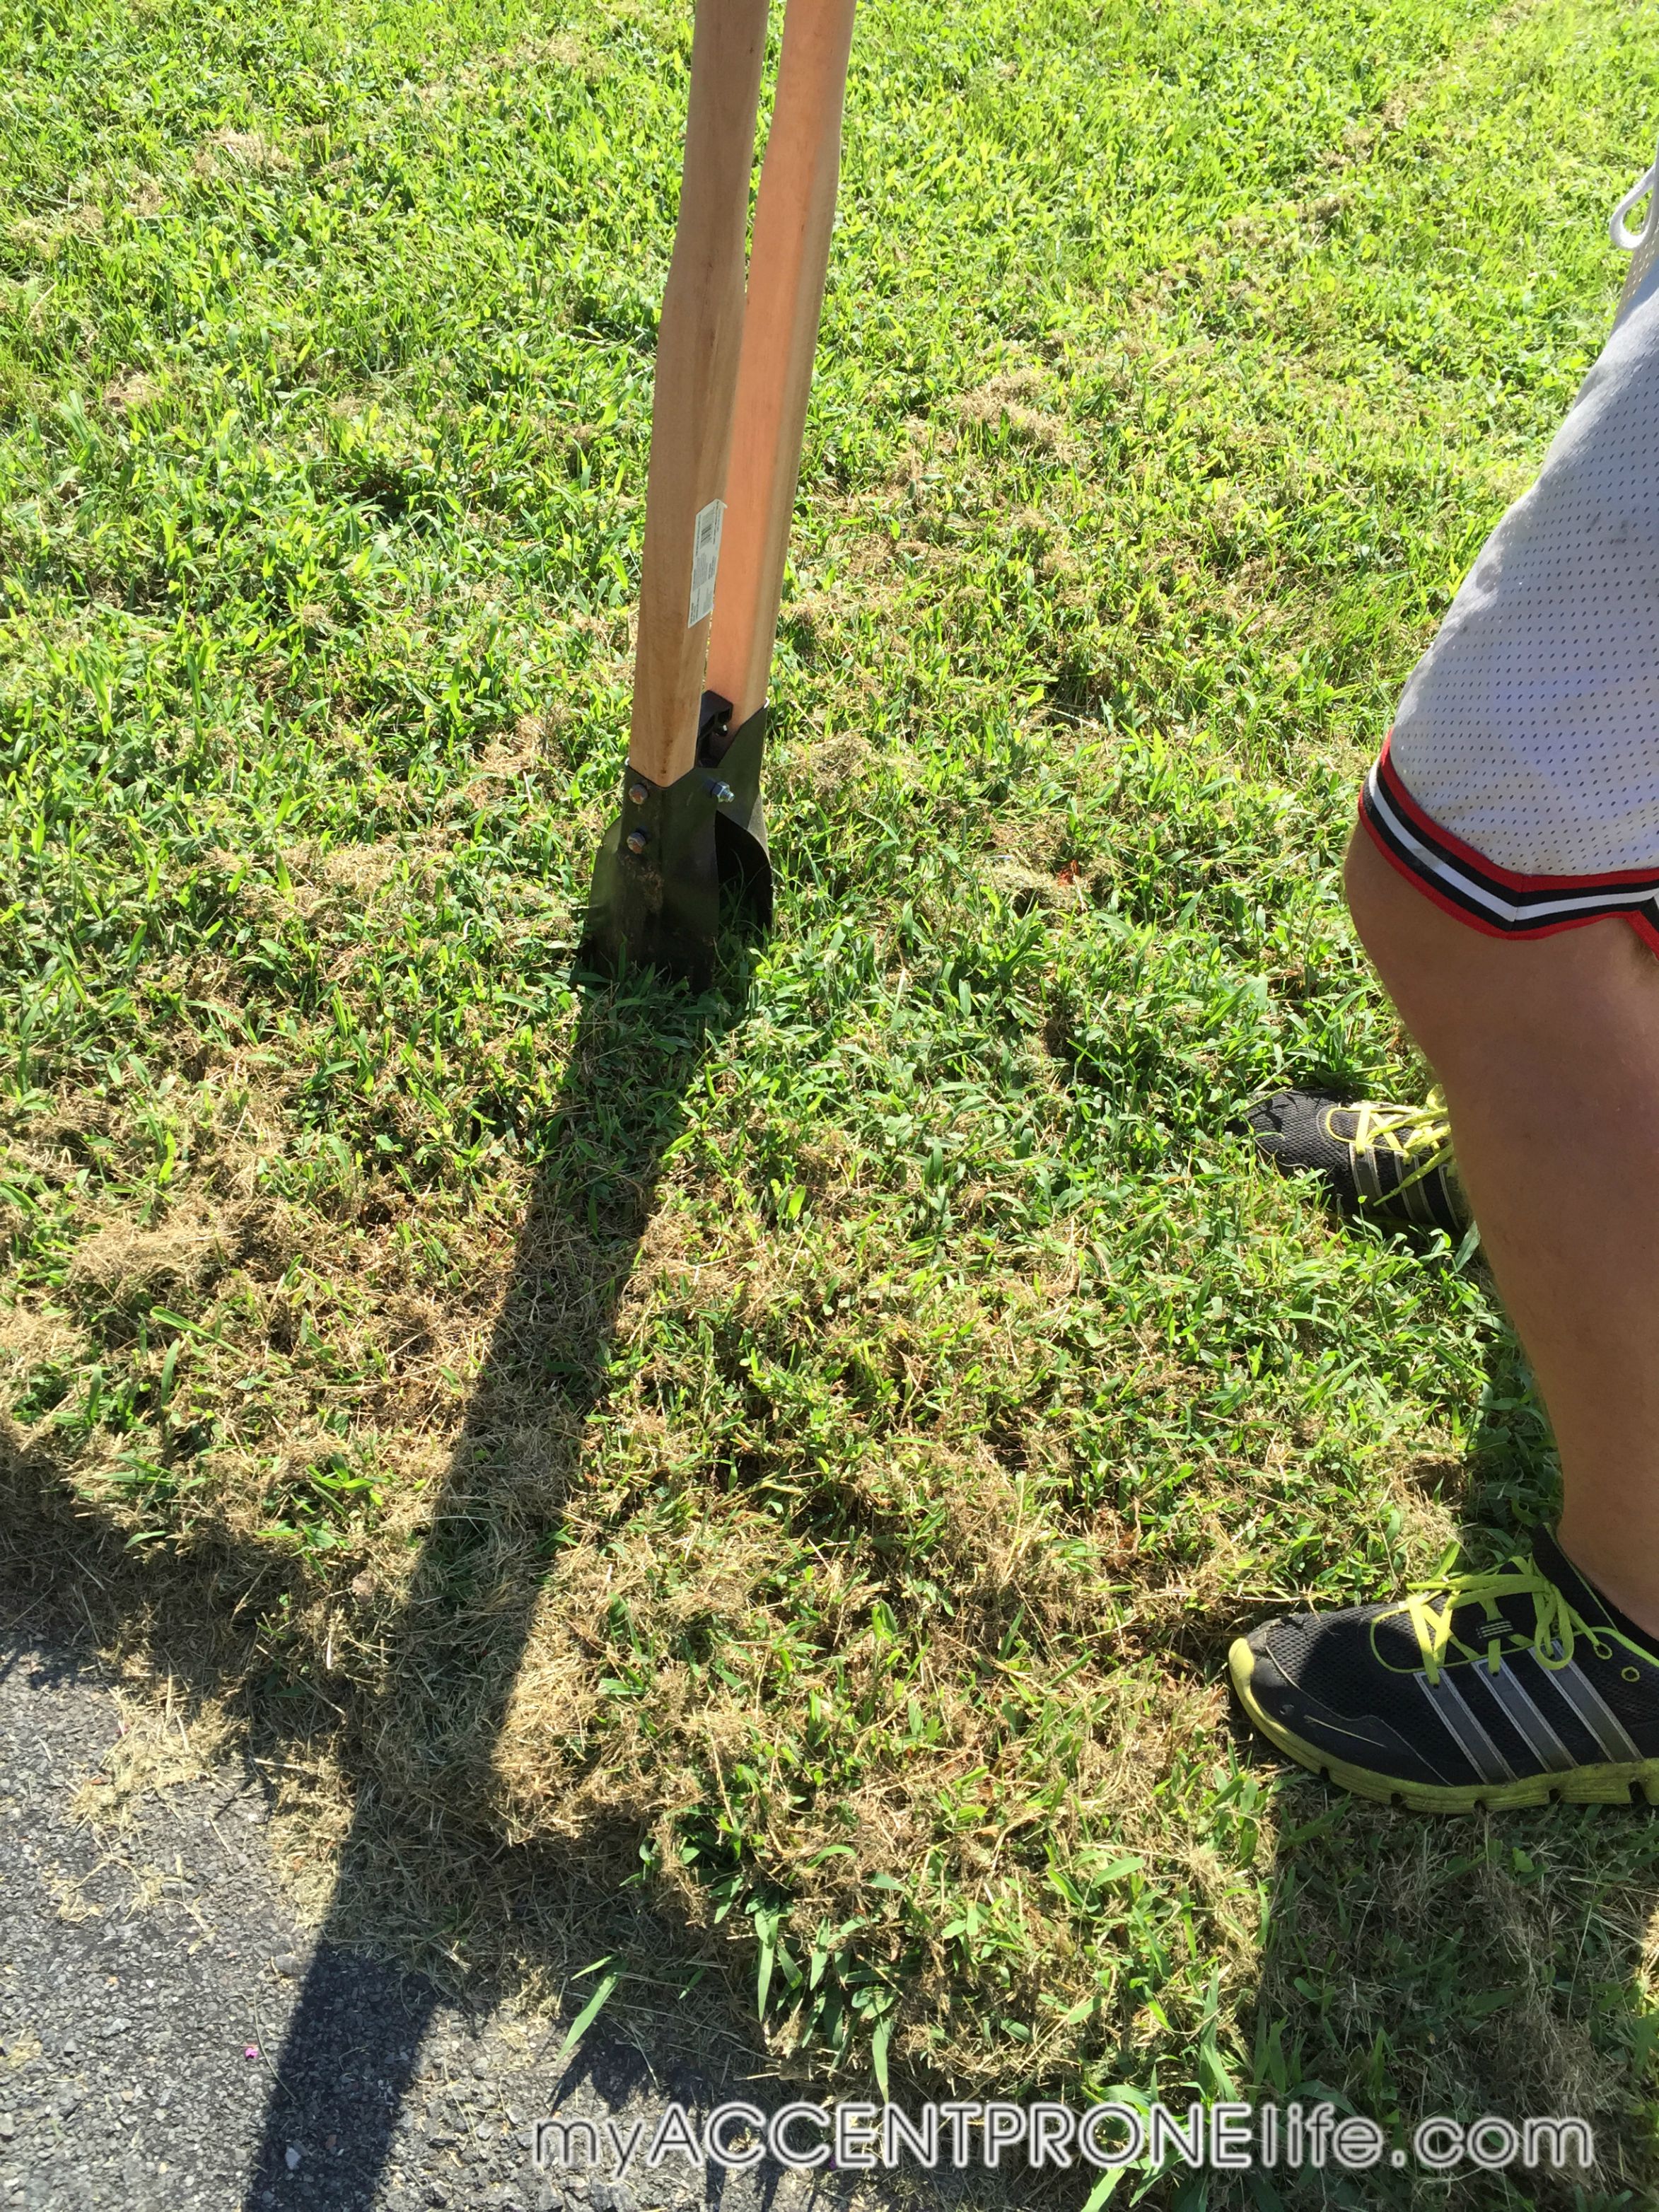
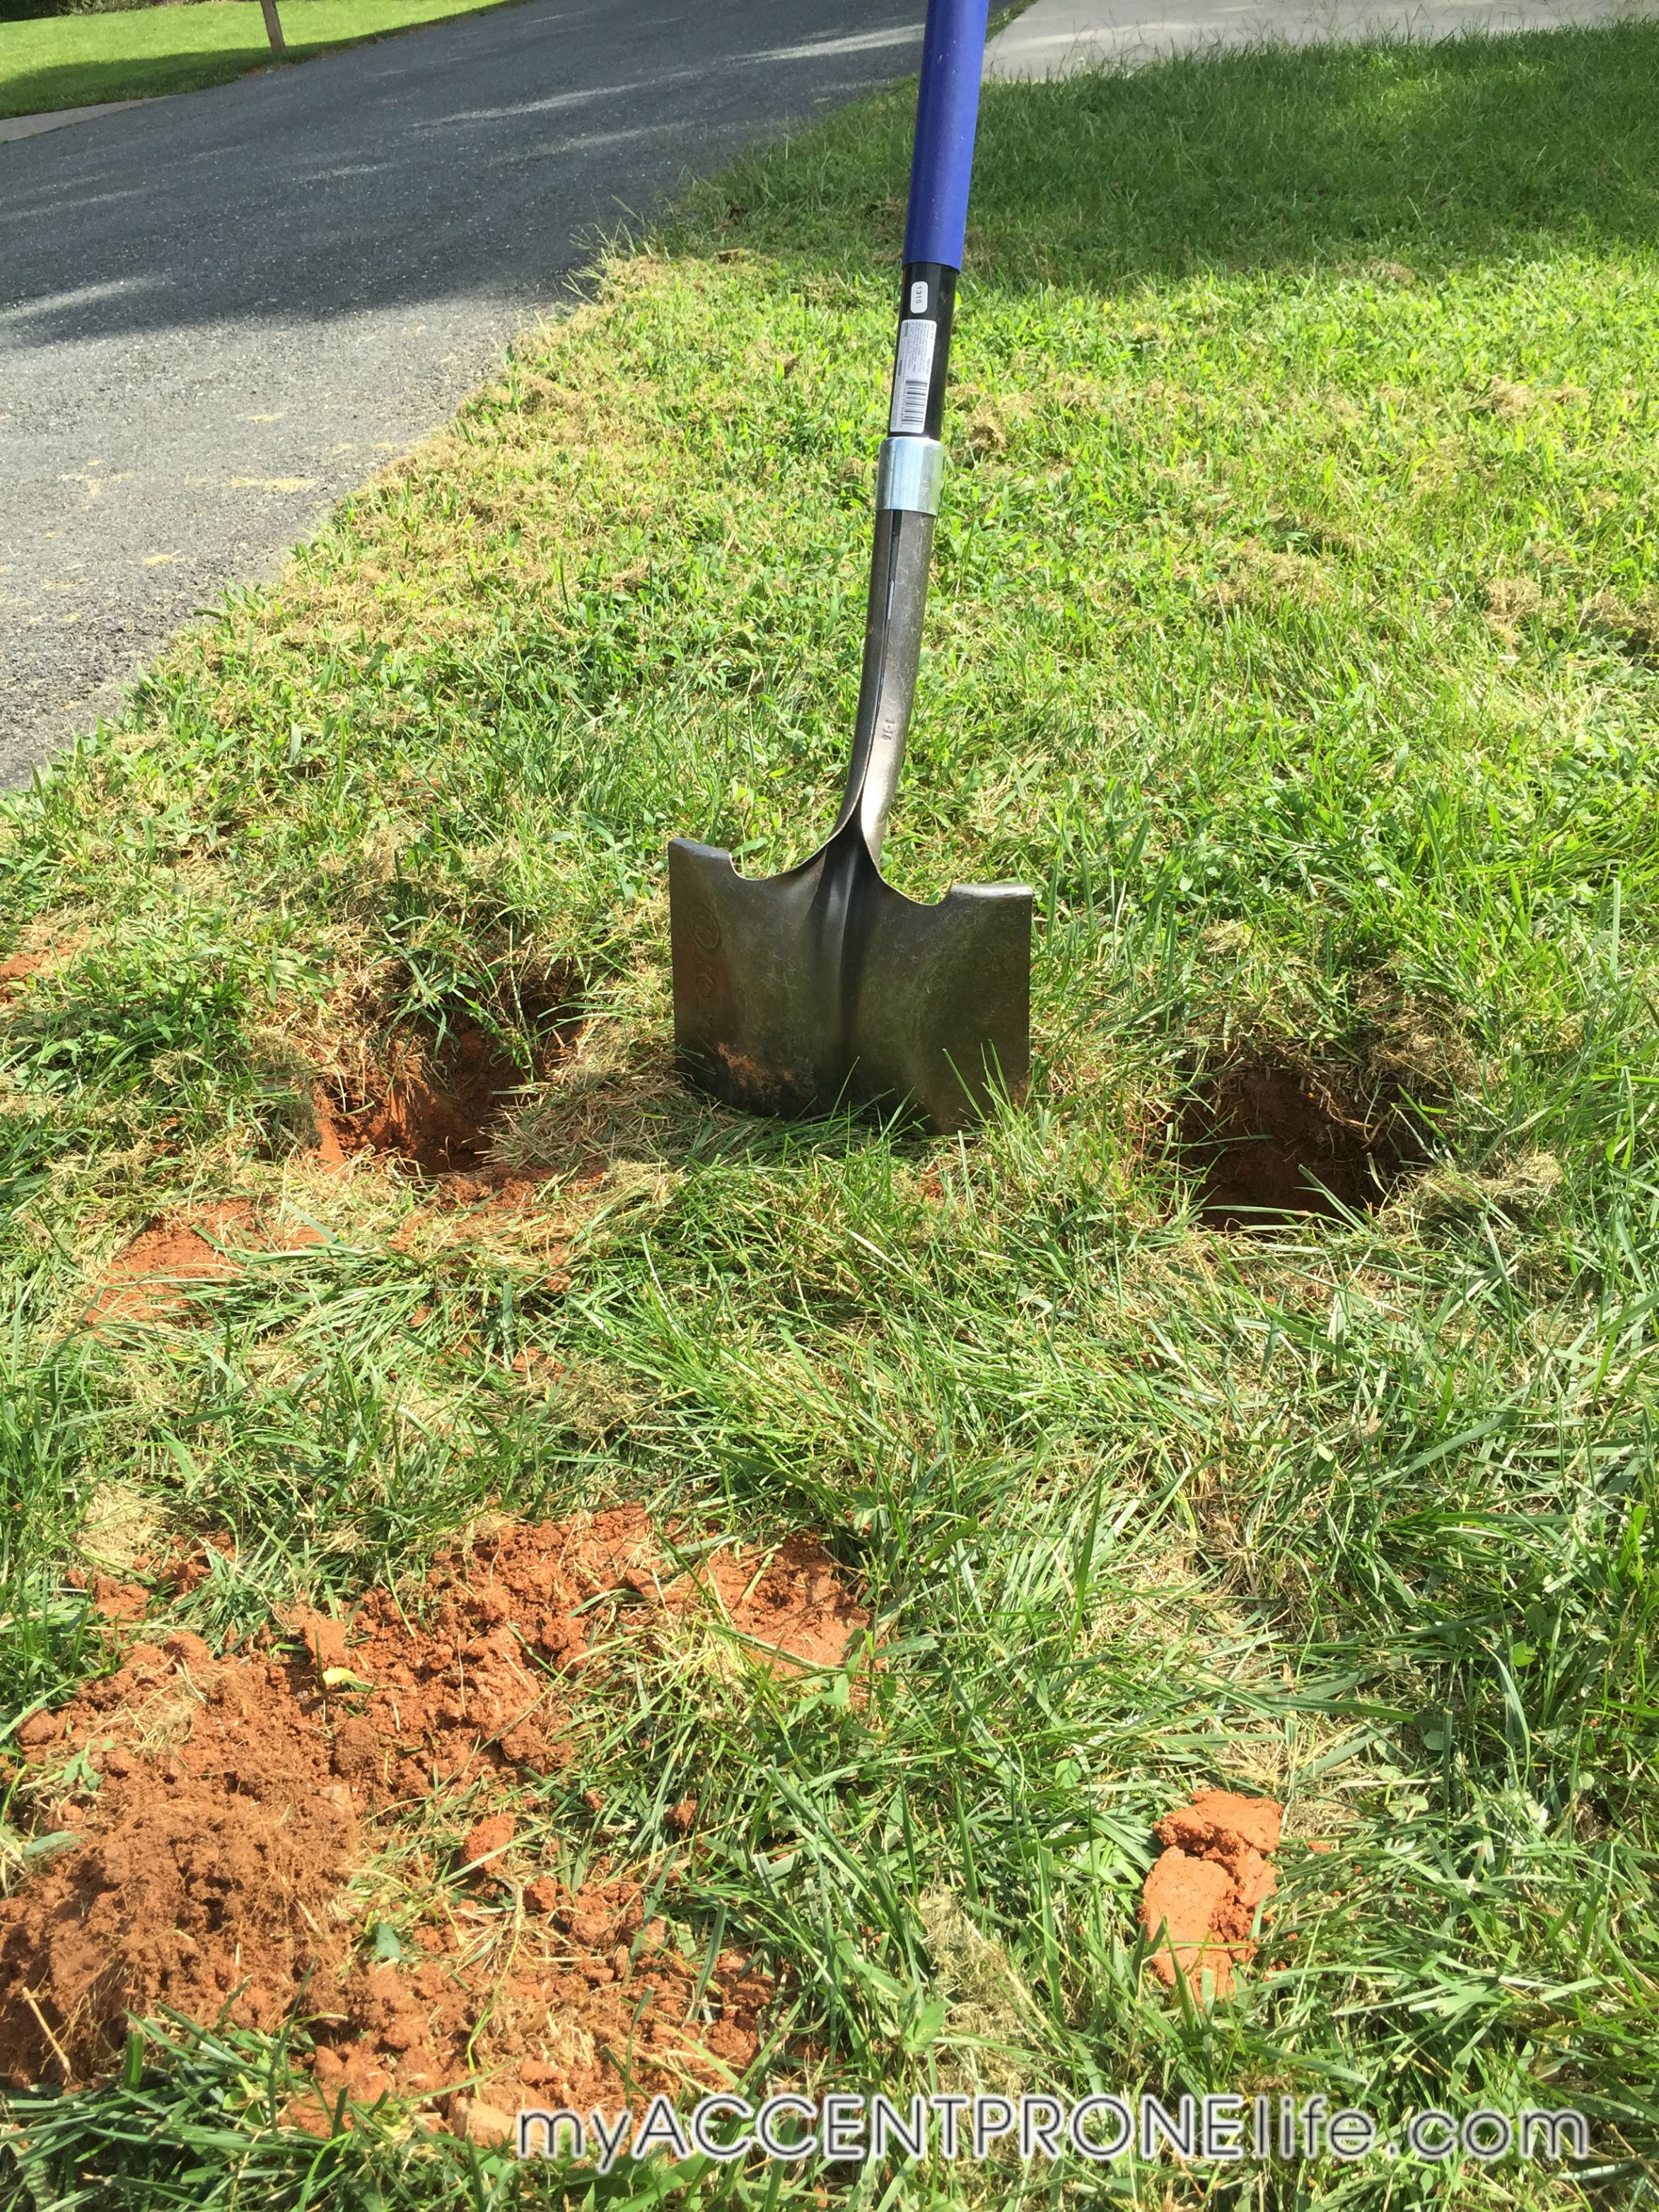
Step 12- Dig 2 holes in your yard to put in the mailbox posts using a post hole digger. The holes should be about 18″ deep and 16″-18″ apart.

postholedigger


2holes

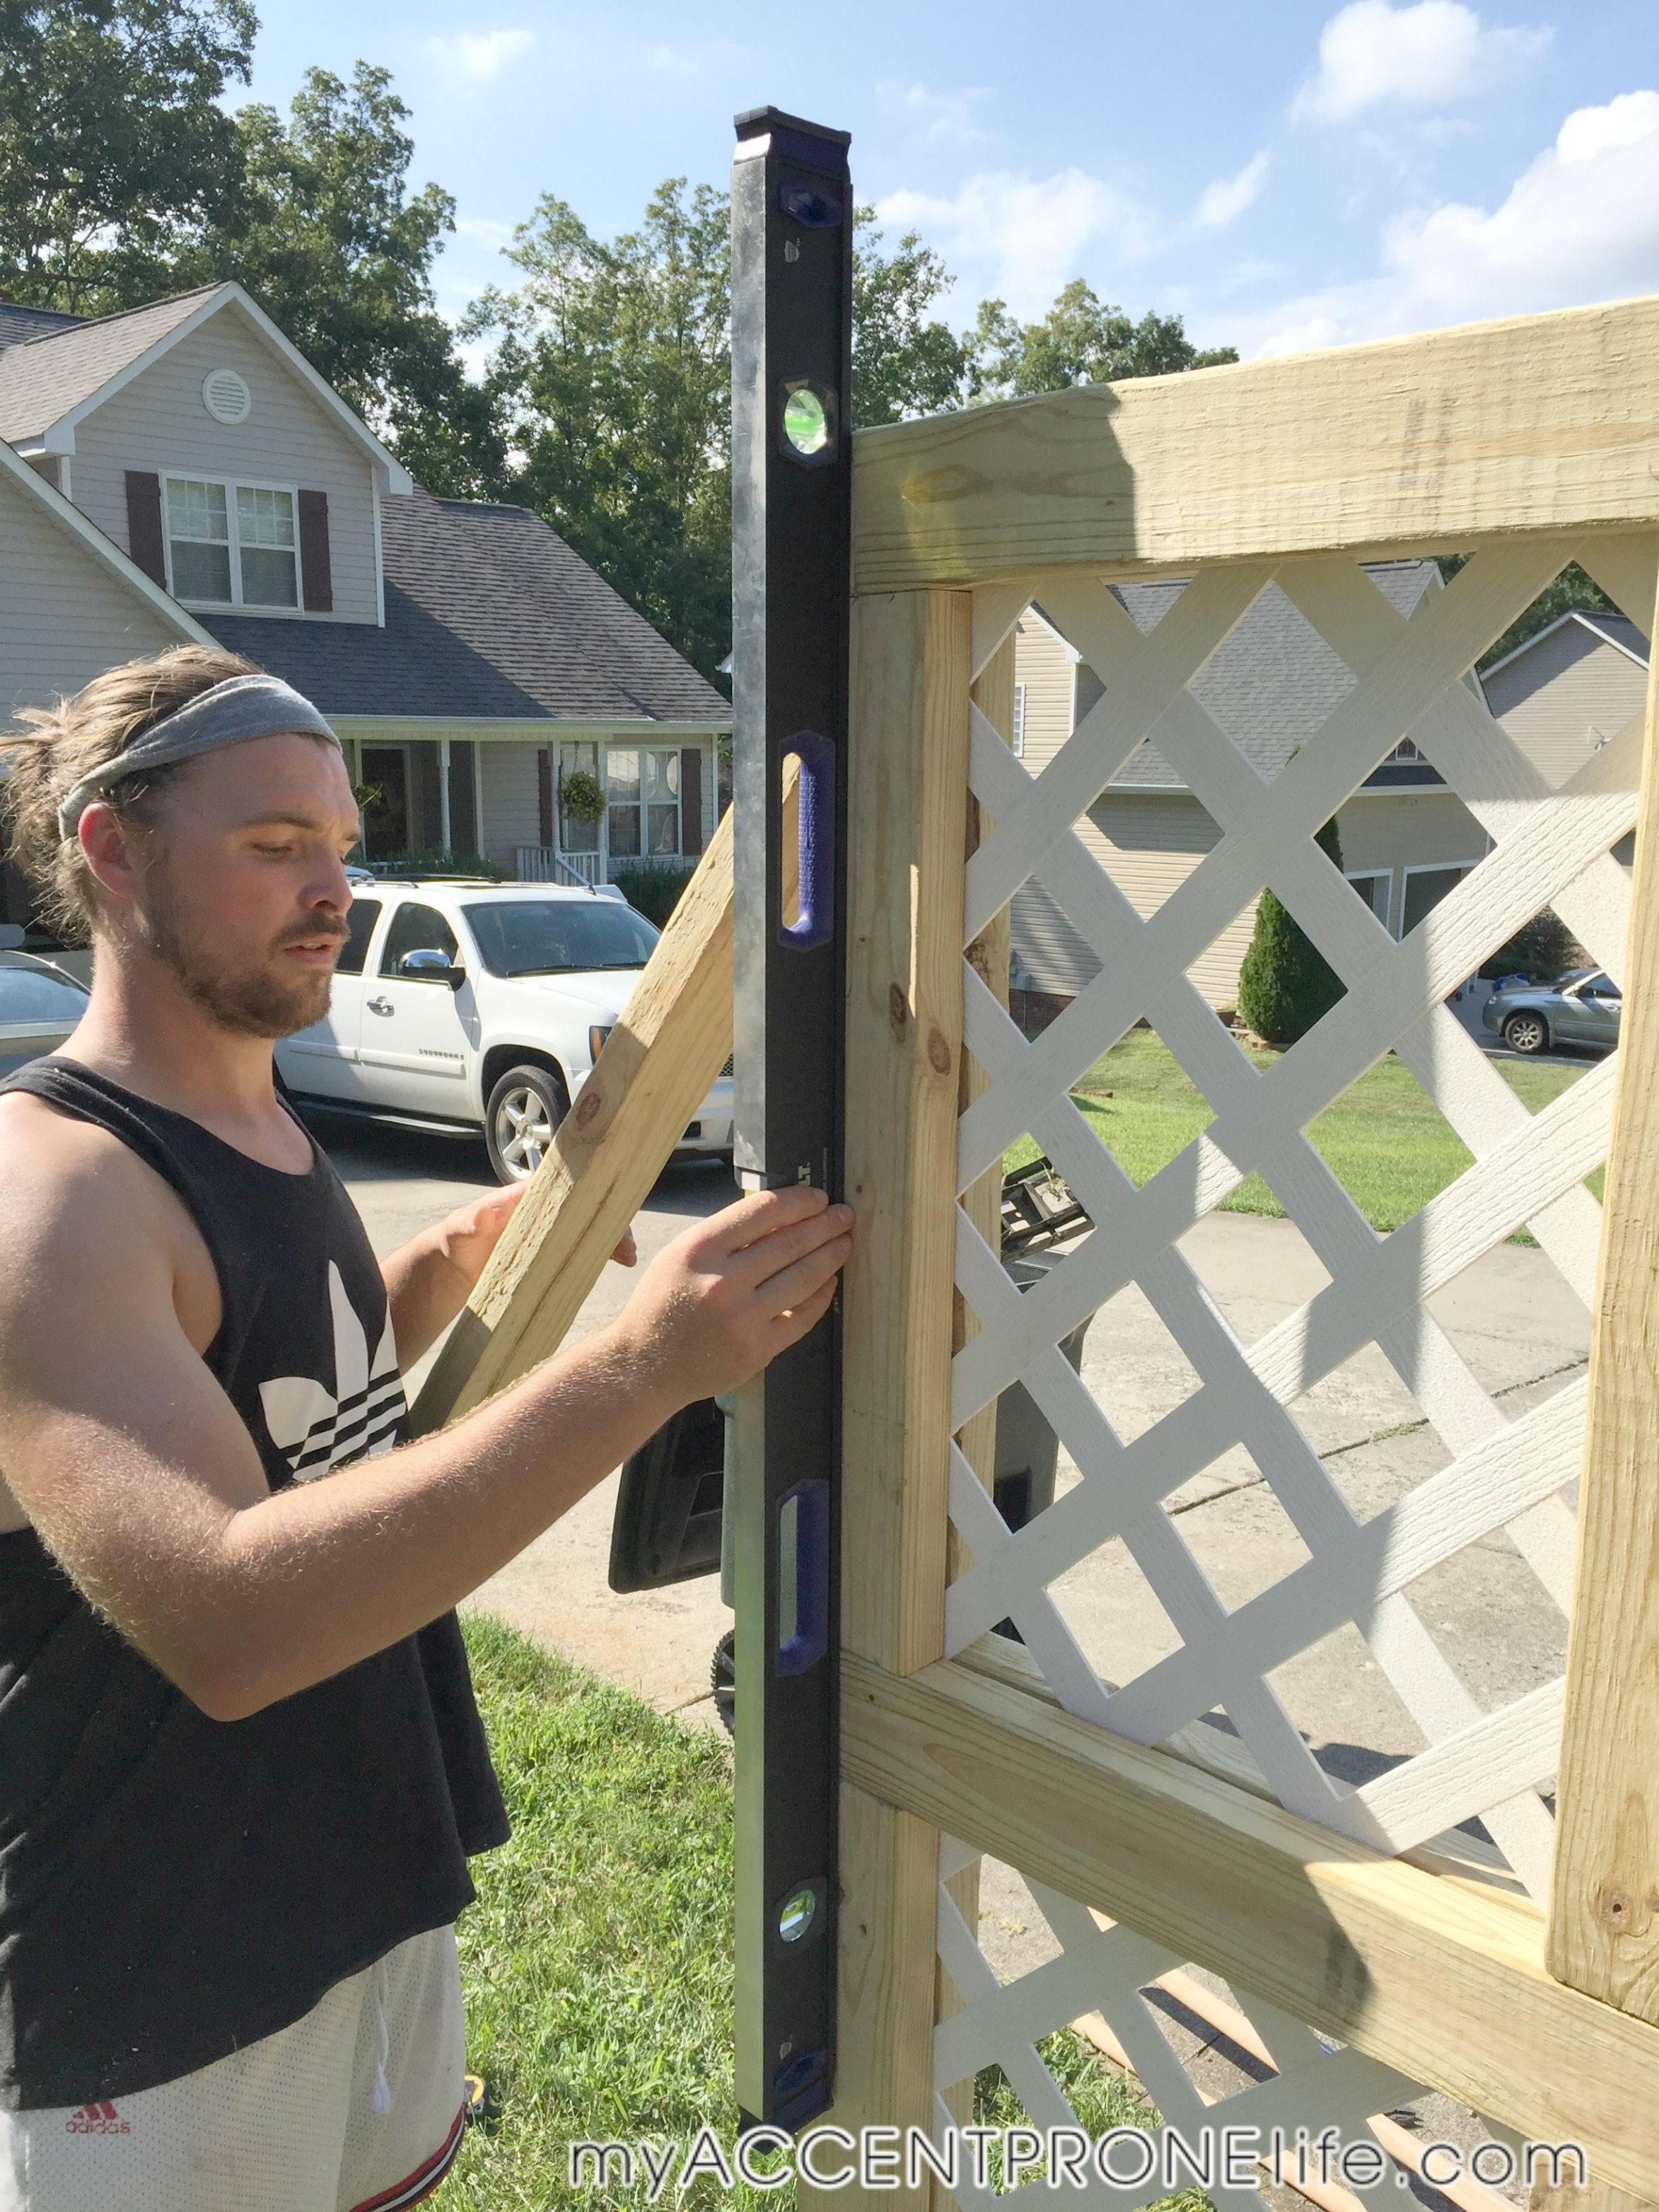
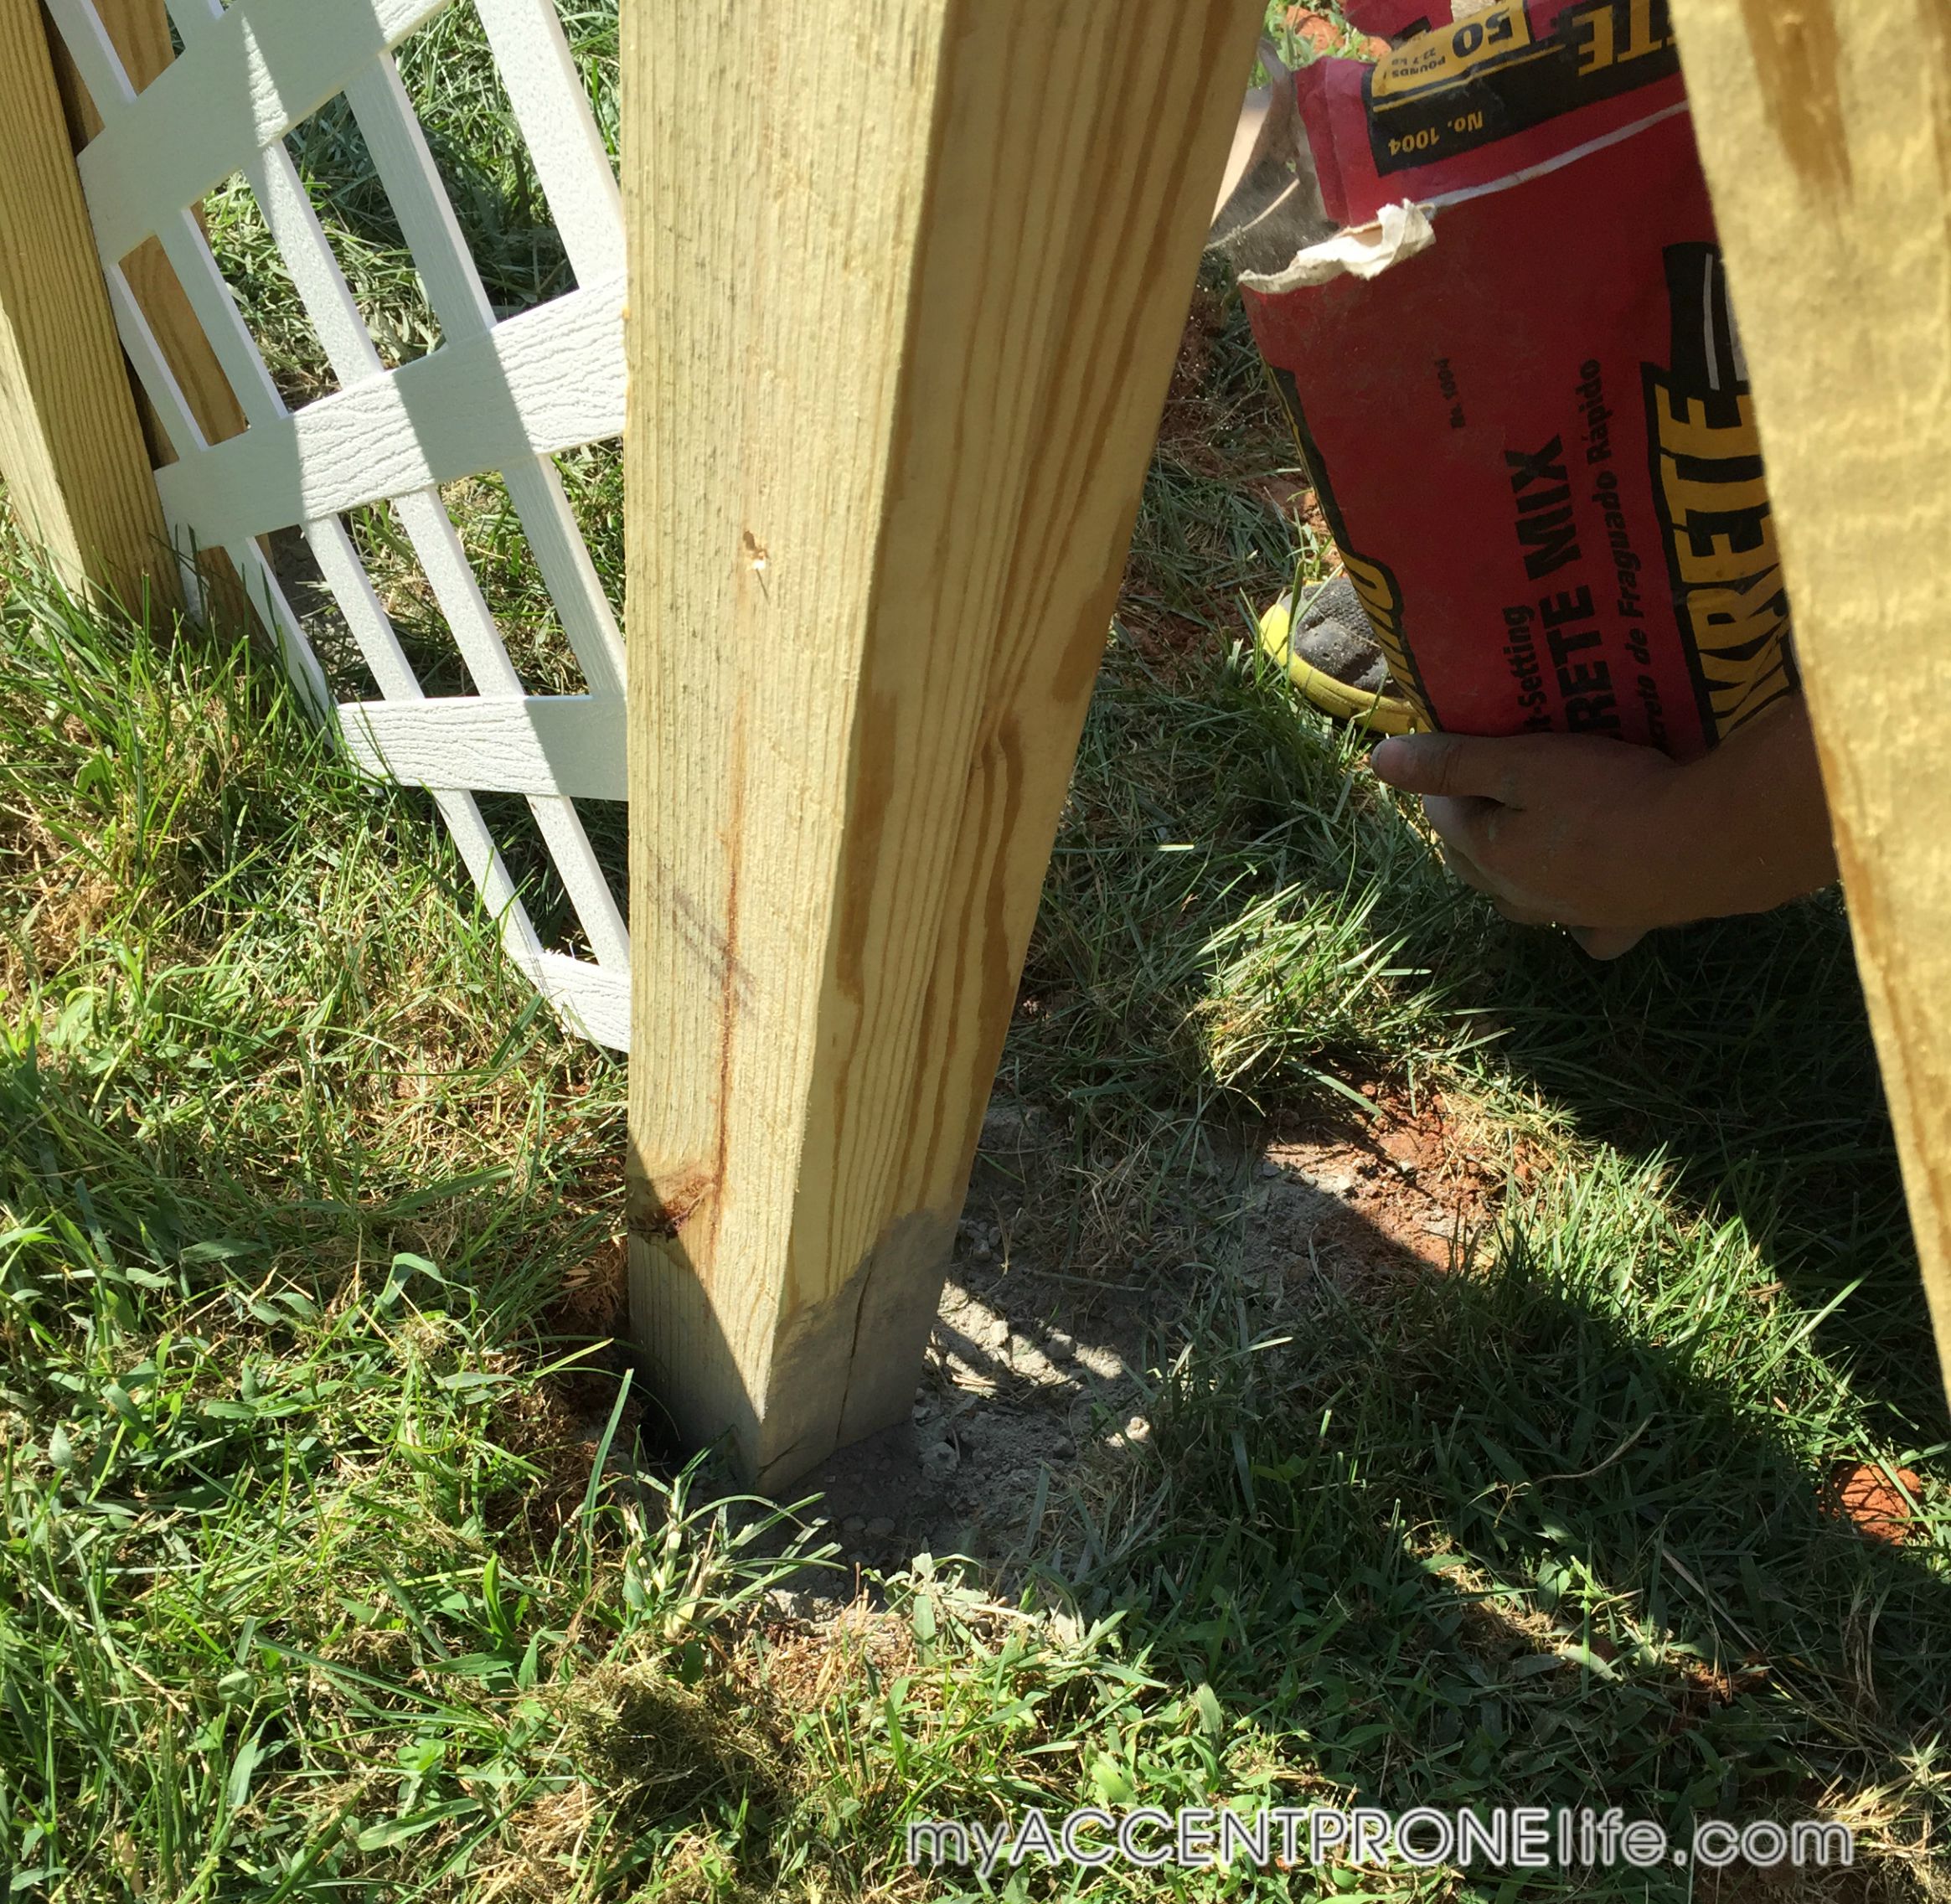
Step 13- Place the connected mailbox into the holes. The bottom horizontal post should be 42″ high at the top of the post.(the hole should be about 18″ deep). Make sure it is horizontally and vertically level before cementing into the ground. You can use 2x4s to stabilize and hold it into place while cementing it.

stablizeposts

levelpost

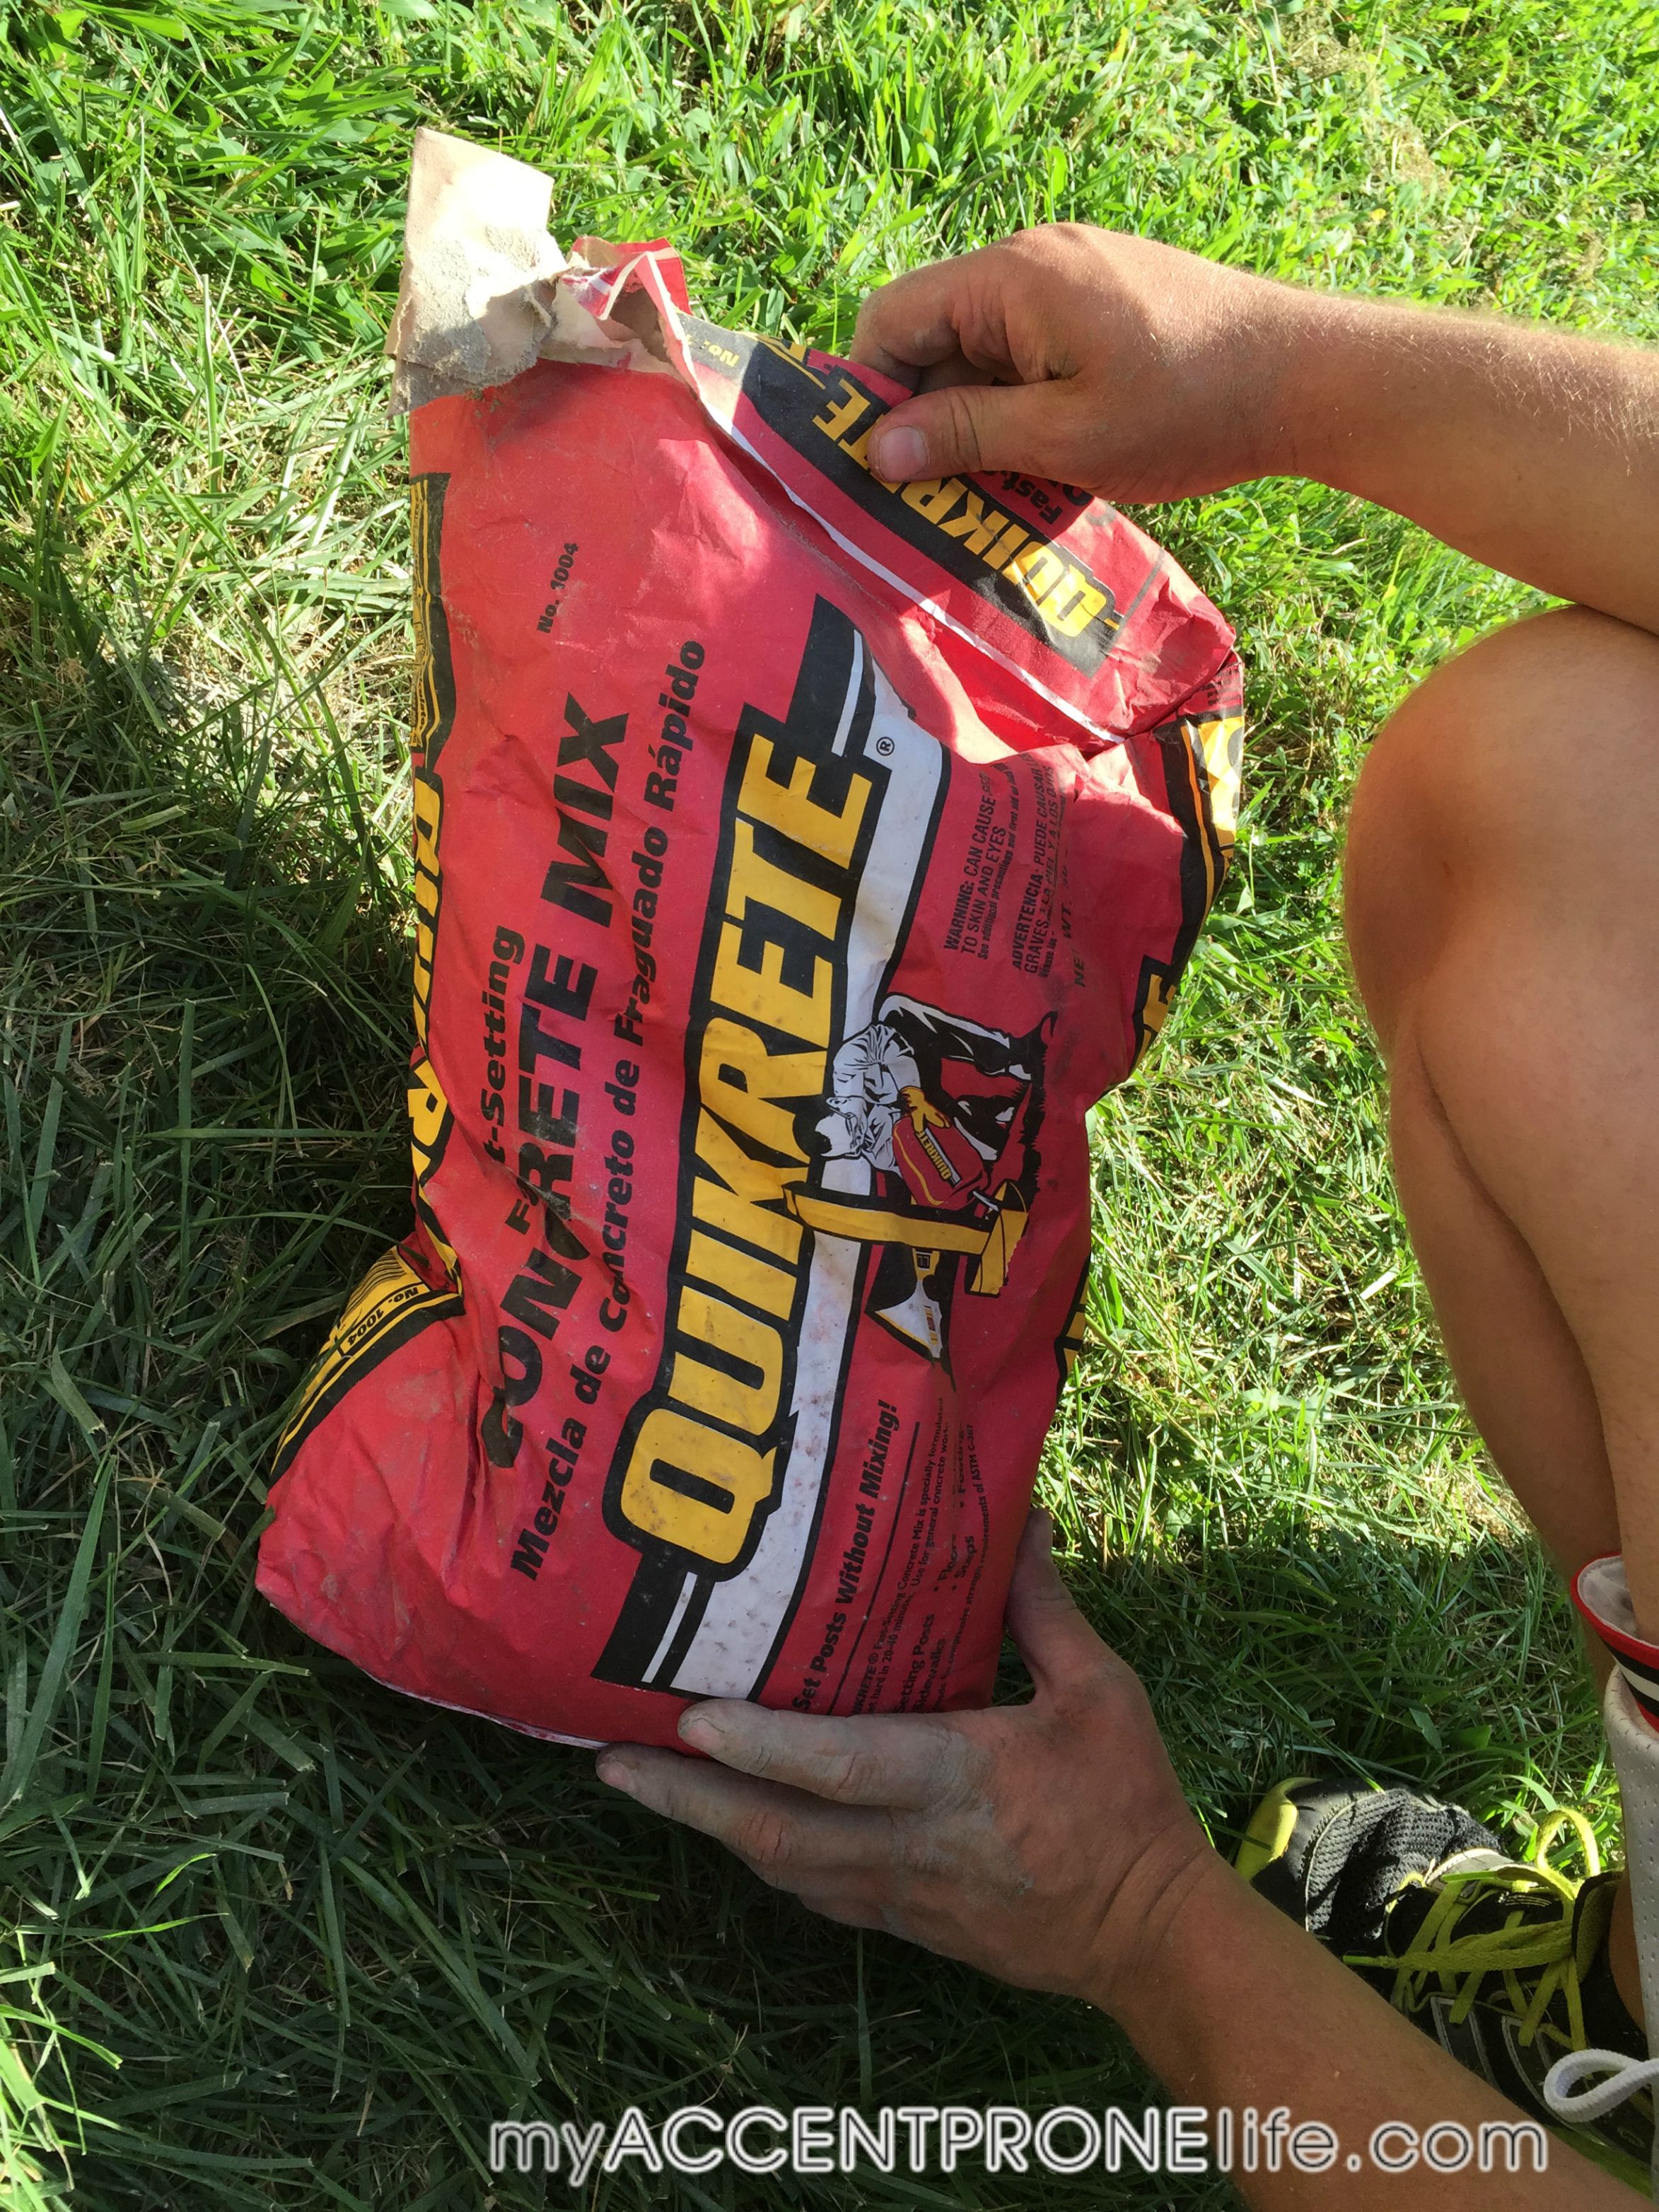
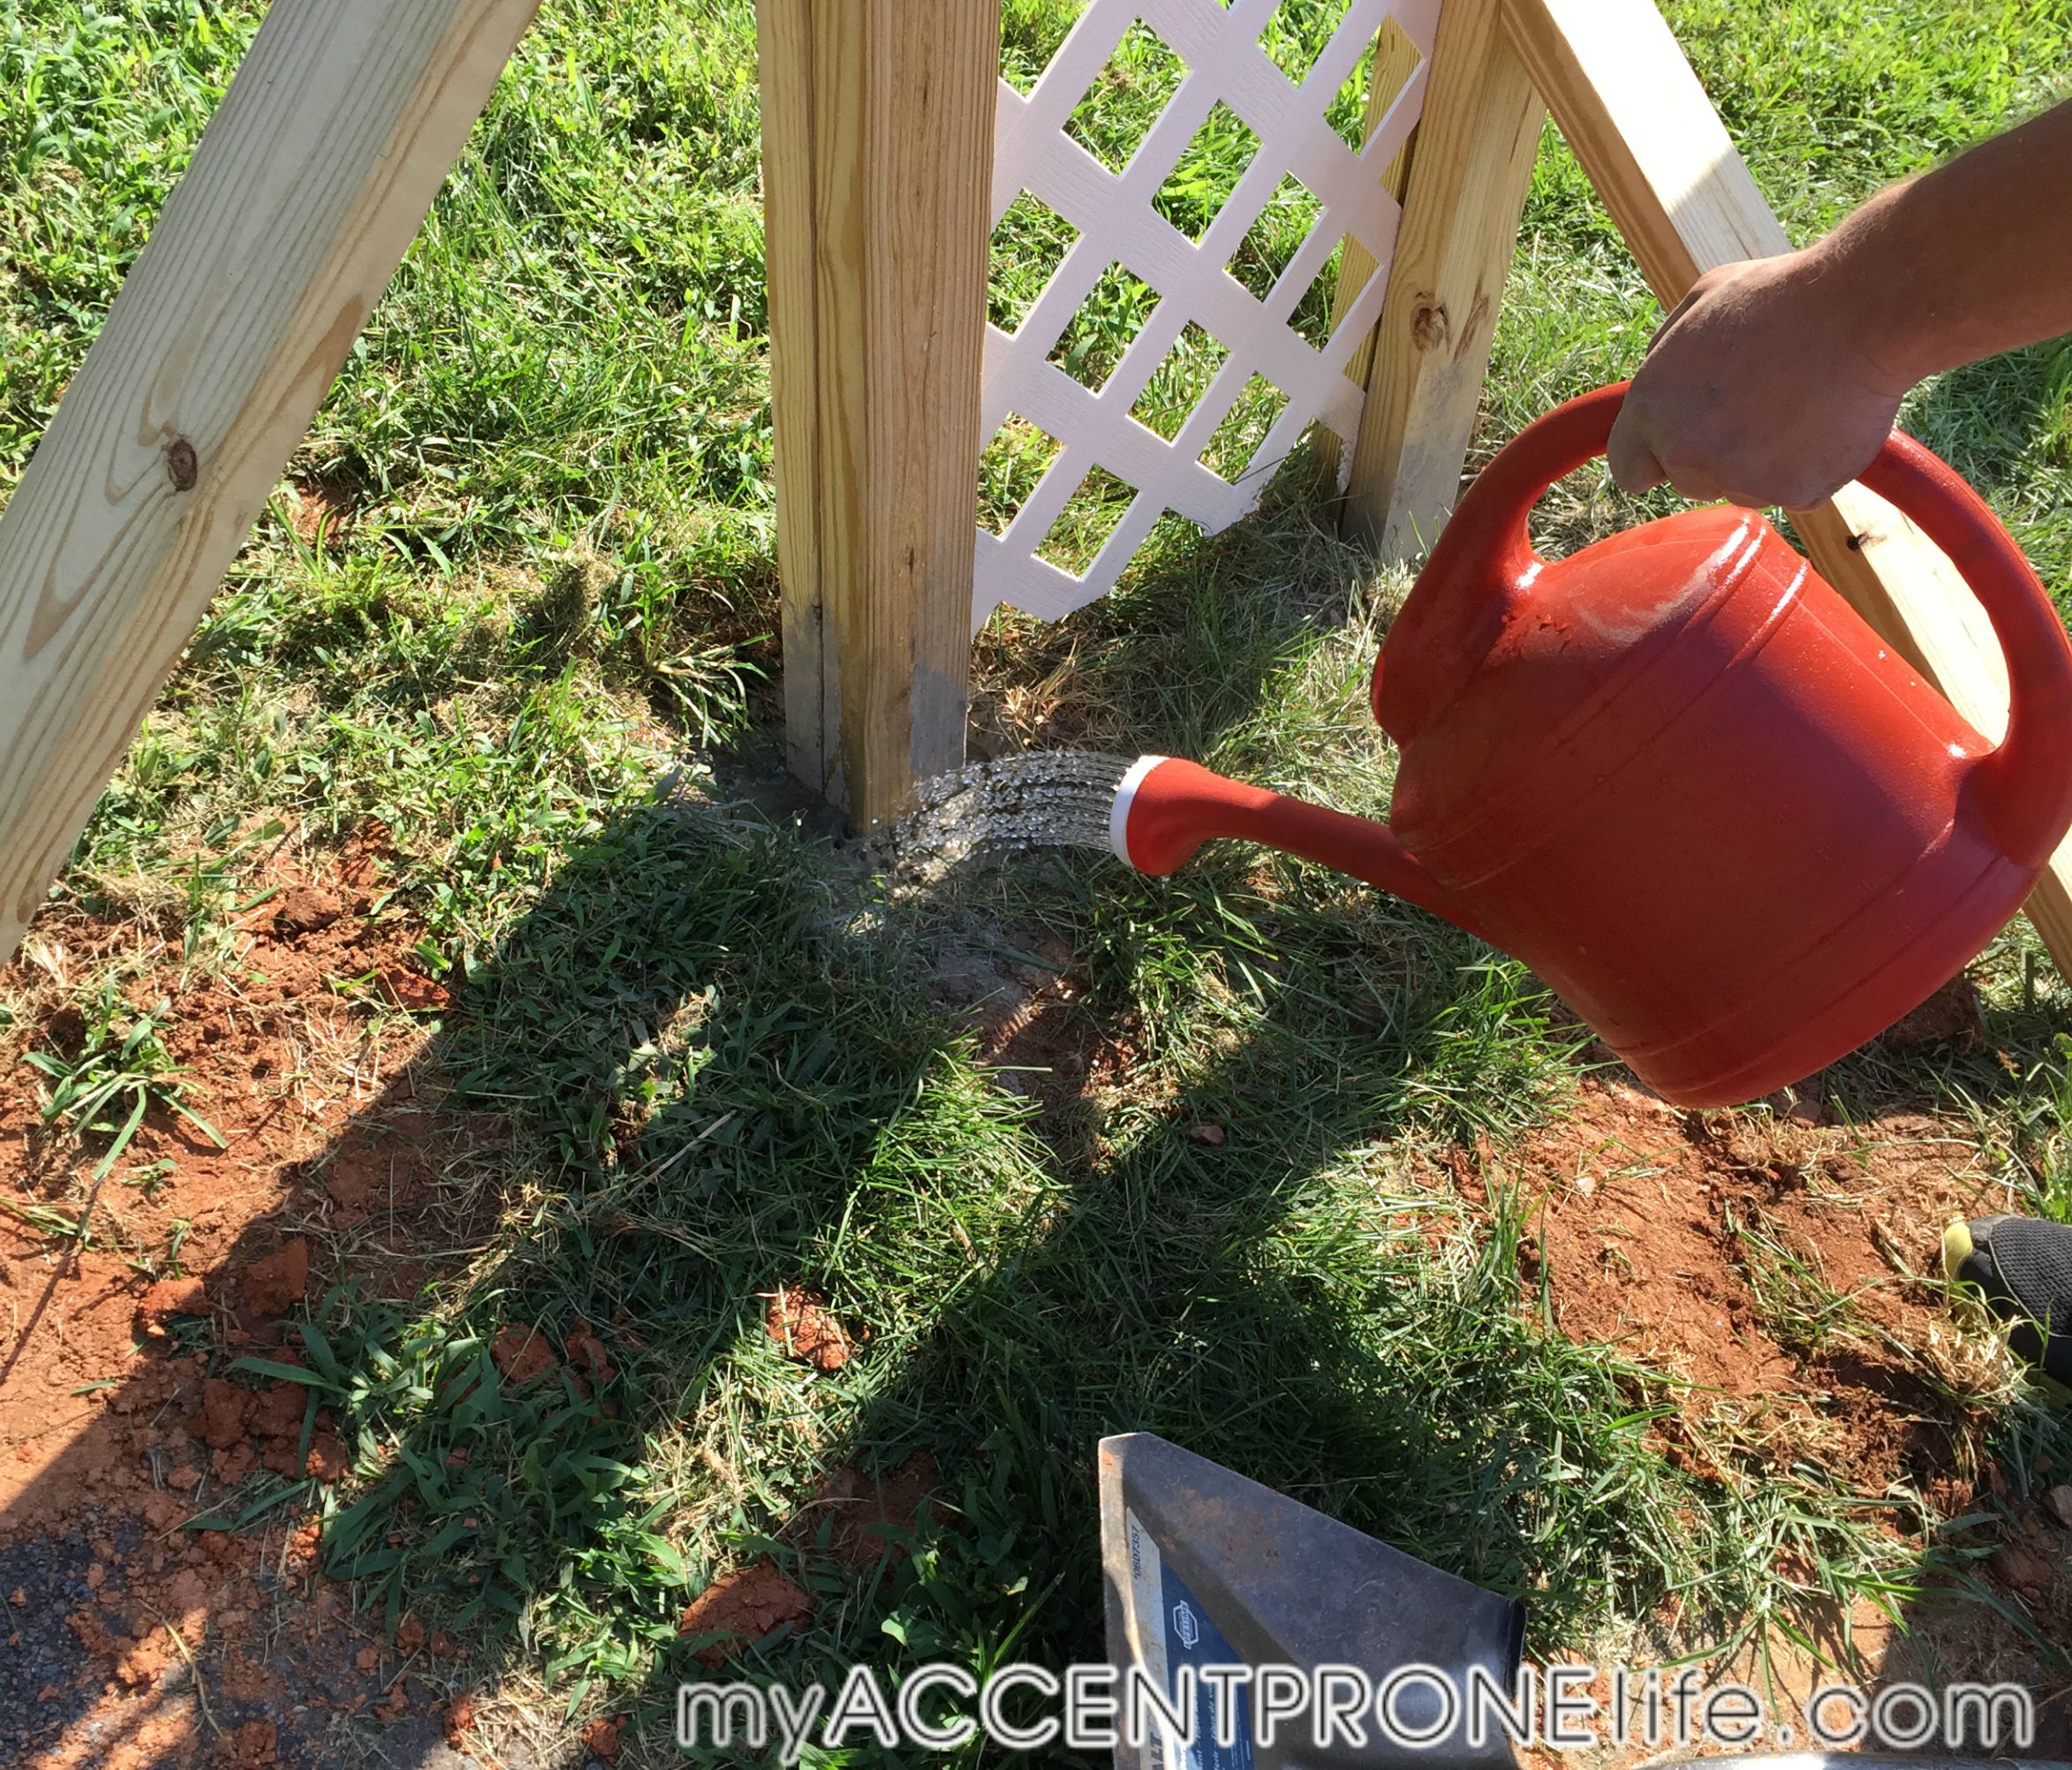
Step 14- Cement into the ground. Fill holes with quikcrete and then fill with water to cement. Let set for about 30-40 min.

quikcrete


quikcreteinground


wateringcrete

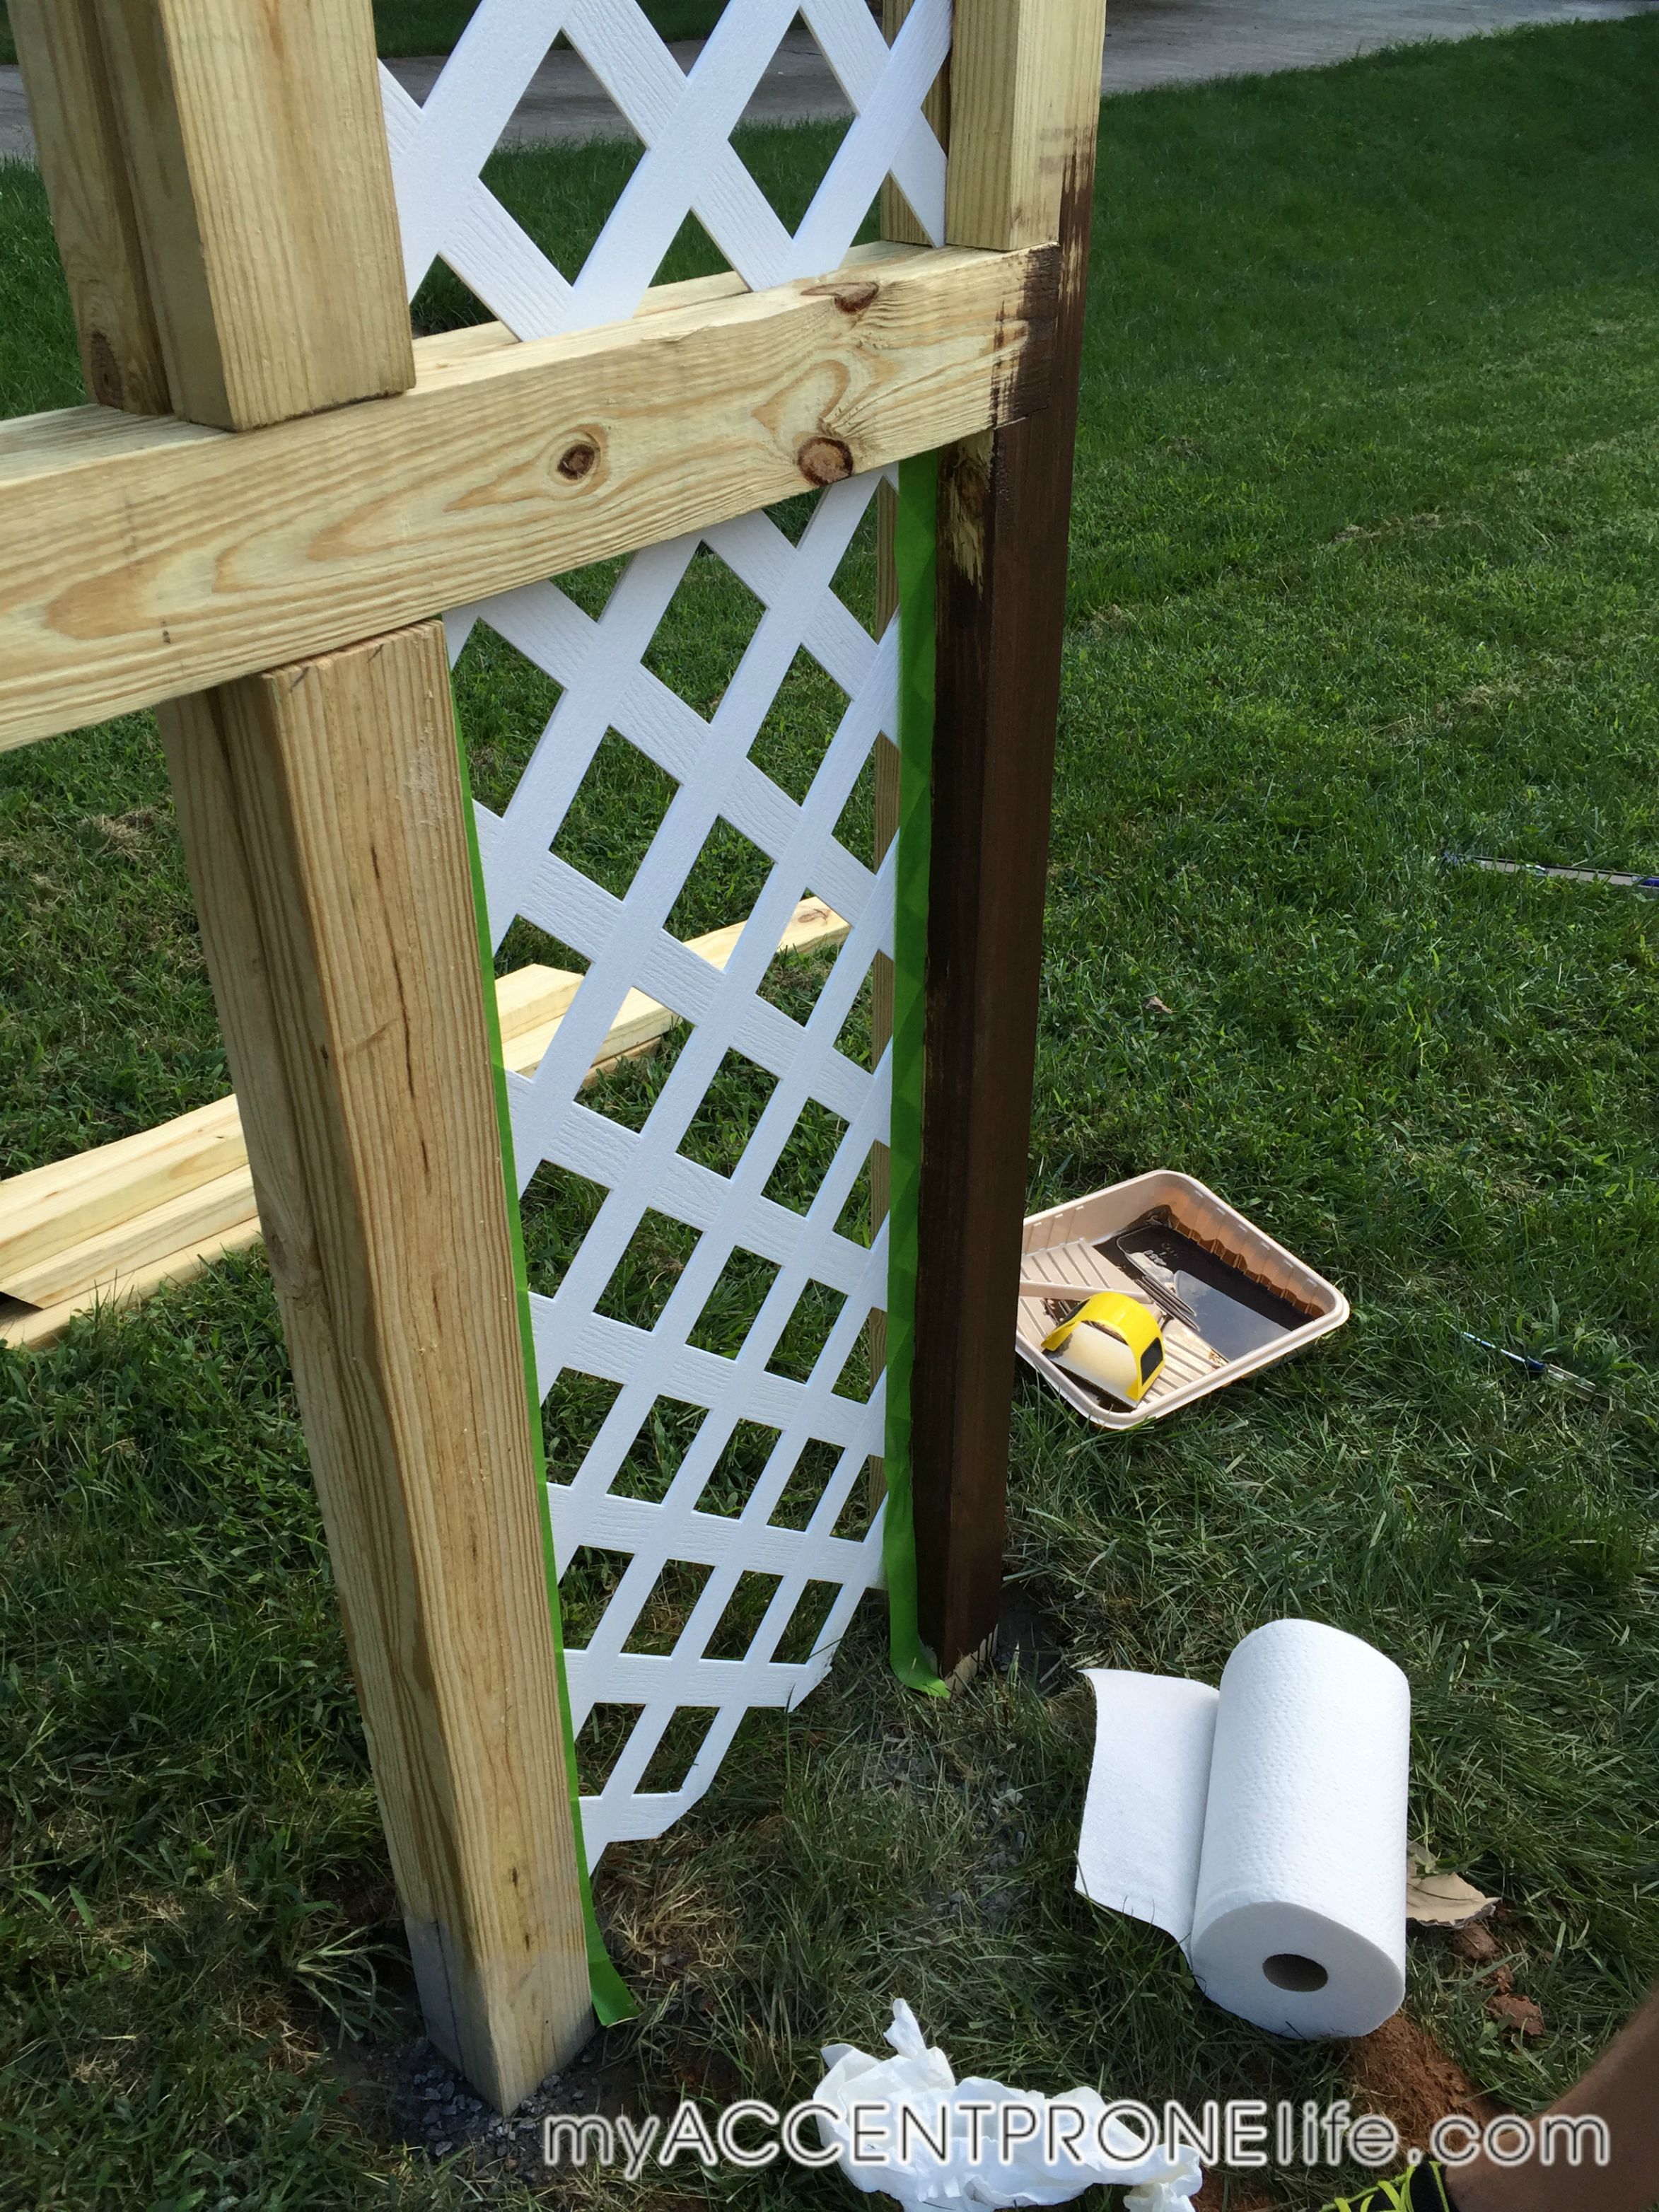
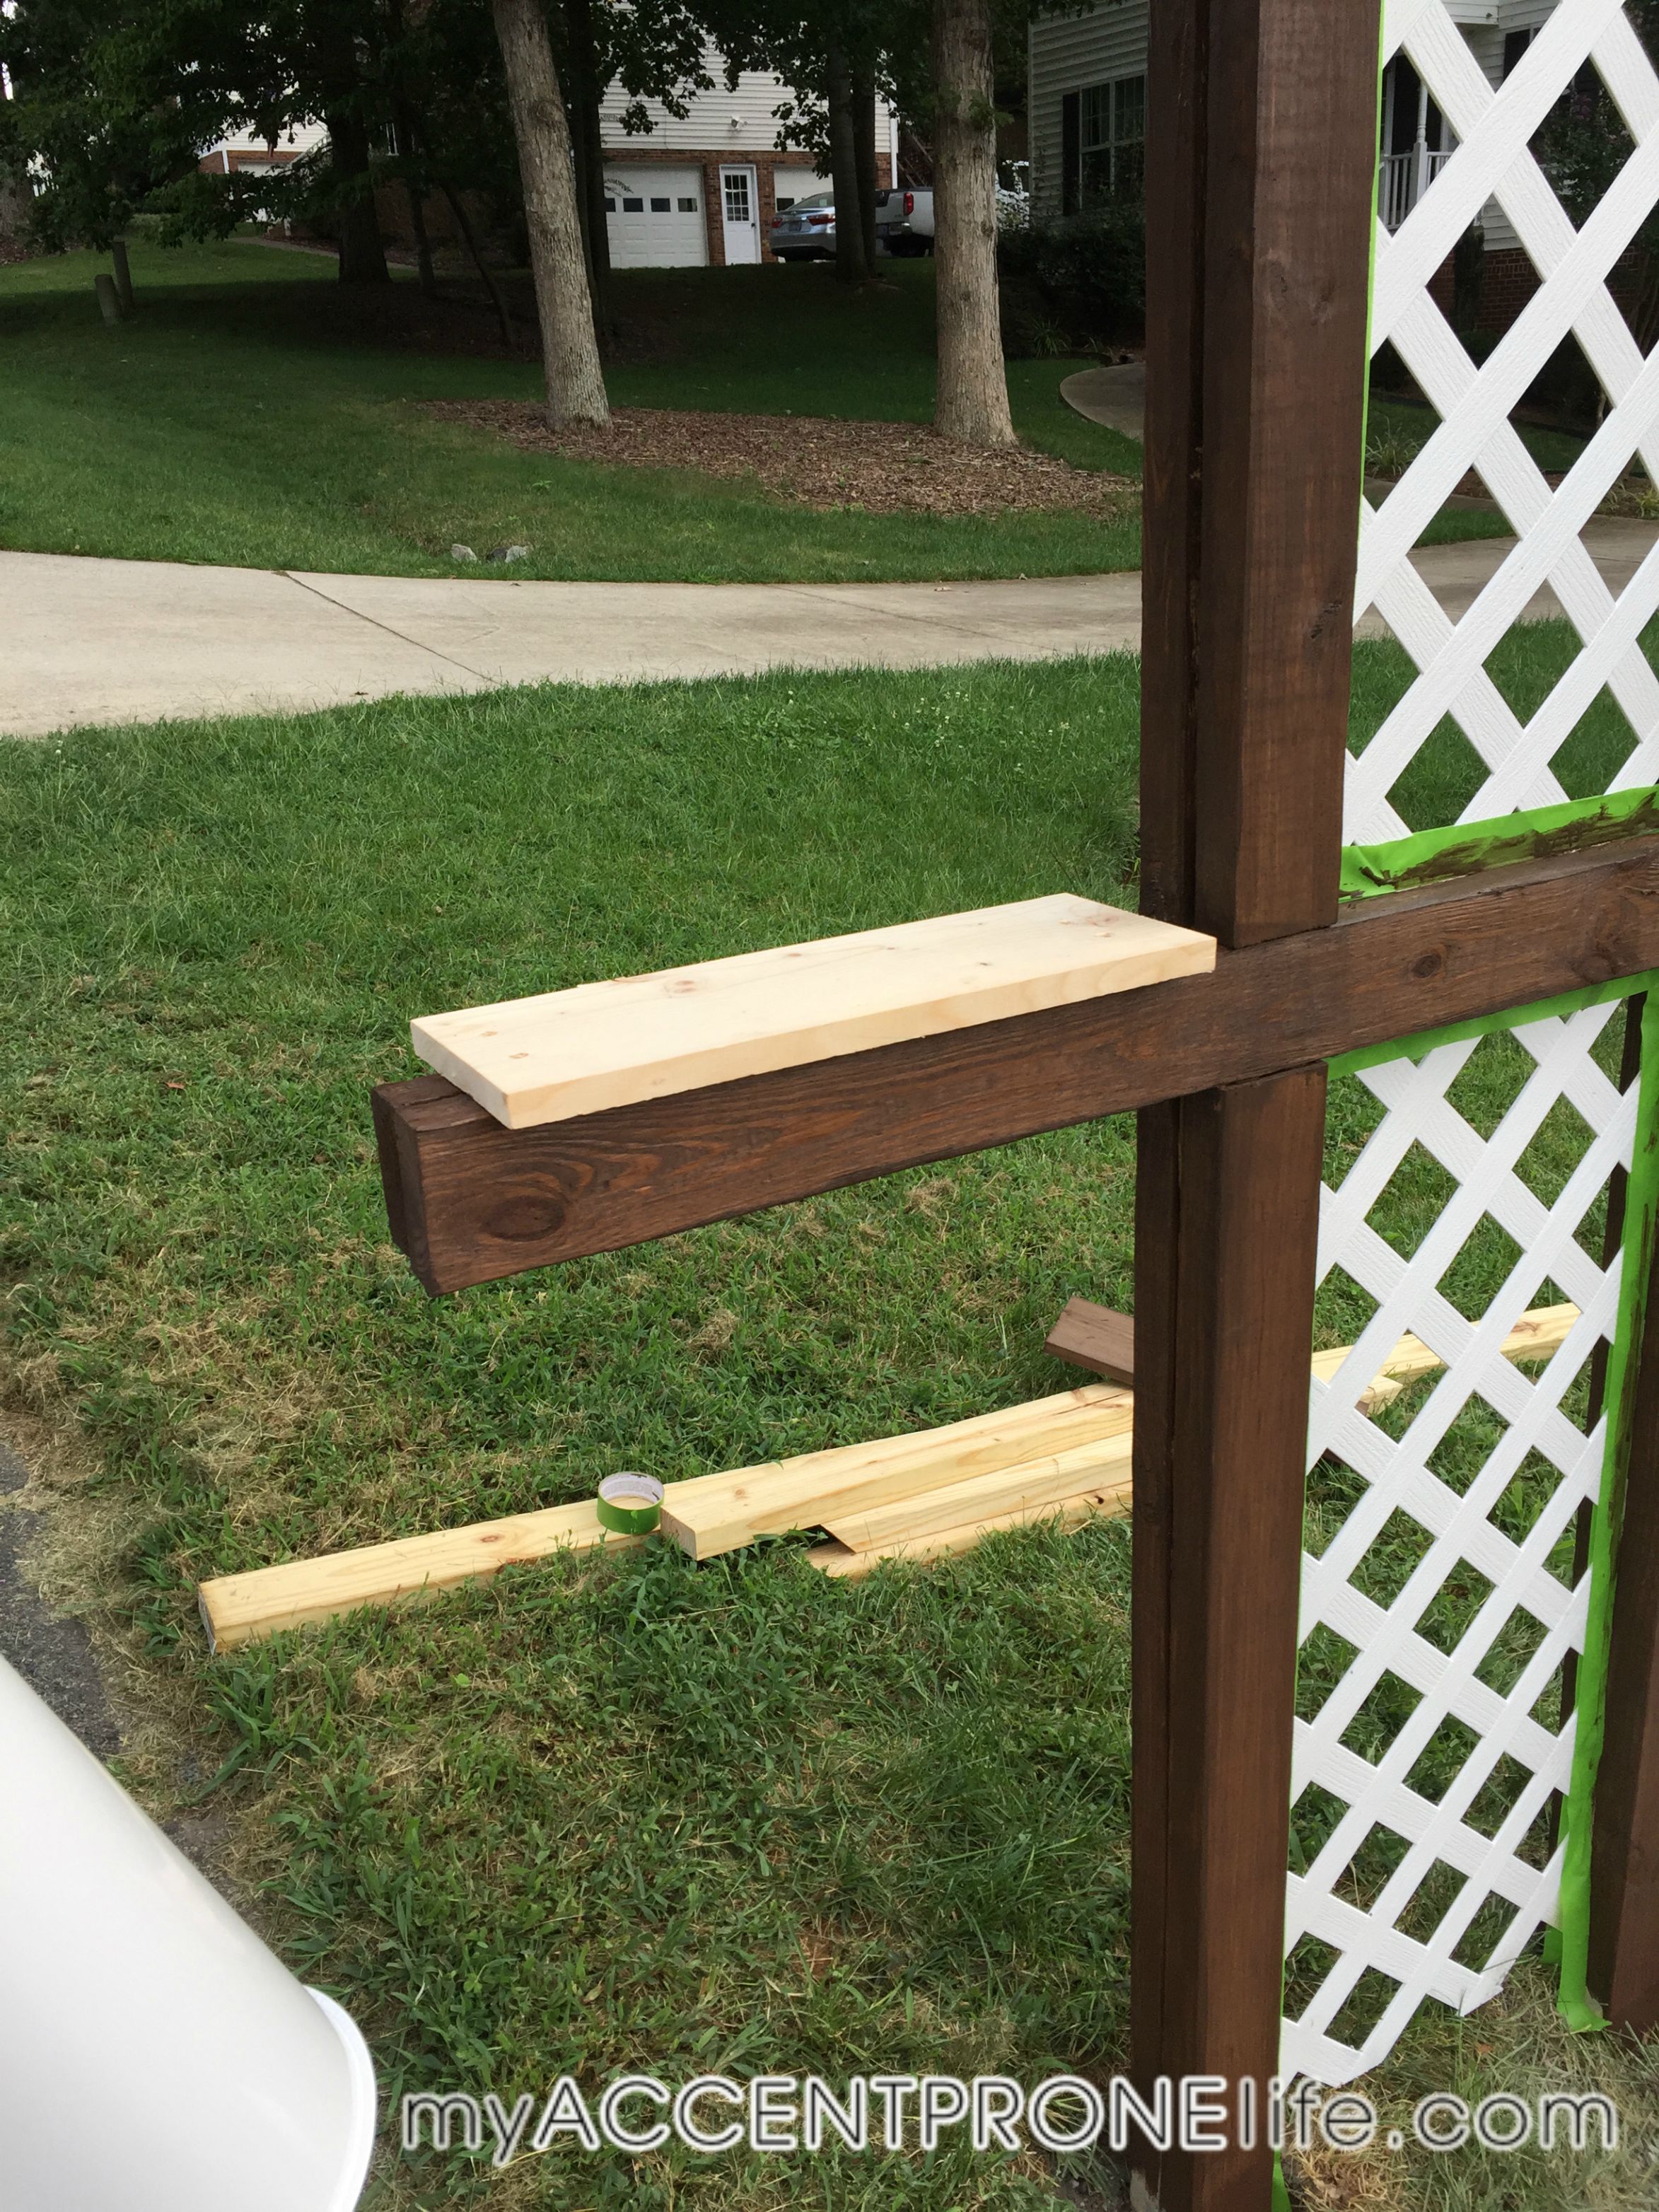
Step 15- Stain the posts and one of the mounting boards for the numbers. Tape off the white lattice with painters tape, and then stain the posts.

stain

staining


staininprogress


Step 16- Attach the mailbox to the frame. We used a mounting board to sit up under the mailbox to screw into.

mailboxboard

mounting boards

mailboxattached


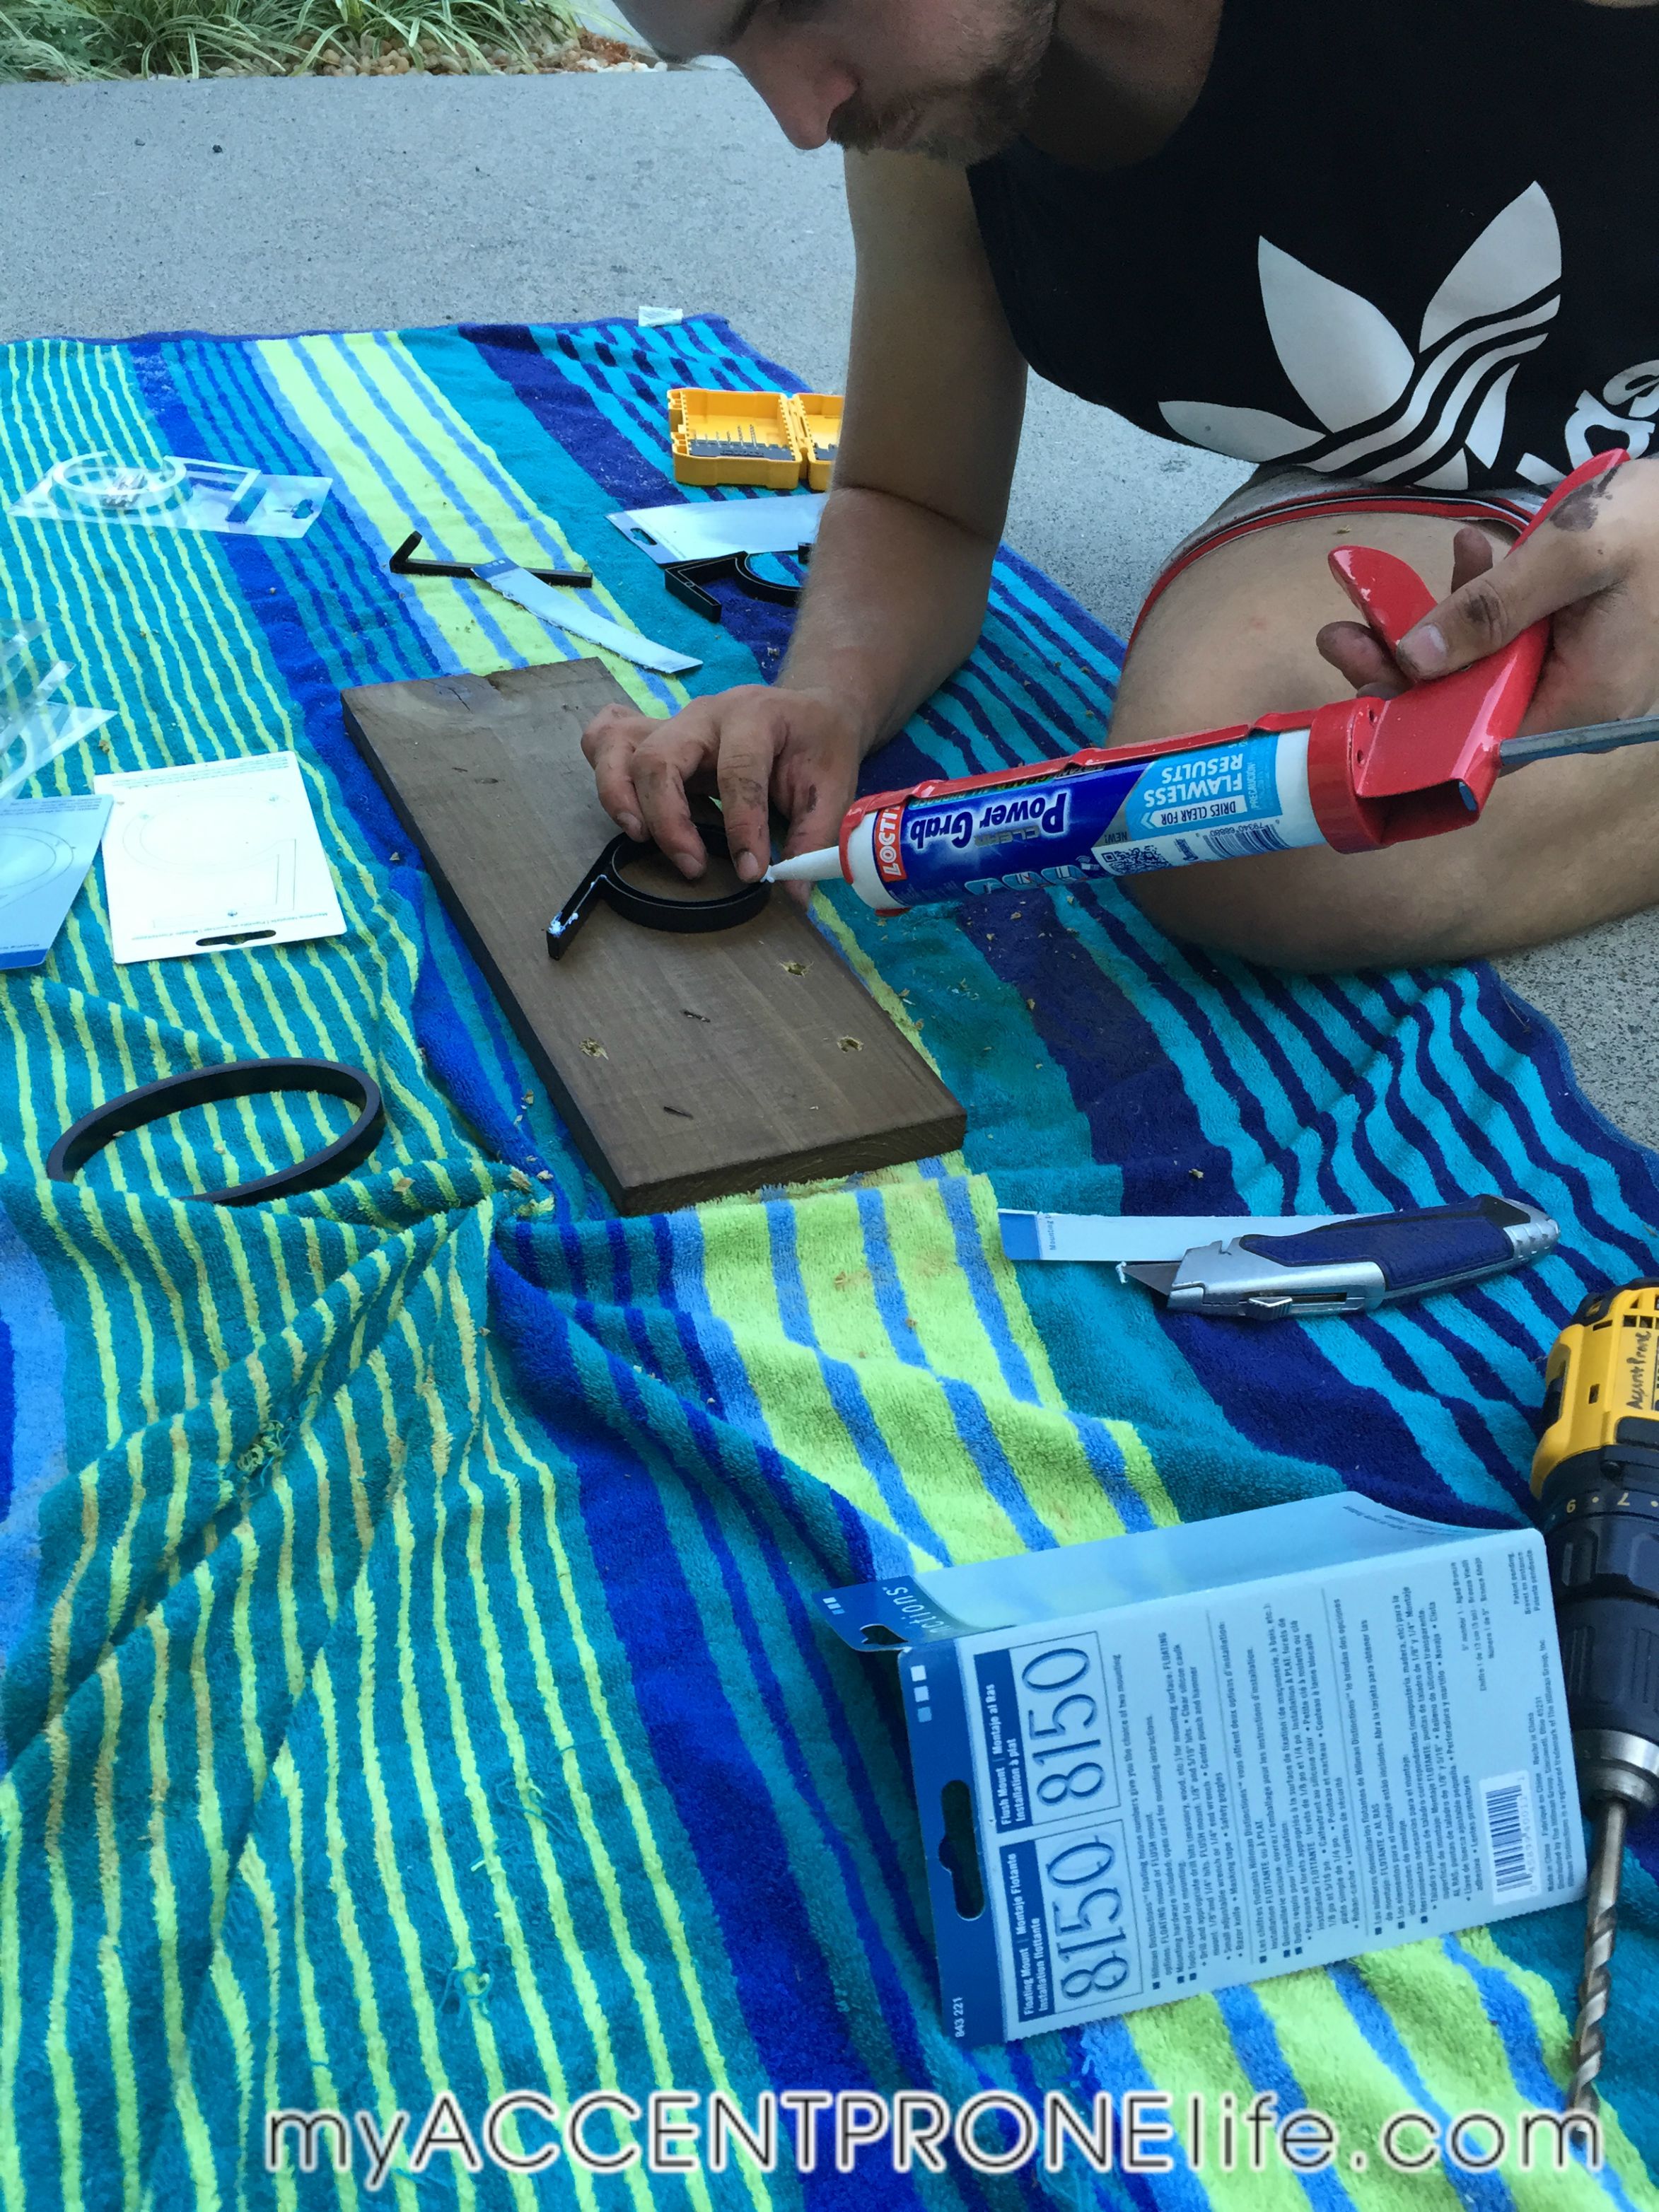
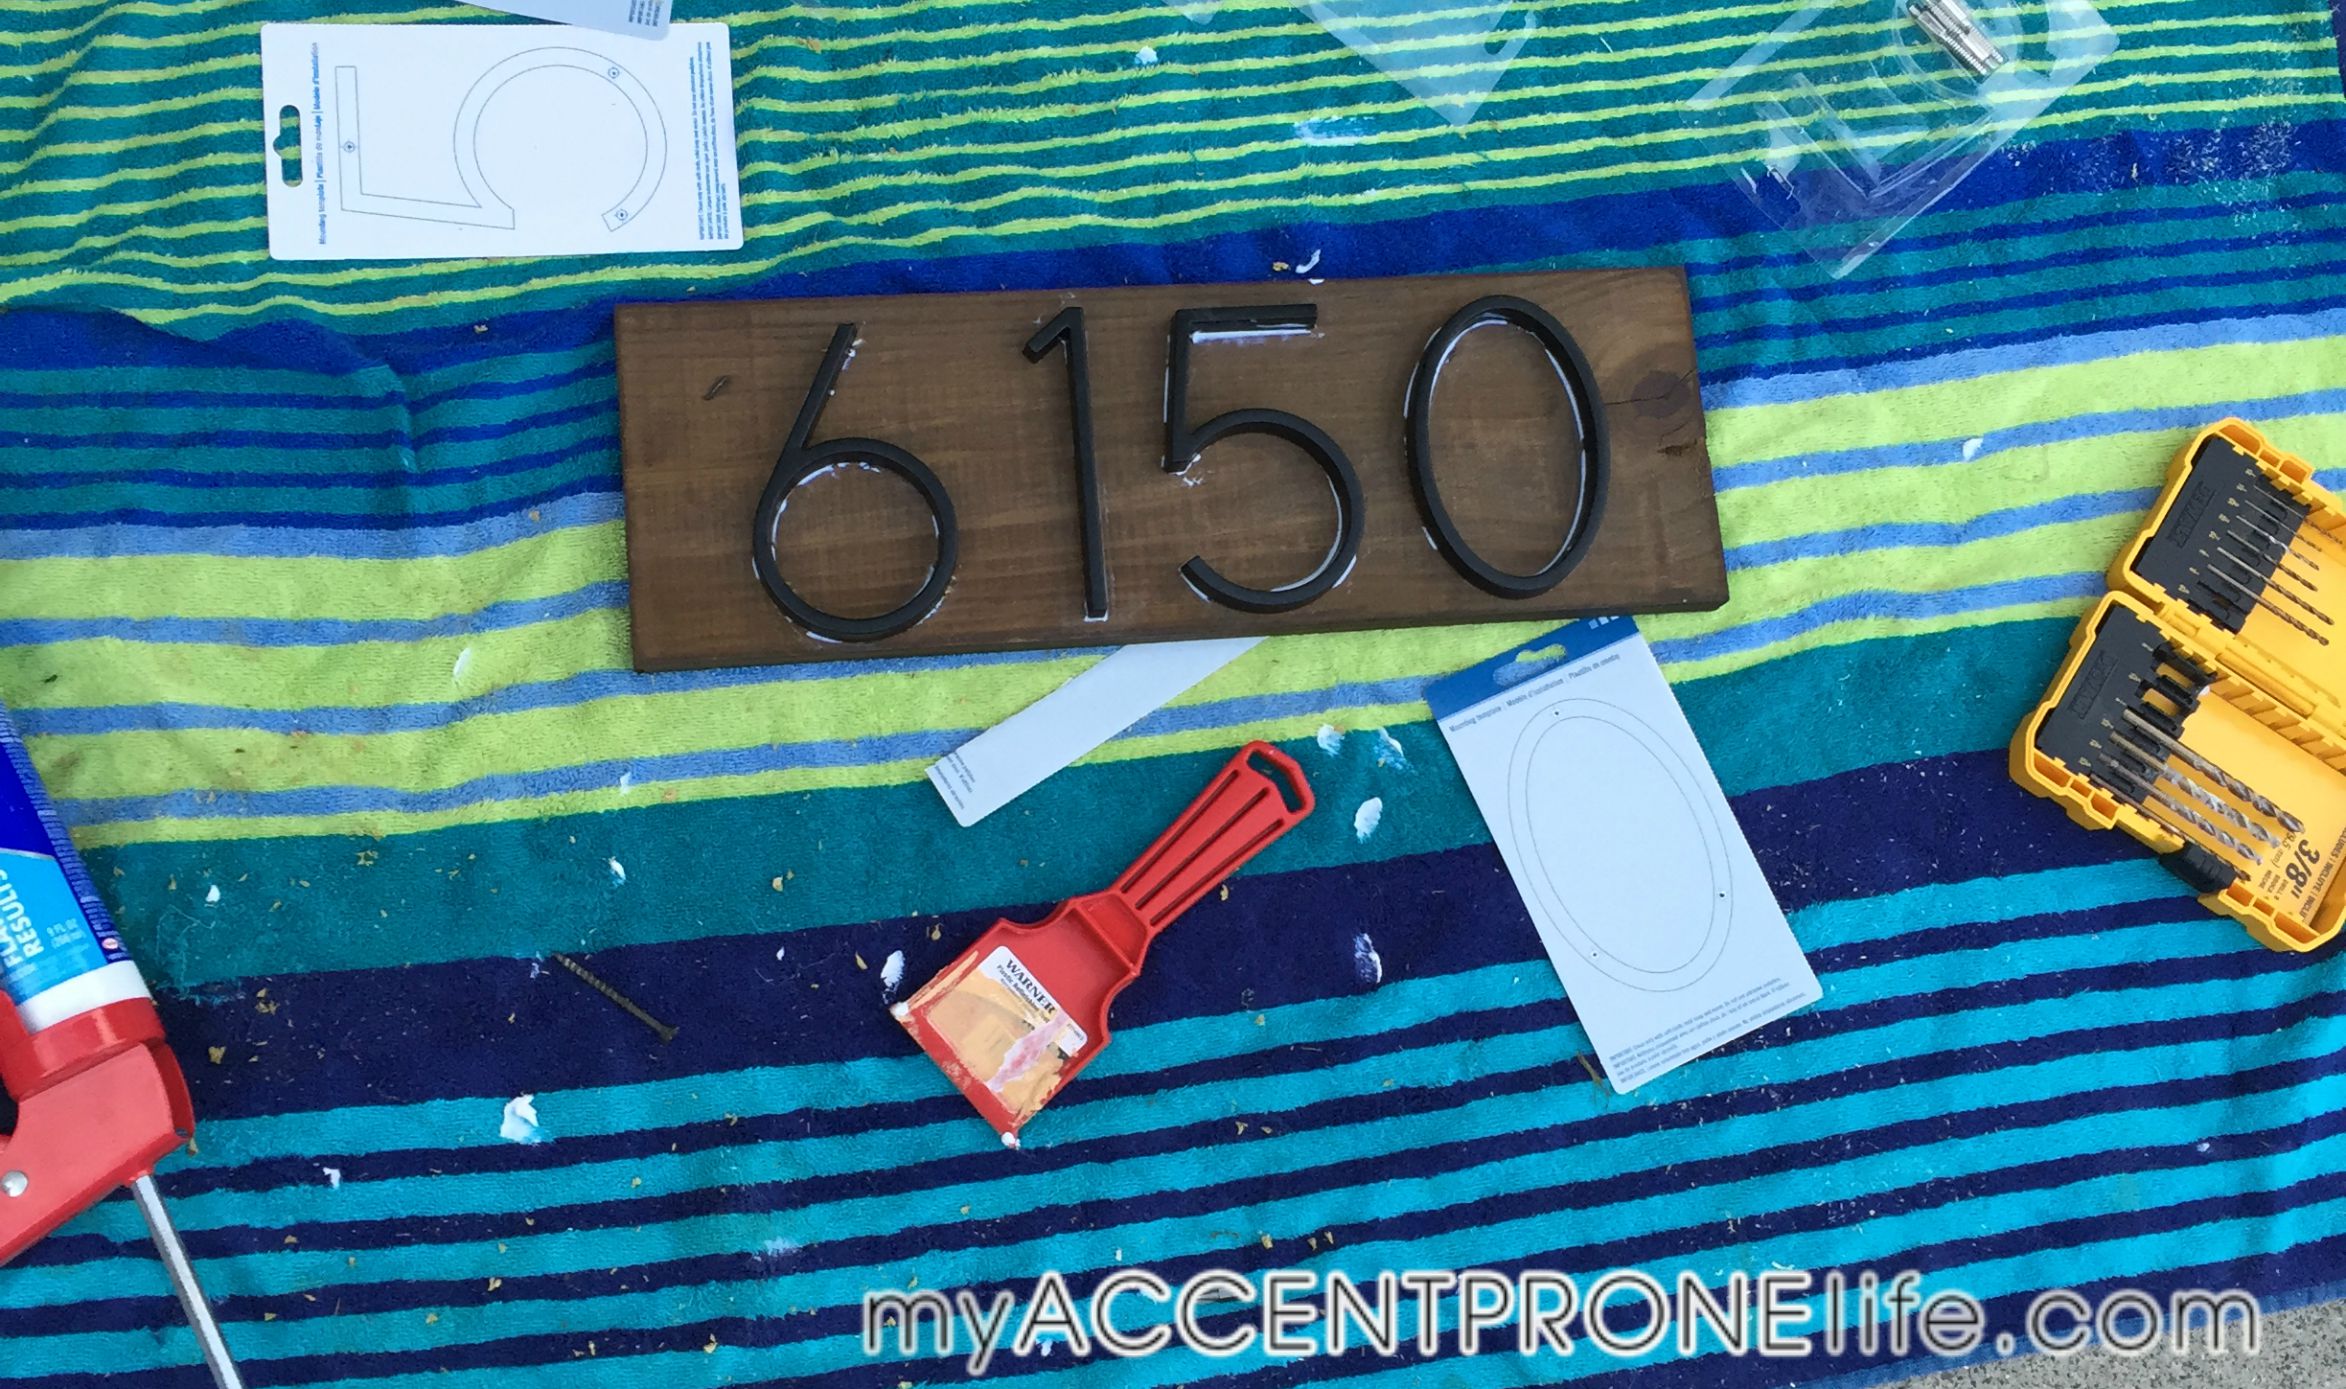
Step 17- Attach the numbers to the stained mounting board. This is 2 sided, so you will have 2 sets of numbers. We used a silicon to attached the numbers, as these are not able to screw in. The silicon will dry clear but, let is set over night to make sure they are firm.

silicon


numbers


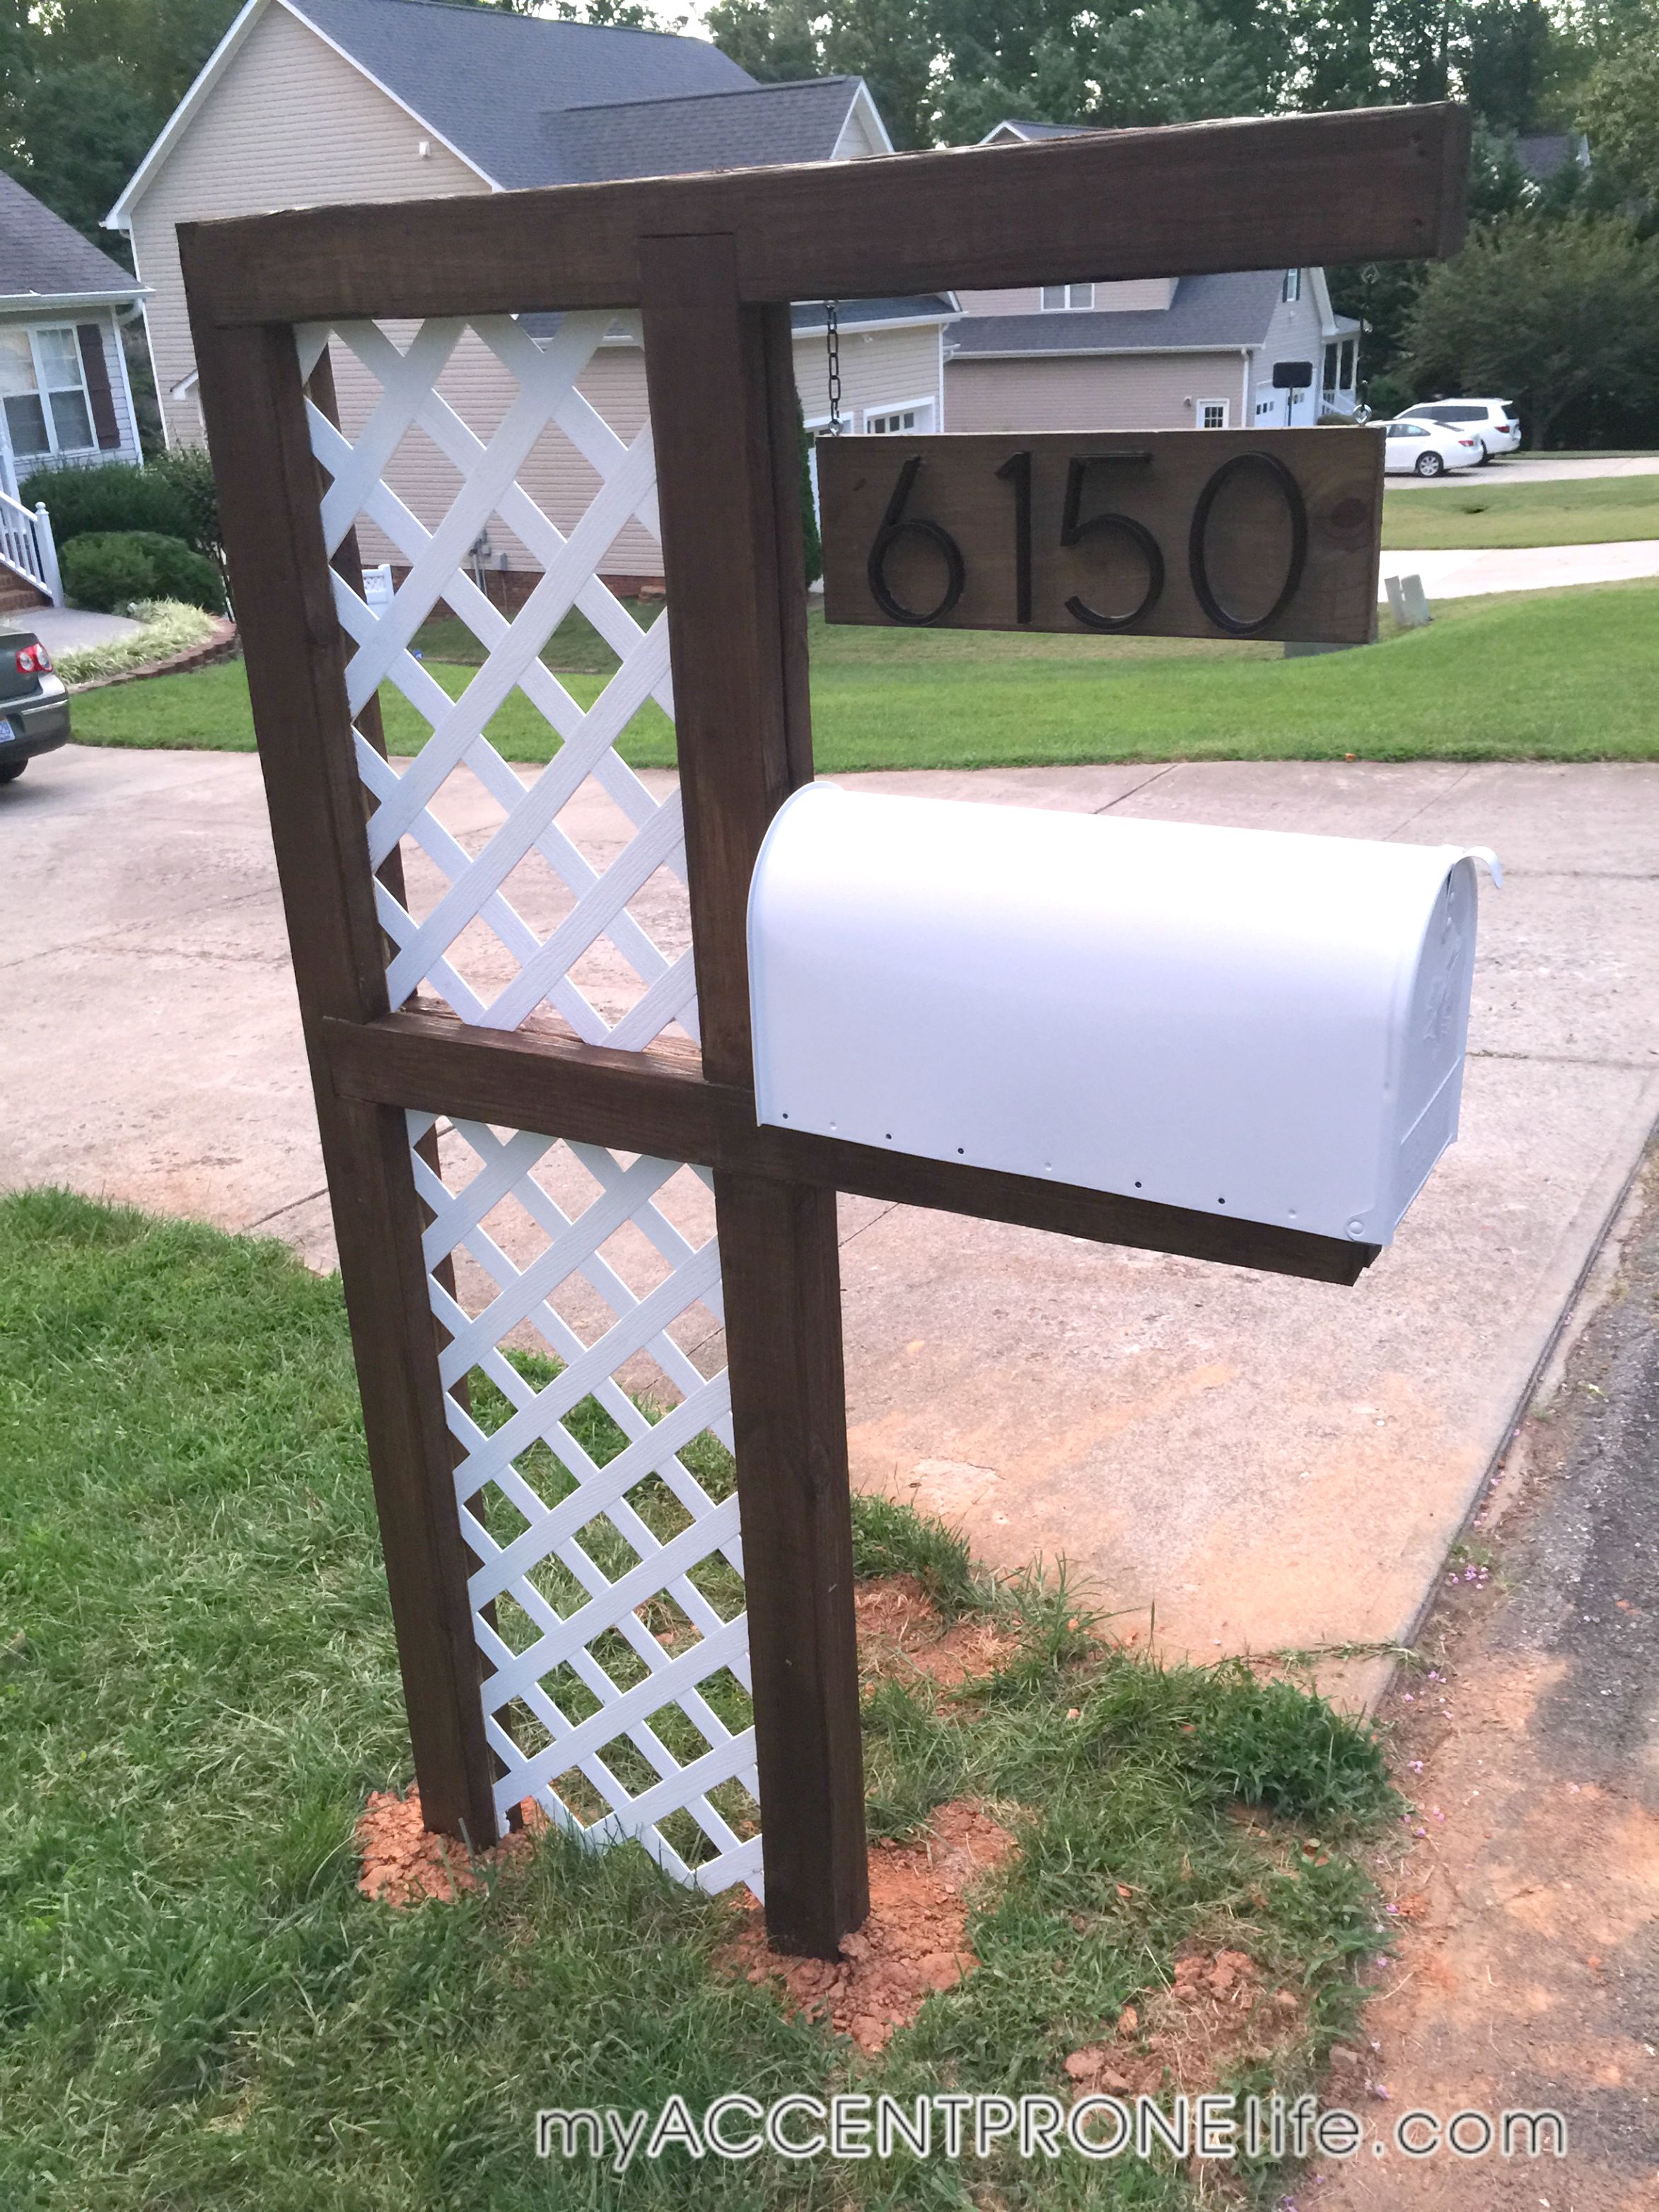
Step 18- Attach the numbers board to the top post using eye hooks and chain.

eyehooks


attachingnumbers


justinattaching


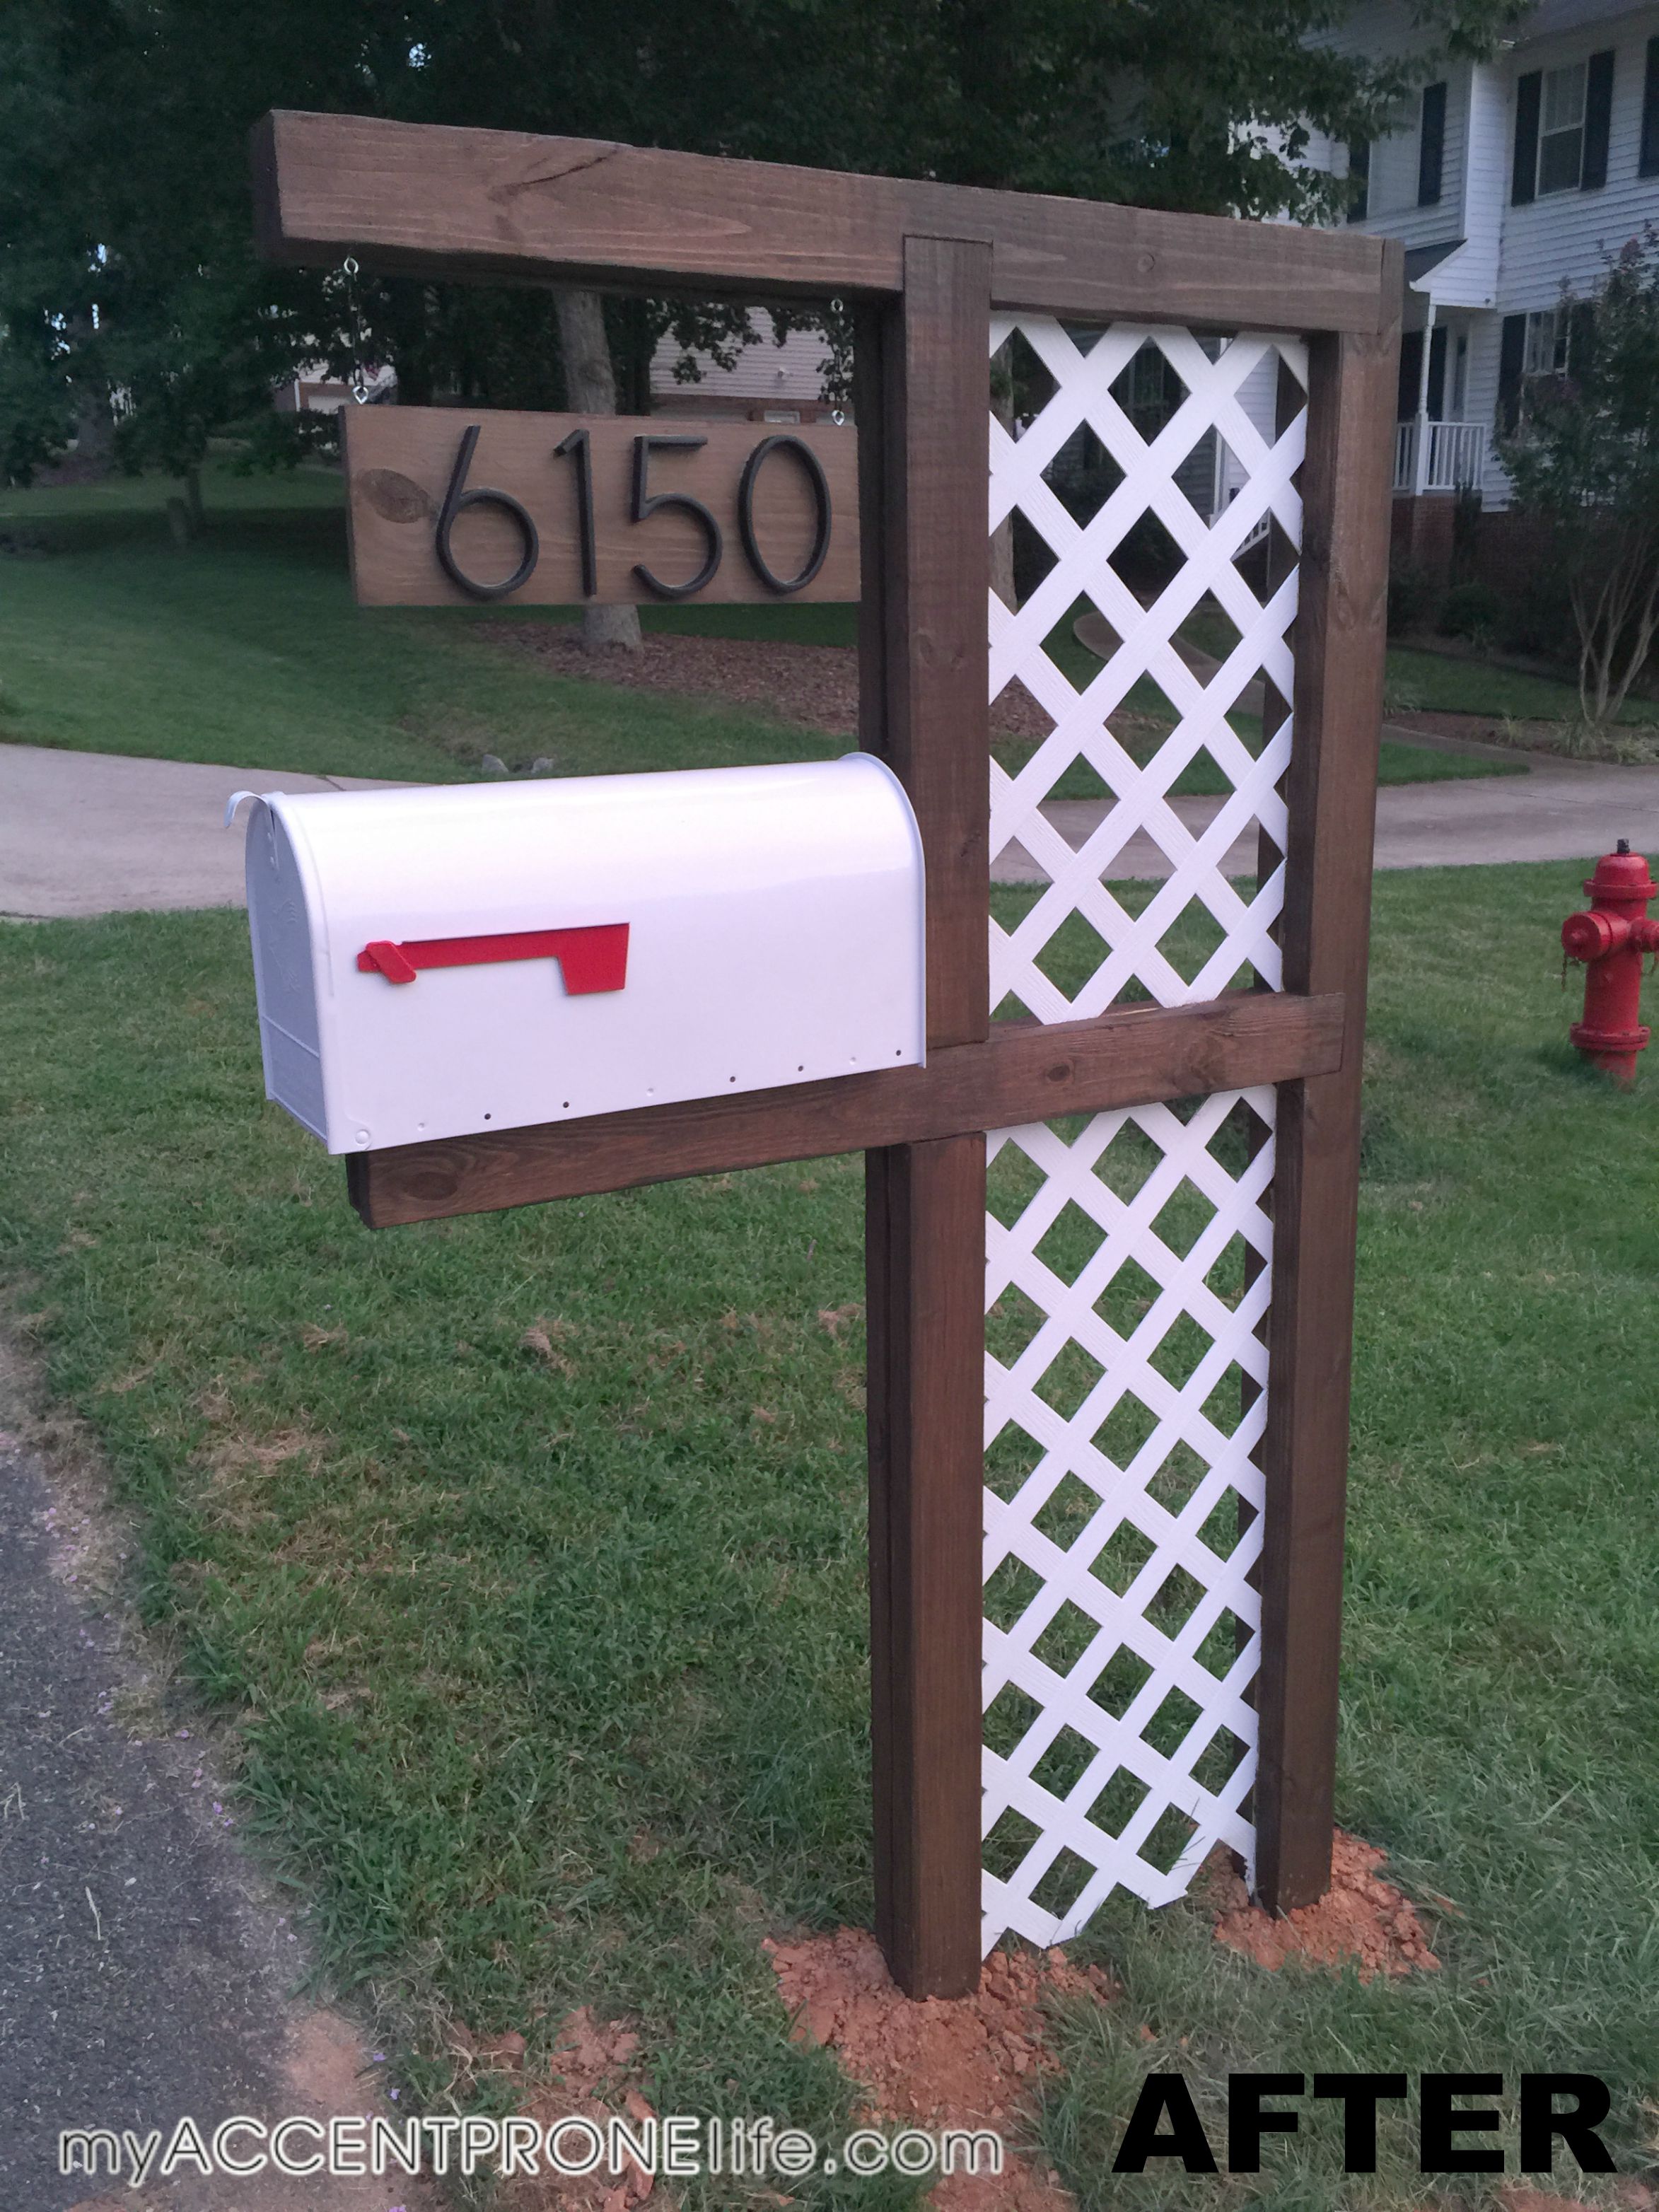
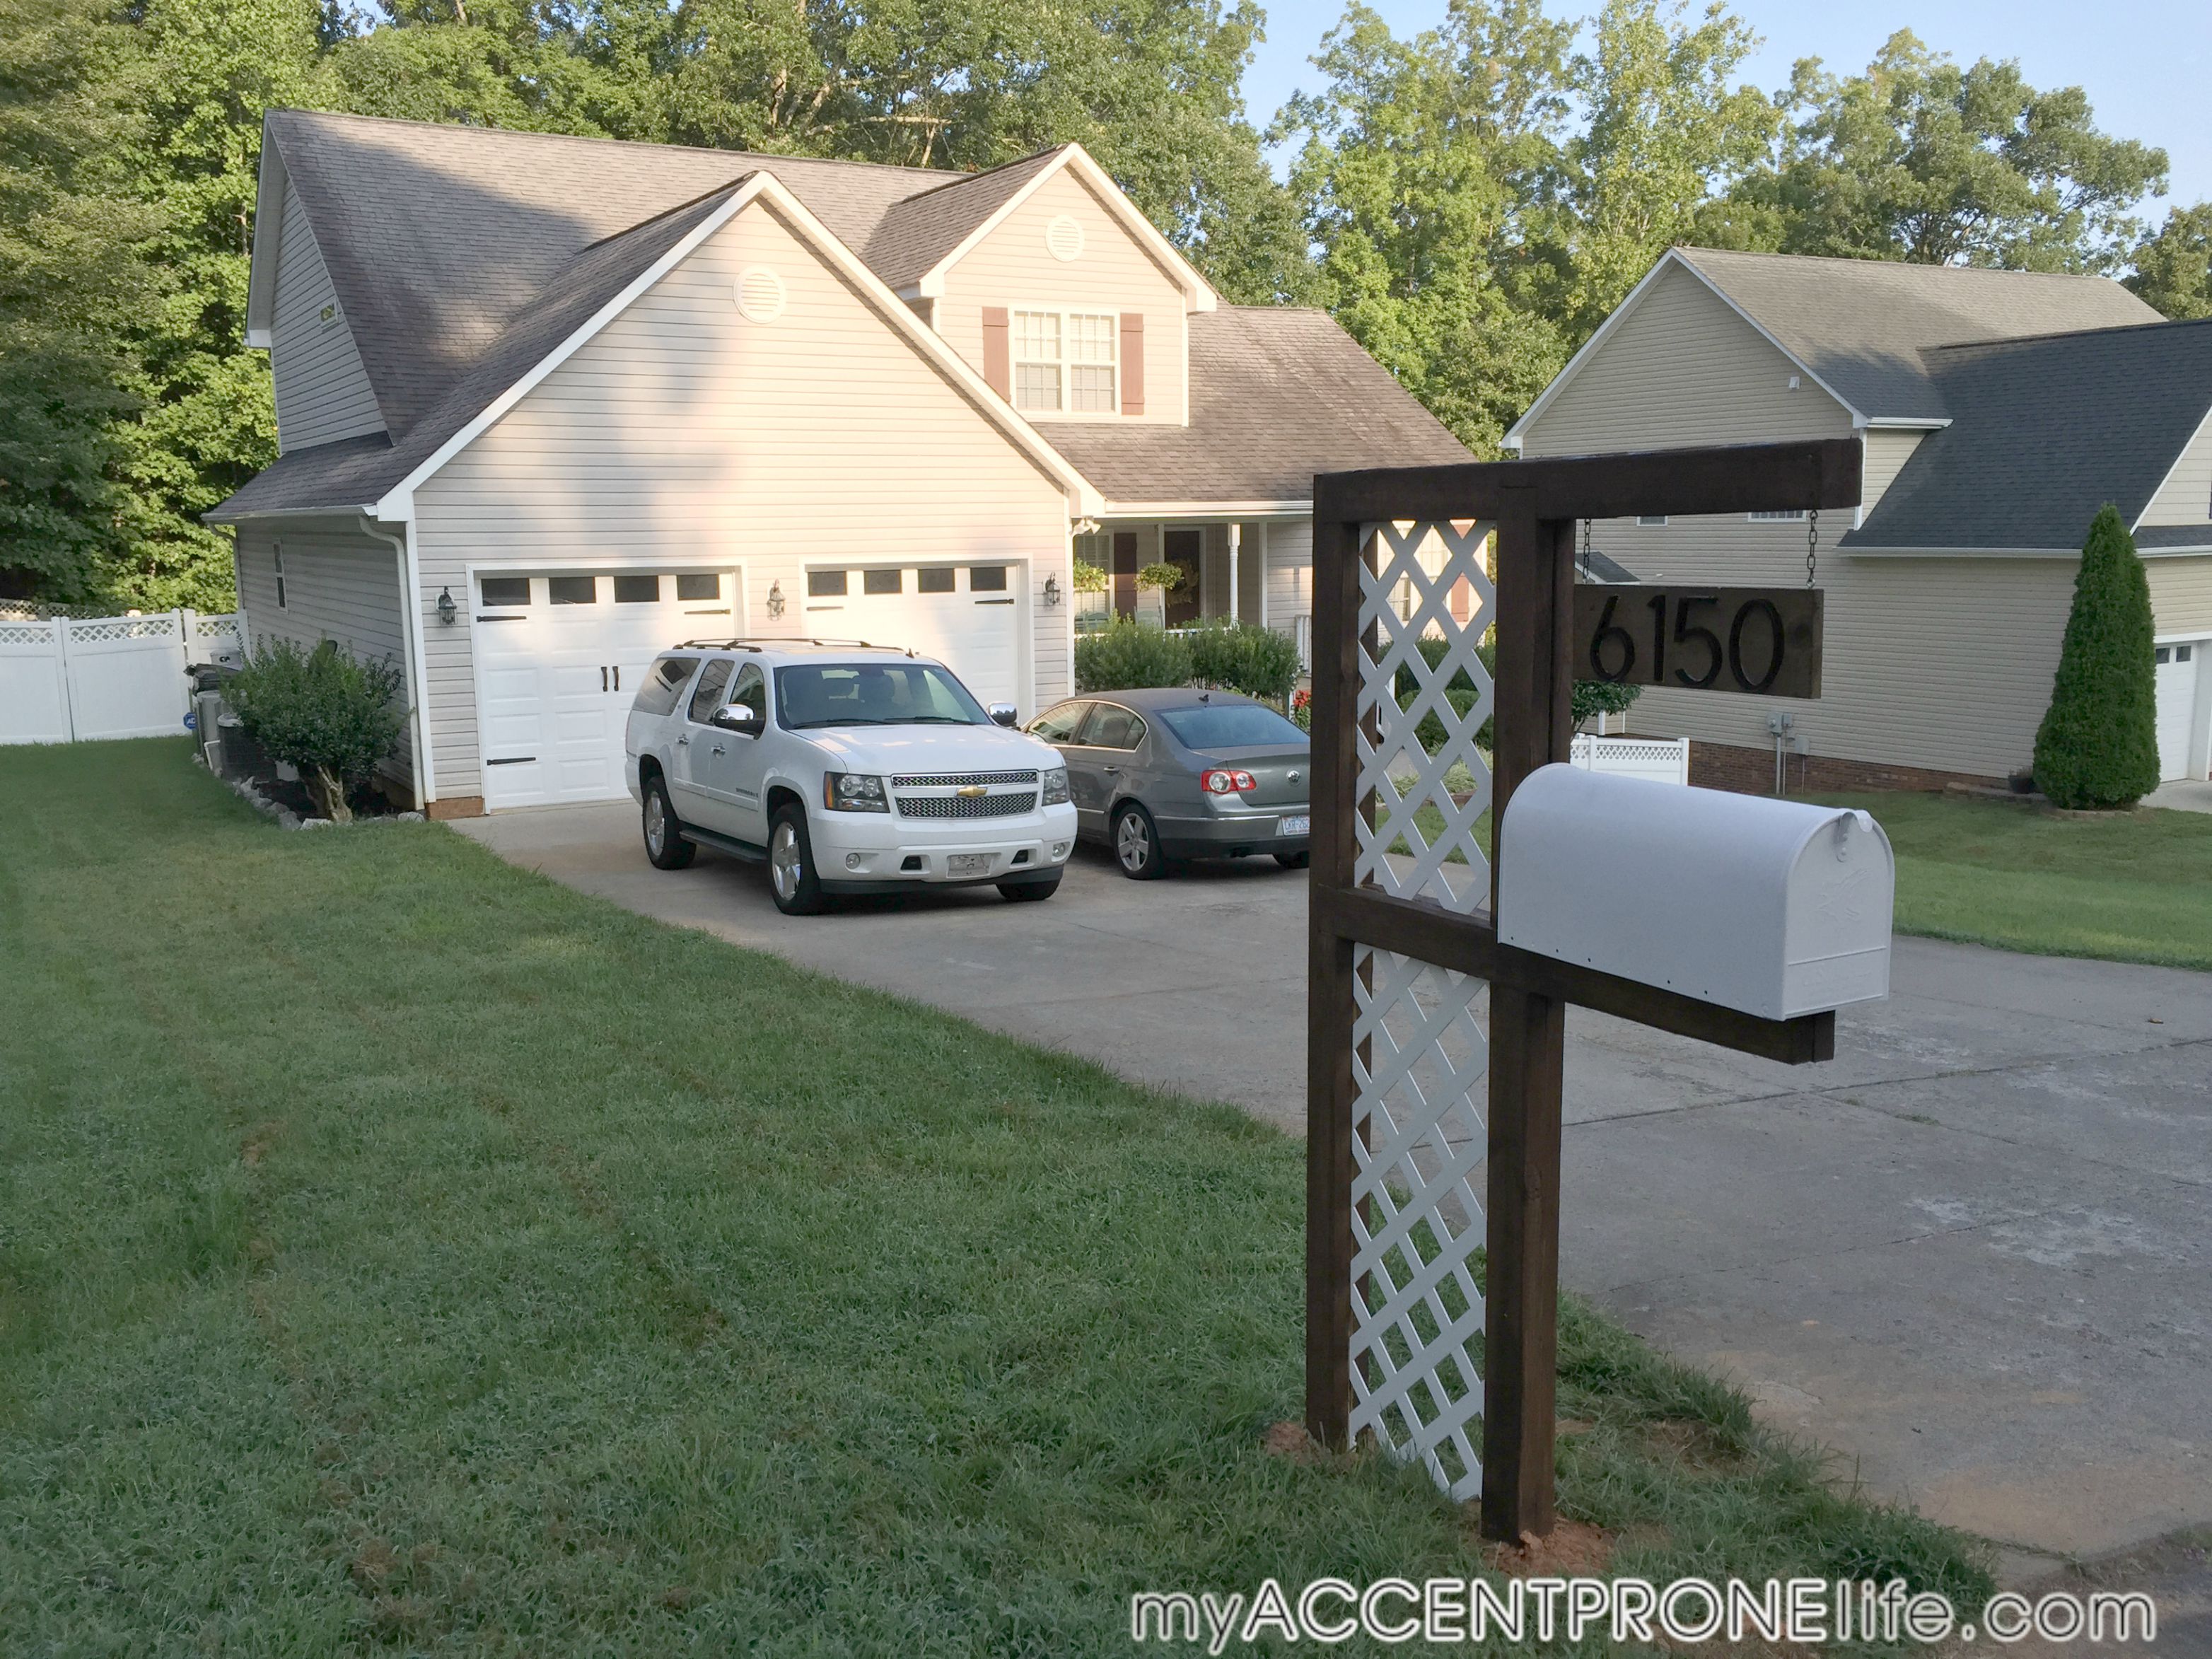
And there you have it! (yes we are in need of some awesome landscaping around it. And we plan on growing ivy up through the lattice, but that is another Sunday project to come!)

mailboxafter


afterotherview


fenceinback

We are aware that some of this was a little confusing and tricky, so if you have any questions, please email us at info@accentprone.com, and we will be happy to help!

Thanks for stopping by everyone! Hope you have enjoyed!

On to the next,

1newcreate.php

The Shirt Dress

08.17.2015

With Fall rapidly approaching, I had to get in a white summer look before labor day rules are set into motion. I’m definitely not a big supporter of the “no white after labor day” fashion law. Nevertheless, this shirt dress only has a couple more wears this season before the leggings and boots are to come out, and I must say, I can’t wait for Fall fashion!

My best friend, Catey, and I took a stroll around downtown Kernersville one summer morning. To our surprise, we found some lovely little spots that made for some gorgeous picture backgrounds. A few snaps, and we bolted for some nearby cover while a short rain storm passed through.

Shirt dresses are casual and oversized. I loved wearing mine this summer with a pair of sandals or flats, and I fully intend on wearing it a few times this Fall with a pair of skinny jeans and boots.

cheristanding


sittingbrickwall

sideview

sittingflowers

HOHnecklace

armcandy


We just started carrying these “Mantra Bands” at Accent Prone. This “breathe” band is now my daily reminder to sometimes take a breath and appreciate all the good things in life.


mantrabandbreathe

sittingdownpurse


Flats are also a great option to wear with a shirt dress, and can take the look from a little more casual to more put together. I splurged on these tan and gold flats last season, and they are my favorite shoes that transition from summer to fall.


sittingstepsnewshoes

choos

TBpurse


And for those friends of mine that are reading this right now, you know that I pretty much ALWAYS have this turquoise Tory Burch purse on my shoulder. I absolutely love pops of colors as accessories! In my home and with my fashion, I live by this law.

Outfit Details:

Shirt Dress (Now on Sale!!)

Tory Burch Miller Sandal in Vintage Vachetta

Jimmy Choo Wheel Flat in Latte

Hat was purchased at a local boutique, but you can find similar ones here and here.

Bourbon and Boweties bangles, Mantra Band, House of Harlow Necklace, and all other jewelry is from my boutique Accent Prone.

Purse is last season but you can find similar styles here and here.

Tory Burch Panama Sunglasses

————————————————————————-

Thanks for reading everyone!! Hope you all have a fantastic week ahead!!

“Breathe in the future, and breathe out the past.”

1newcreate.php


All photography is by my amazing friend Catelin McNamara. If you live in the Piedmont Triad area of NC, and are interested in her photography services, email me at cheri@accentprone.com for her contact info.

How to Install Your Own DIY Plank Wall

08.11.2015

Joanna Gaines has recently made quite an impression on me with her love of shiplap. (And, I can’t deny the fact that their commercial with the #shiplap hashtag, repeated over and over and over again, has really been stuck in my head. So maybe this was some kind of shiplap psychological hypnosis? I guess we will never know!) While Joanna and Chip love to shiplap pretty much everything, I wanted to add in some of this gorgeous boarding in my home without taking it overboard (see what I did there? Ha!) Shiplap adds great dimension to a room, and can make it feel very airy and open when painted white. We decided to add shiplap around our fireplace in our living room as a statement wall. The white boards against the darker stone will be very high contrast, and while some may think of this as way too much variation, contrast is one of my favorite things to contribute to a space. High contrast brings more of an eclectic atmosphere and interest to a room, which is why rustic contemporary is personally my favorite decorating style.

On that same point, when creating shiplap walls you can either go very rustic with them or take them more contemporary, depending on how you paint them and if you fill in the holes or not. We decided to make our shiplap more refined and thus went in the more contemporary direction as opposed to the more farmhouse appeal. I will point out in the steps below how to proceed with the farmhouse look if that’s what you are going for, but steps 1-7 will be the same.

Here is a shot of our room before we began.

beforeplankwall

Step 1 – Measure your walls (width x height) to estimate how many boards you will need for your wall. Then, take these dimensions to a lumber yard and they can help you determine the exact number you will actually need. We bought 12×1 pine wood boards. You can buy smaller boards (a lot of people use 8 in. boards for shiplap walls), but we wanted our boards to be a bit larger since we have such high ceilings. You can buy this wood from a hardware store like Lowes, but we have found in the past that lumber from hardware stores is a lot of times warped. We prefer to go to a local lumber yard where each piece is always inspected much better.

Step 2 – Make sure your ceiling line is completely level.  While this might sound crazy, a lot of people’s ceilings are actually not level, so you will want to start the first board completely level as opposed to following the line of the ceiling. Otherwise your whole wall will end up looking slightly crooked.

measureceiling

Step 3 – Measure the width of the wall and cut your first board to put up. While most people’s boards will be the same width all the way down, because we are doing our shiplap beside a rocky fireplace, each stone protrudes out slightly different. Because of this, each of our cuts will be different all the way down. If you are doing a normal wall then I recommend measuring your wall and having all of your boards cut professionally for you at the lumber yard where you purchased. This will save a lot of time and headache!

cutboards

Step 4 – Nail up your first board! You will need to use a professional nail gun, and make sure that you are keeping the board level as you nail evenly across it. You will also want to make sure that you are getting some nails into the studs of the wall. We used a stud finder before we put up the first board to know where they were. Once you find the studs it is easy to follow the majority of your nail holes all the way down the wall.

firstboardup

Step 5 – You will need something to space your boards to create the shiplap look. We experimented around with several different things before we found the gap size that we wanted. Turns out 2 nickels taped together was the winner.

2nickels

2nicks

Step 6 – Once you have the first board hung, hold up the second board and wedge the spacers in between the boards to create the gap. We used 2 of the nickel spaces all the way across. Make sure the board is completely level once again, and then nail the second board in.

board2

It is hard to see the nickels in this picture, so here is a better close-up to show how to use the nickels as spacers.

nickelsupclose

Step 7- Once you have this process down pat it actually becomes pretty easy. Just continue to space the boards with nickels and check your level all the way down the wall.

downthewall

If dealing with a tricky wall like ours you might have some more complex cuts.  Just remember to measure twice and cut once!

trickycuts

Step 8 – Now, this is the step where you have the decision to either take the design more rustic or refined. We chose to go the refined route, and so we used wood filler to fill in all of the knots and crevices before painting. If you want to have a more rustic shiplap wall, then skip this step all together. And, believe me, I LOVE a rustic shiplap wall with knots and prevalent wood grain, but for our design scheme we wanted cleaner looking walls. You really can’t go wrong with either choice. If you choose the refined look, then after your wood putty has dried you will want to evenly sand the wall.

woodfiller

wood putty walls

(Notice how the outlets are now sunken into the wall because of the thick boards? You will want to take a screwdriver and loosen up the screws in the outlet cover to make it become flush with the shiplap. You can even buy extra long screws at Lowes. We skipped this step because our outlets hide behind the media stand, but it is really quite easy to do!)

Step 9 – Now it’s time to paint! We chose Sherwin Williams Dover White in satin. Since these are raw wood boards, you will want to prime first to help seal the cracks and make it easier to paint. We used Zinsser Bin Primer. This is a shellac based primer that helps seal knots. If you want to go for a more rustic look, then add some water to your white paint to create a whitewashed, distressed look. If going for the more refined look then you will want to do about 3 coats of paint to cover nicely.

binprimer

paintdoverpaint

paintingwall

Since we moved in we have wanted a new mantle, but that project is on our to-do list a little further down the road. In the meantime, we decided to go ahead and paint the mantle to match our white shiplap. We used a liquid deglosser that you wipe on with a cloth. It takes away the shiny finish and will allow for you to paint.

mantle

deglosser

Step 10 – Take off the tape and enjoy your new shiplap wall!

plankwallafter2

plankwallupclose2


mirror

Yes, my mantle is MAJORLY lacking some accessories, but we just completed this project and haven’t quite made it that far yet! We also plan to add some darker wood art pieces onto the shiplap to combine the contrasting tones a little more. Mirror and accessories shown here are from my home furnishings boutique, Accent Prone.

Thanks for reading everyone! Stay tuned soon for the full reveal of our living room makeover!

On to the next,

1newcreate.php


Snake Charming

08.03.2015

I must admit, I have a snakeskin infatuation. And this is coming from someone who HATES snakes. I mean I REALLY hate snakes. But something about the monotone combinations of the beige and black tones mixed together really intrigues me. You really can’t go wrong with neutrals, and thus snakeskin has fallen into that category for me.

I first bought this maxi skirt (and it’s now on sale!) as a piece for a wedding ensemble I put together. For the wedding I wore the skirt with a different black tank that covered a little more skin, but I couldn’t resist this chic pleated crop top (which is now on sale too!).

cheriinfrontoffountain

As you will soon find out, Rachel Zoe is my style icon. I absolutely adore her style. She is bohemian and chic all at the same time, which is my style to a T. Her influence is the reason I love this outfit so much. Flowy and glam; you can dress it up or down depending on if you put it with heels or flats. I have been wanting a wide brim hat and I found this awesome black one on one of my favorite affordable websites asos.com.

snakeblog1

I have been looking for a black structured bag that will go with everything. My sweet husband overheard me mentioning that, and surprised me with this Kate Spade bag for our 2 year wedding anniversary.

cherblackandwhite

zoomedarrowheadcuff

snakebloghat

sunnies

The beginning of summer called for some new shades, so I found these awesome tortoise Tory Burch Panama Sunglasses. And if I haven’t mentioned it yet, I have a lipstick addiction. This one is Nars Shiap.

bourbonbangles

latandlo

mksnakeshoes

backofheels

Accessories are what make an outfit, which is why I paired this look with some of my favorite go-to pieces, my Bourbon and Boweties bangles. You can layer them up and add as many different colors and stone varieties to your stack as you please. For this outfit I kept it simple with 3 of my favorite smoky quartz bangles, but I literally have a huge collection of these ready to mix and match with my wardrobe. We have a great selection of these available at Accent Prone.

The necklace I chose is my Lat and Lo coordinates bar. It has the latitude and longitude of my hometown Kernersville, NC on it. Not only are horizontal bar necklaces really in right now, but the geographical coordinates give it a special touch.

The black arrowhead upper arm cuff is currently one of my favorite accessories I have. Arrowheads are very trendy right now so if you don’t have any in your jewelry box then think about adding one! We have some great arrowhead pieces available at Accent Prone, ranging from necklaces, bangles, rings and cuffs.

cheriwalkingaway

endingpic

Quick list of outfit details-

Crop Top

High Waisted Snake Skin Skirt

My Shoes are last season Michael Kors, but you can find similar ones here and here. Or, if you are looking for a great flat option, I am currently in love with these Rachel Zoe Sandals.

Hat

Sunnies

Handbag

Hot Pink Lipstick

Bourbon and Boweties bangles, Lat and Lo Coordinates Necklace and Arrowhead Cuff are all from my boutique, Accent Prone.

Thanks for stopping by everyone! I hope you have a fabulous Monday and week ahead!

1newcreate.php

All photography by my AMAZING friend, Catelin McNamara. If you are interested in her photography services, email me for her contact info. Cheri@accentprone.com